Outlook
Latest versionOutlook is Microsoft's email and calendaring platform integrating contacts and scheduling, enabling users to manage communications and events in a unified workspace
Authentication DetailsComposio-managed OAuth available
Frequently Asked Questions
How do I set up custom OAuth credentials for Microsoft (Outlook)?
Use your own Microsoft Entra ID app registration when you want the Microsoft consent screen to show your app's name and you want to control which permissions Outlook requests.
Create the Microsoft Entra app
-
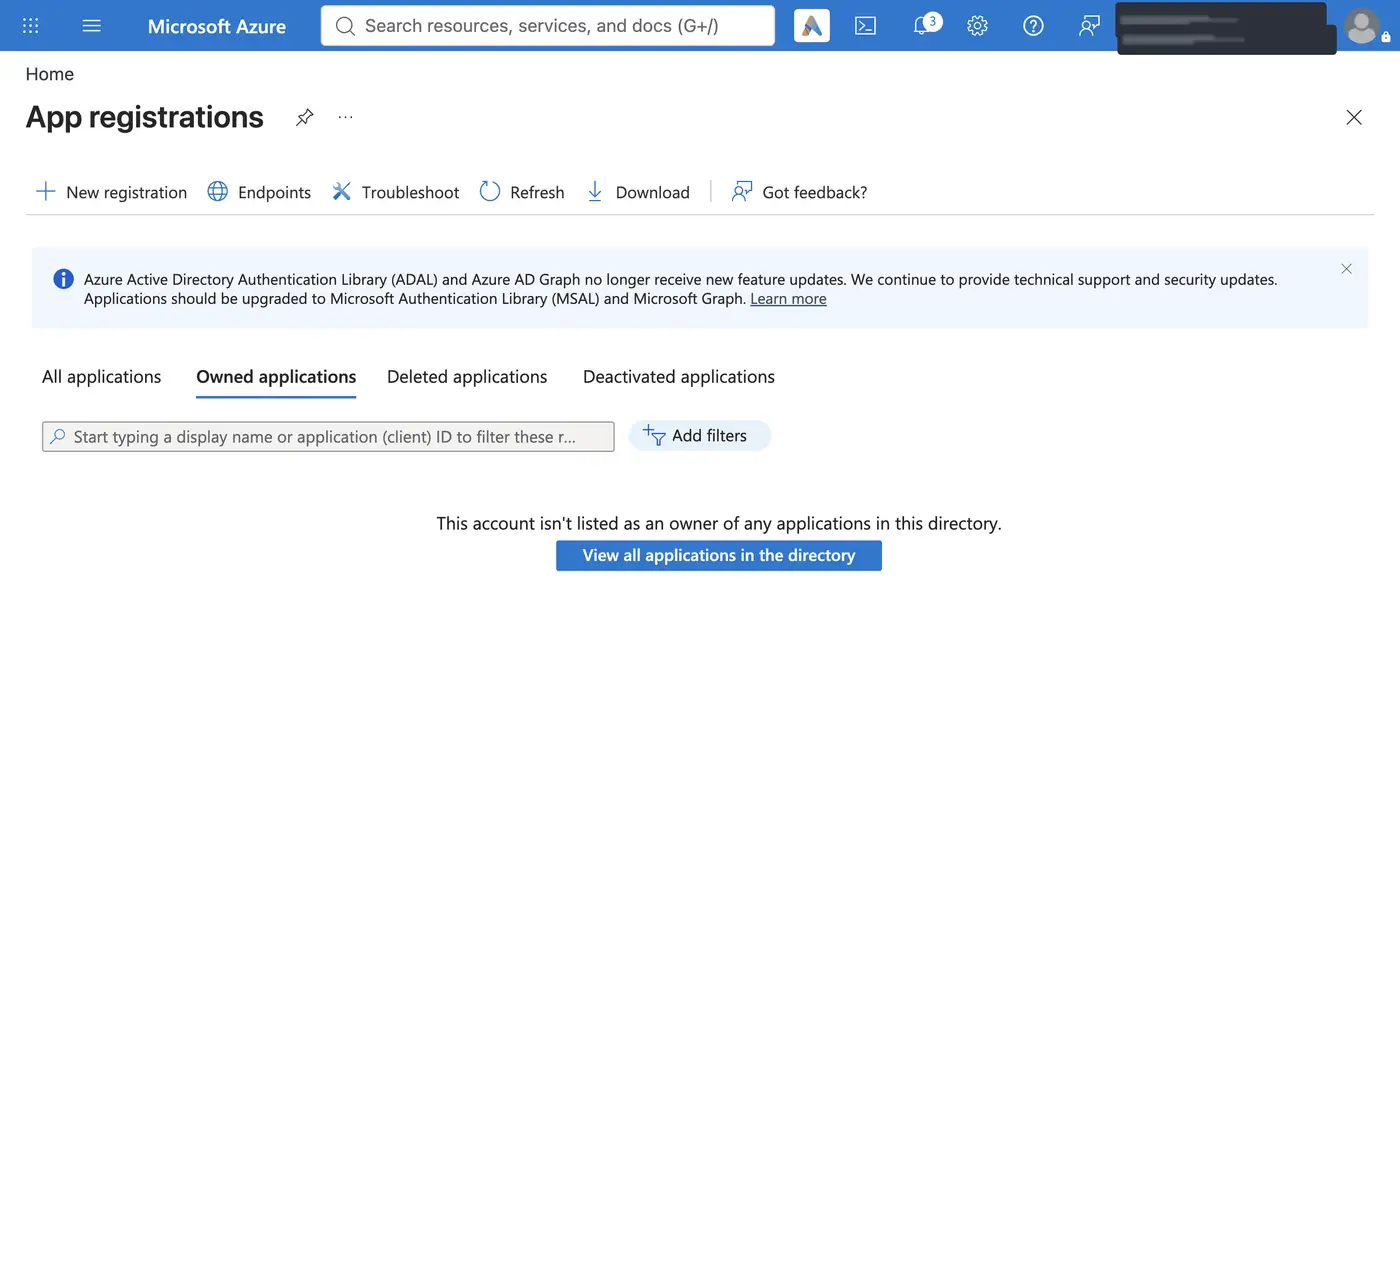
Sign in to the Azure portal, open App registrations, and click New registration.
-
Enter a Name. Under Supported account types, choose Accounts in any organizational directory and personal Microsoft accounts (shown as Any Entra ID Tenant + Personal Microsoft accounts) if you want to connect both work or school and personal accounts. Choose a single-tenant or multitenant organizational option if you only connect work or school accounts.
-
Under Redirect URI, select the Web platform, enter
https://backend.composio.dev/api/v1/auth-apps/add, and click Register.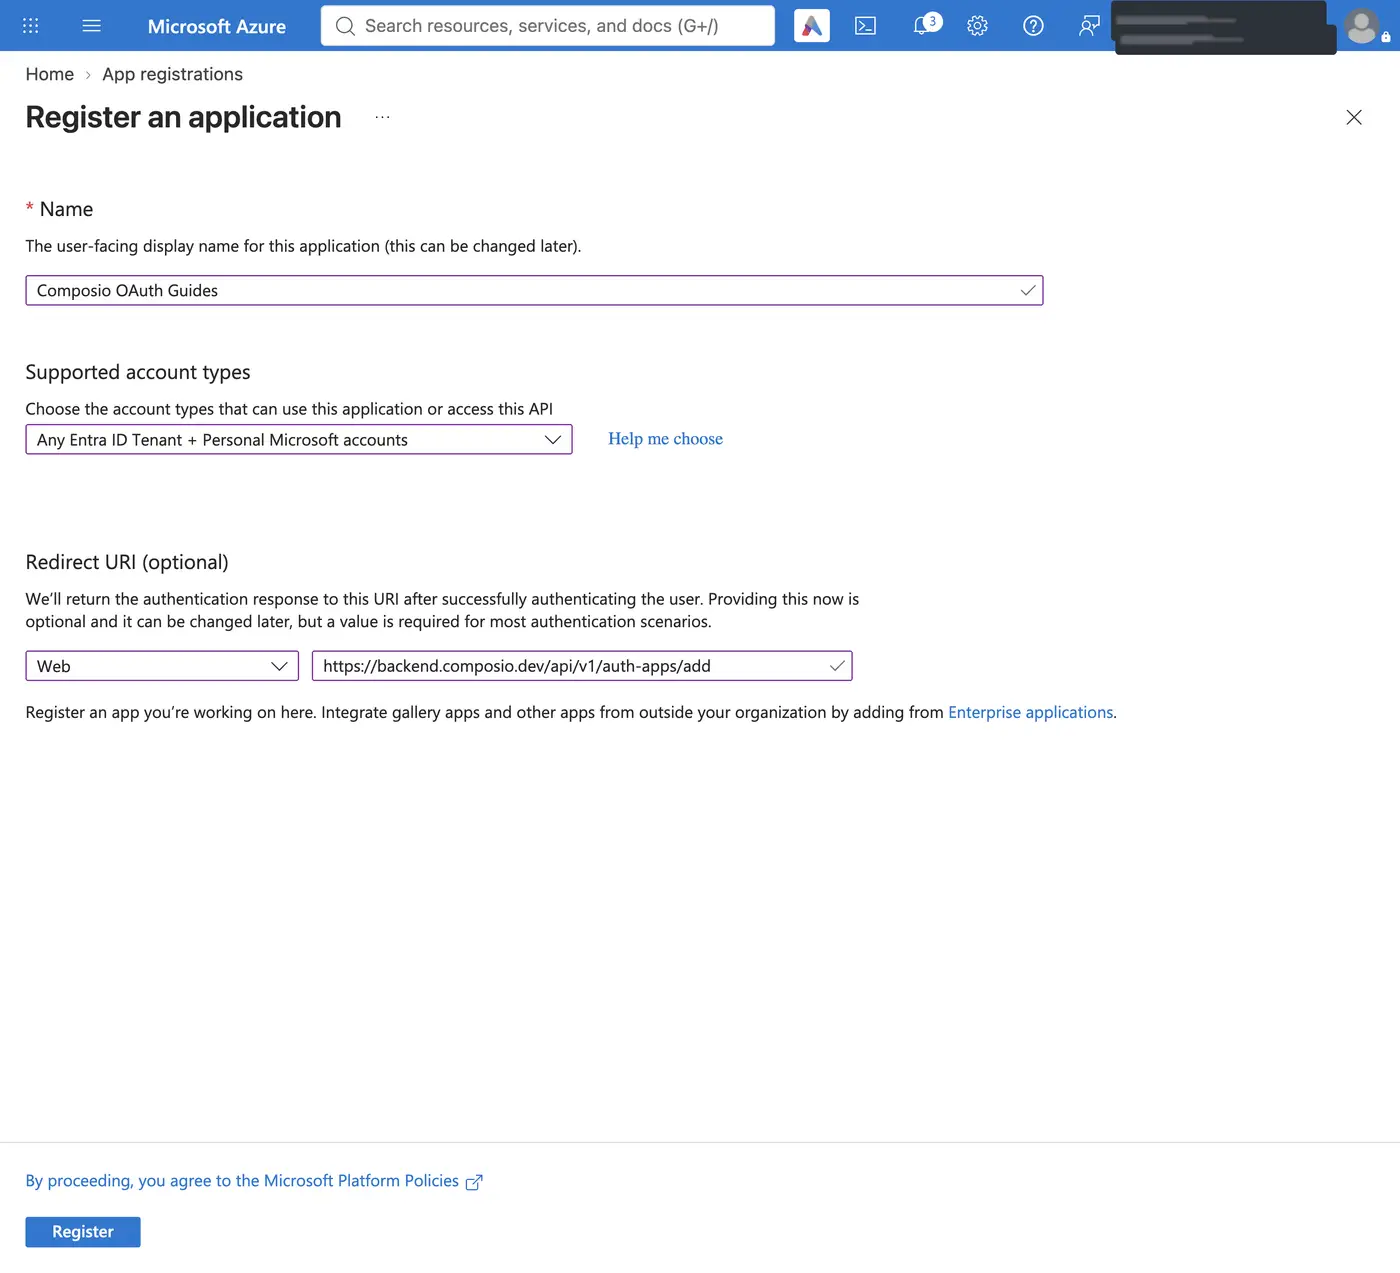
-
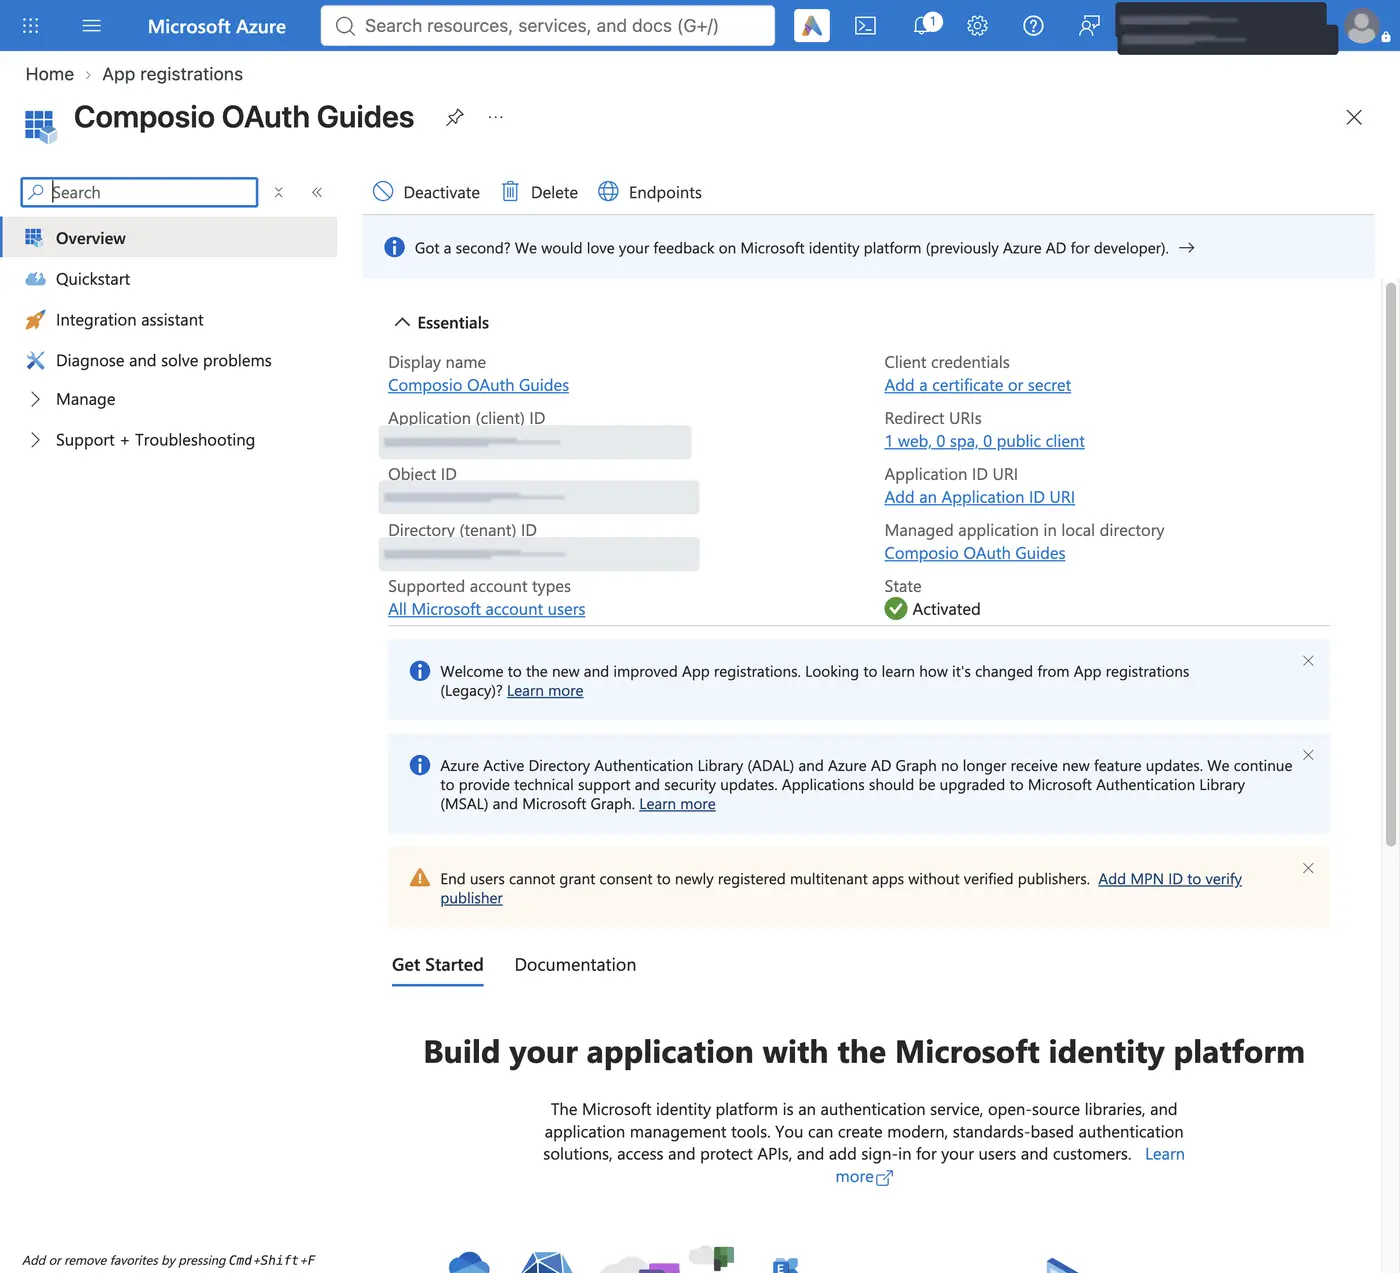
On the app's Overview page, copy the Application (client) ID.
-
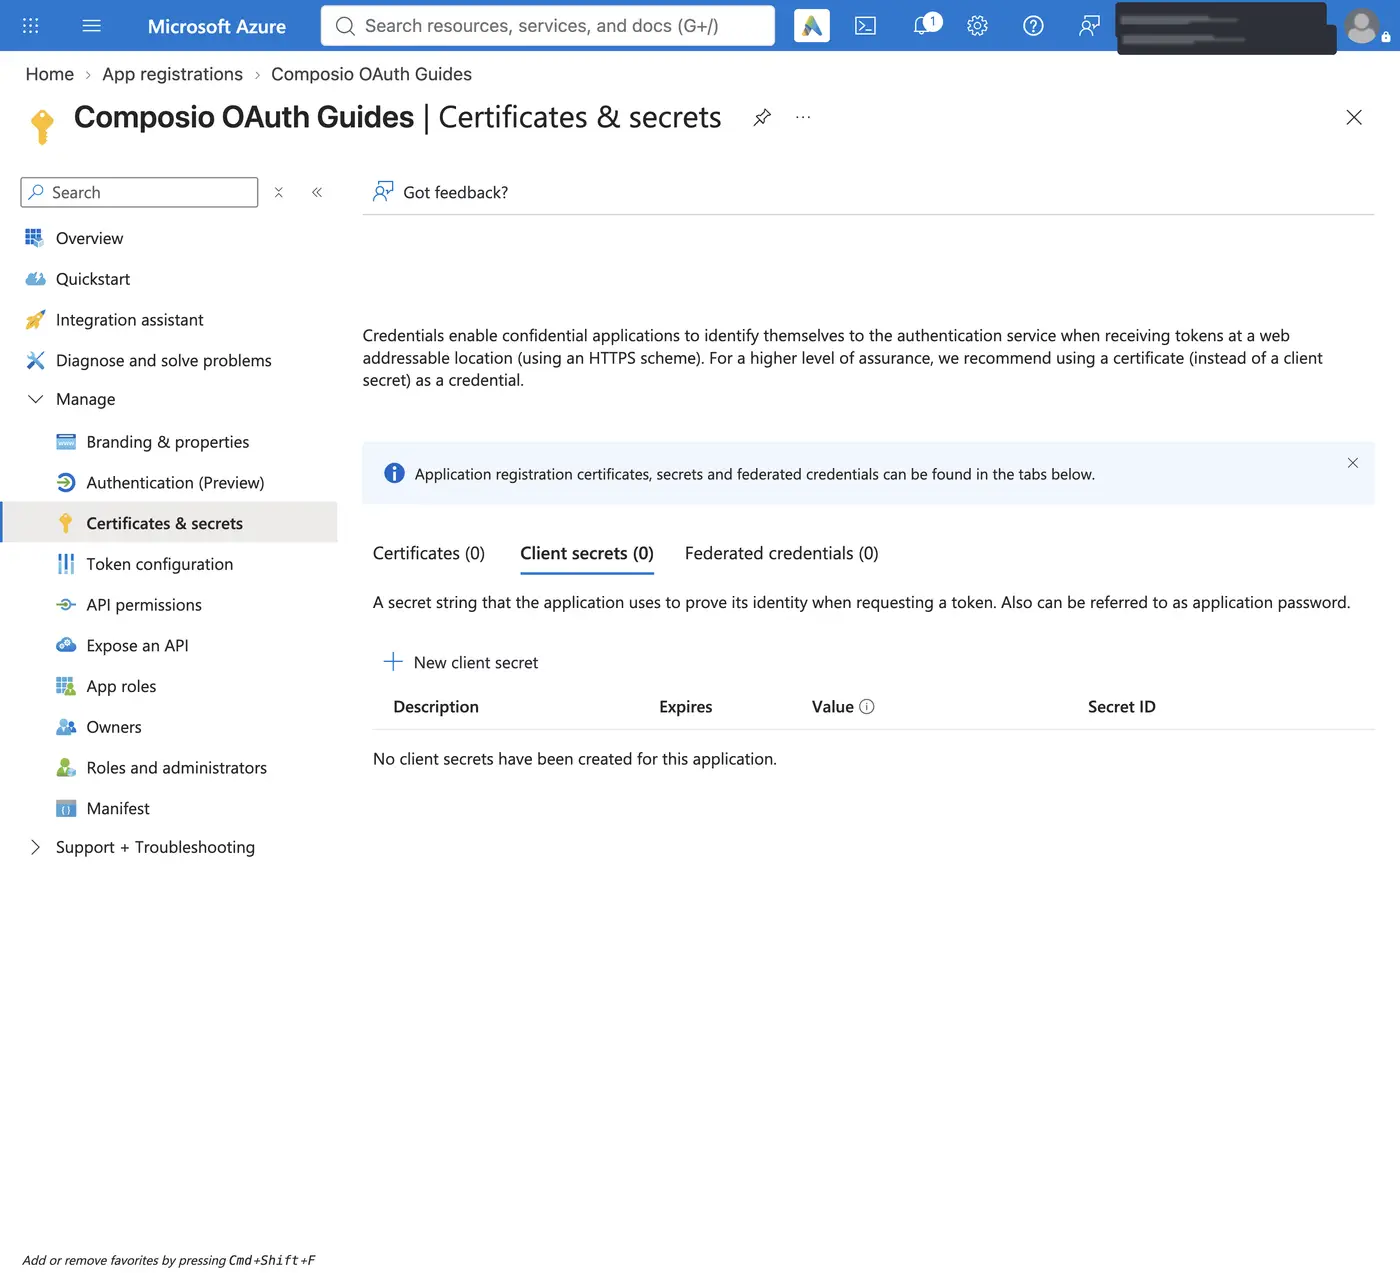
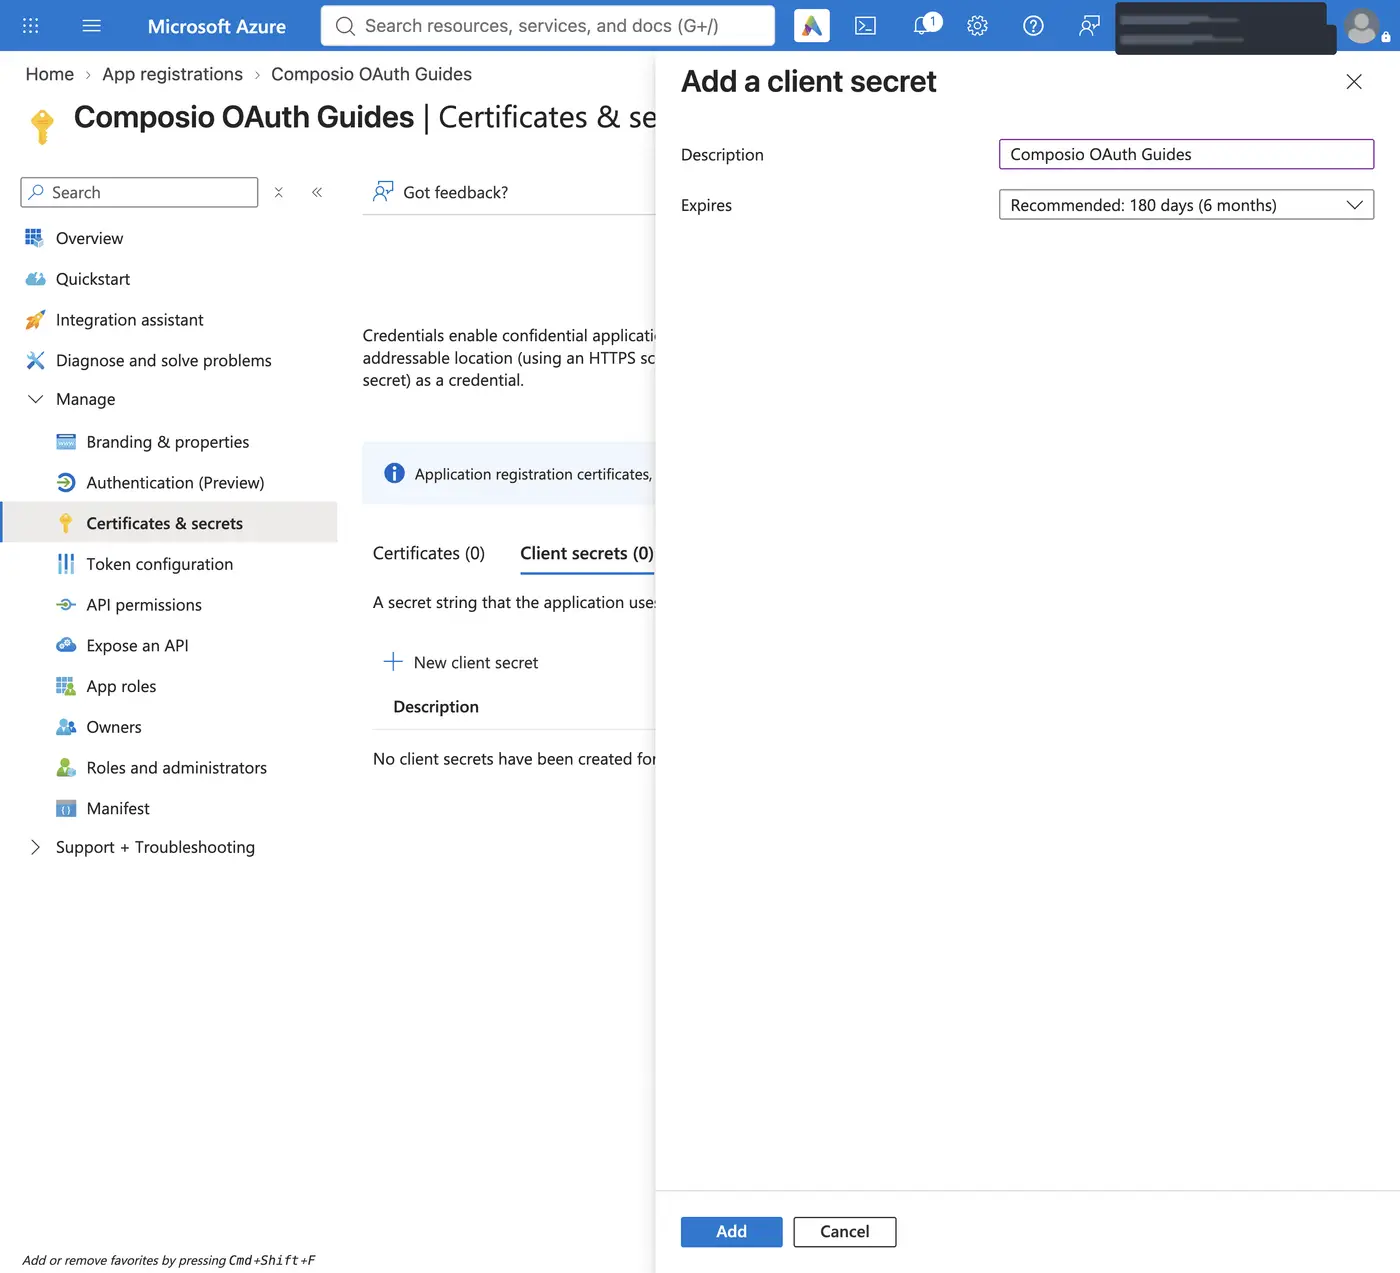
Open Certificates & secrets and click New client secret. Add a description, choose an expiry that fits your rotation policy (for example, 180 days), and click Add. Rotate the secret before it expires.
-
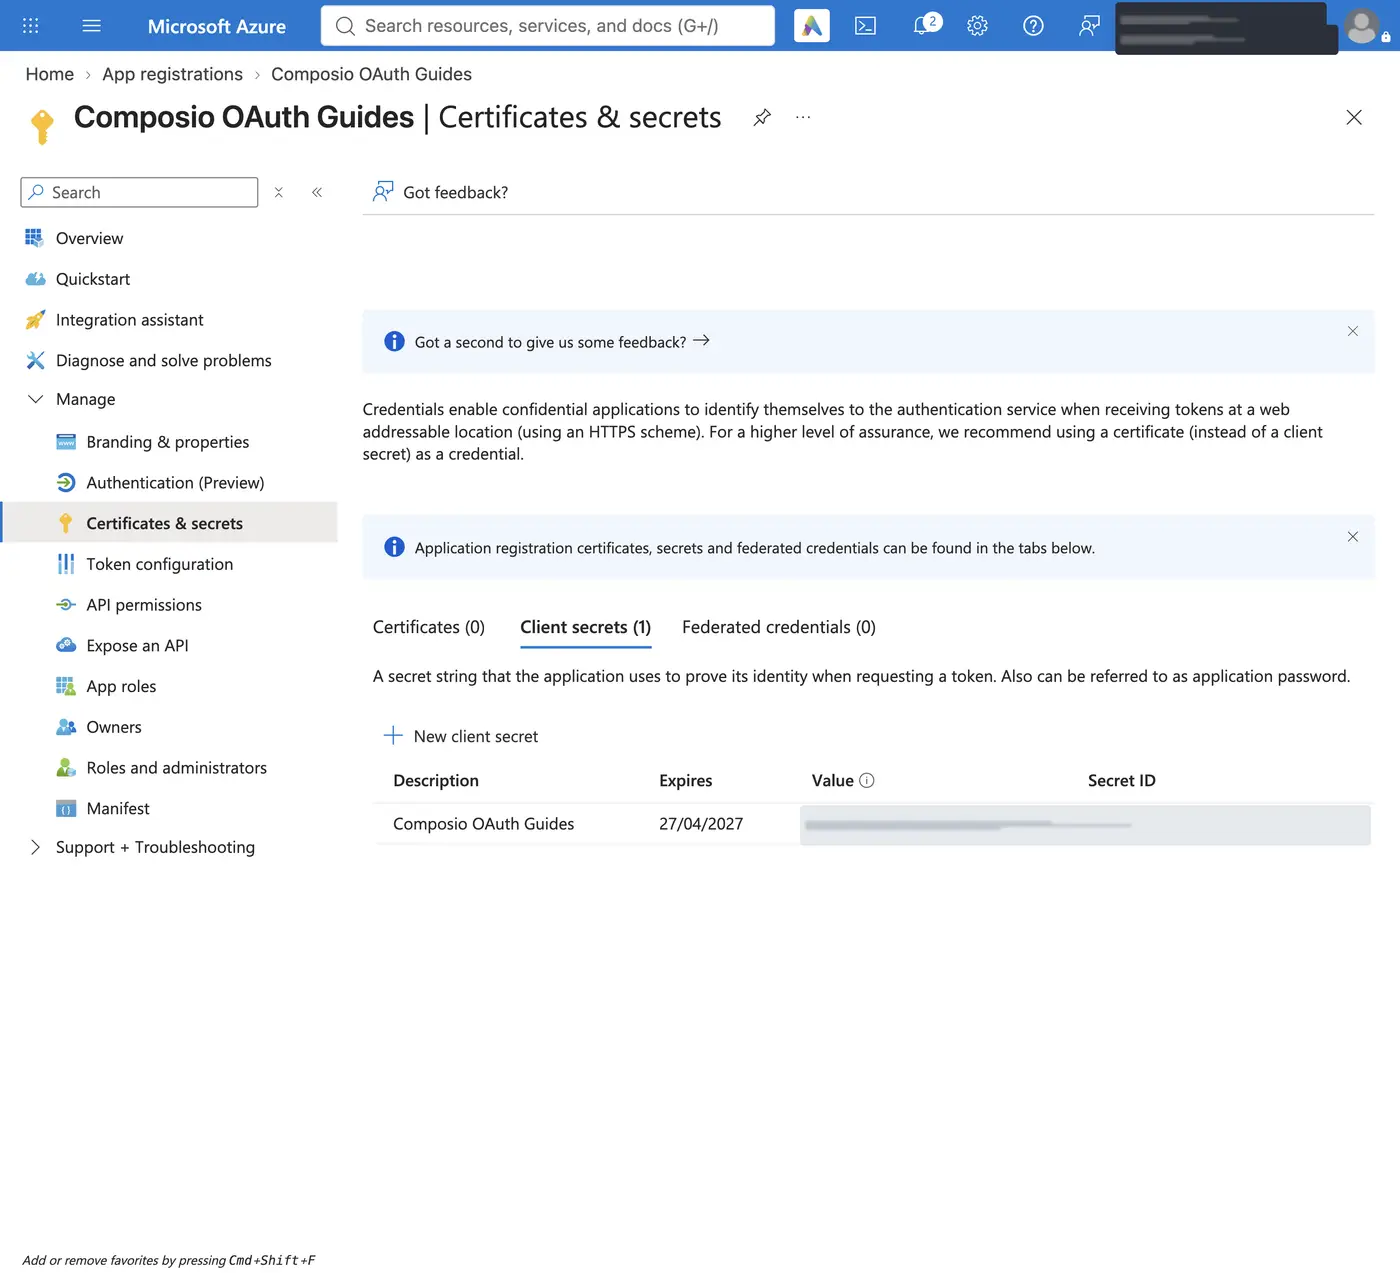
Copy the secret Value right away. Use the Value, not the Secret ID. Azure shows the full value only once; if you lose it, create a new secret.
-
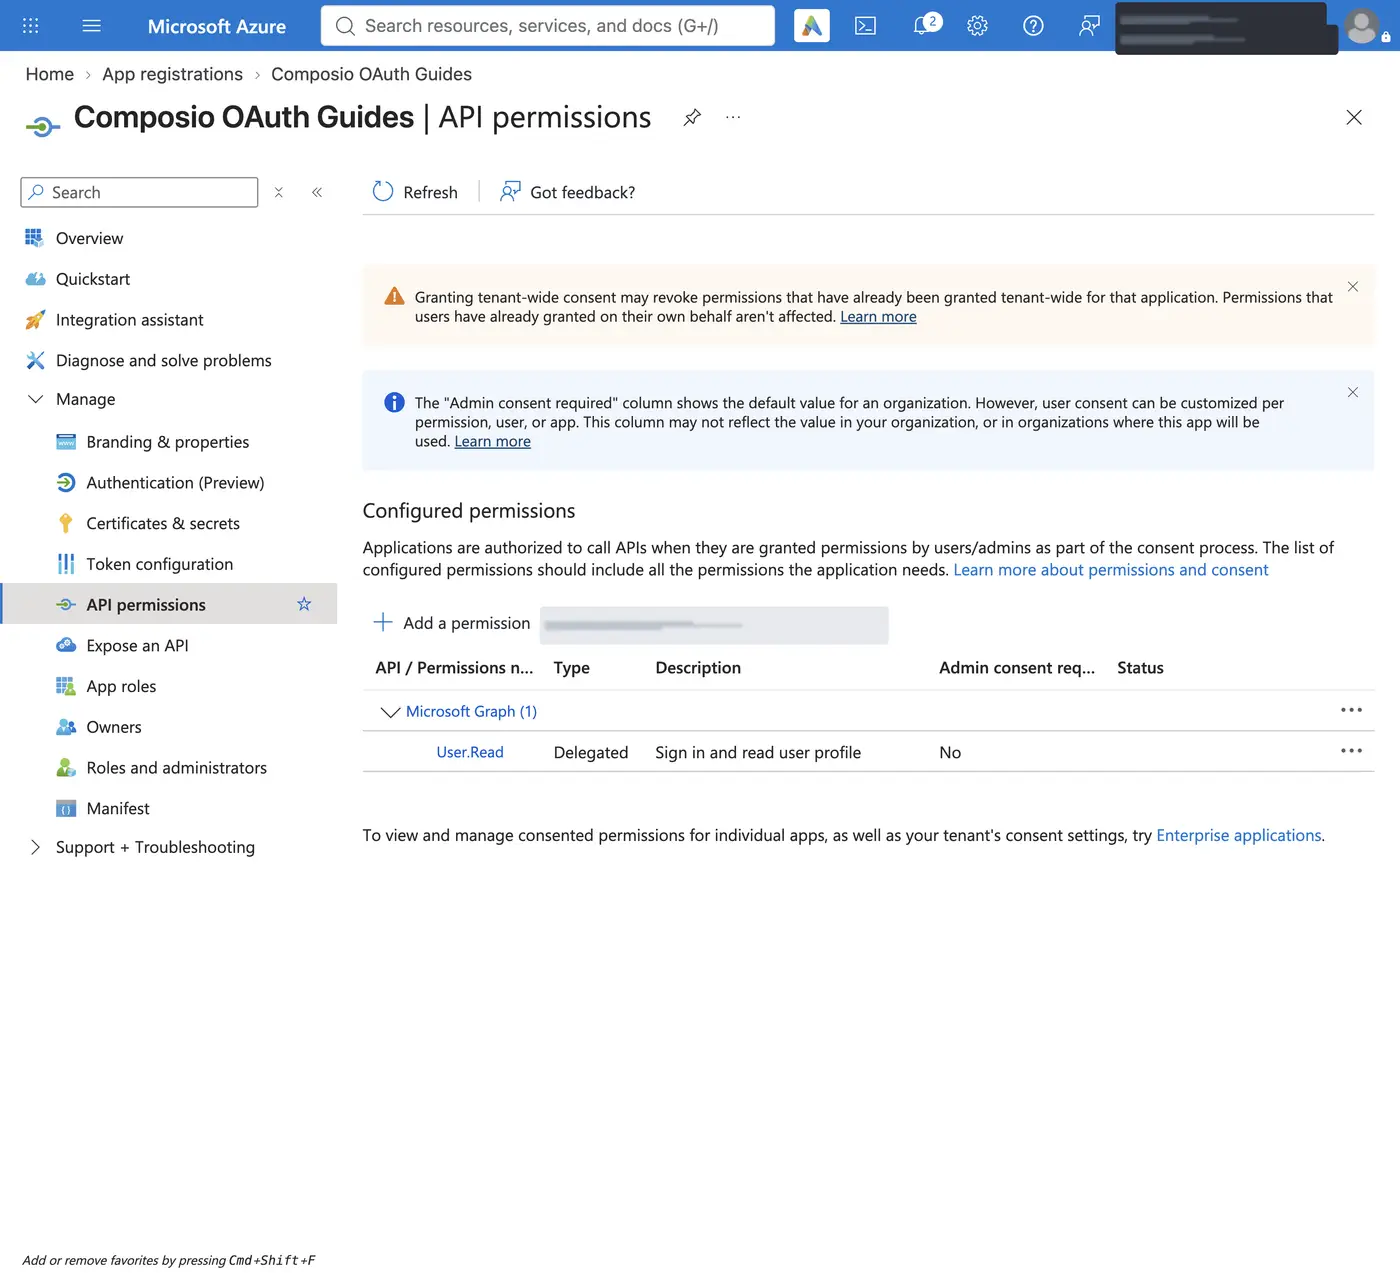
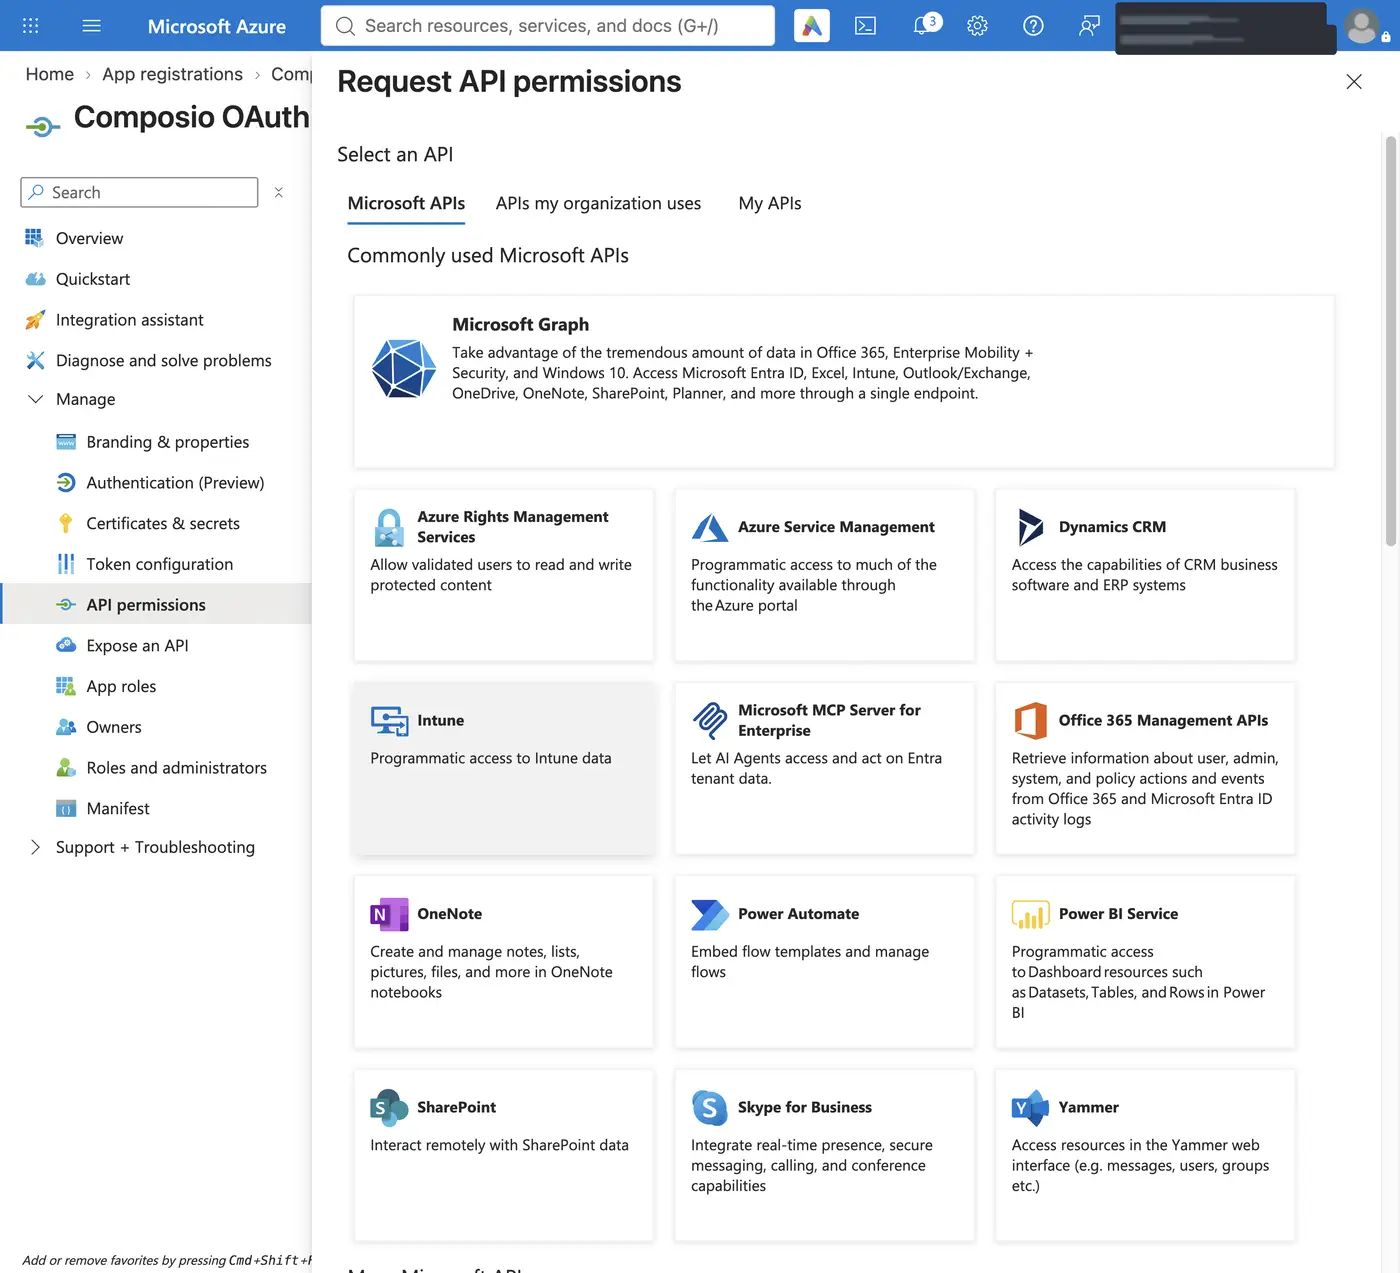
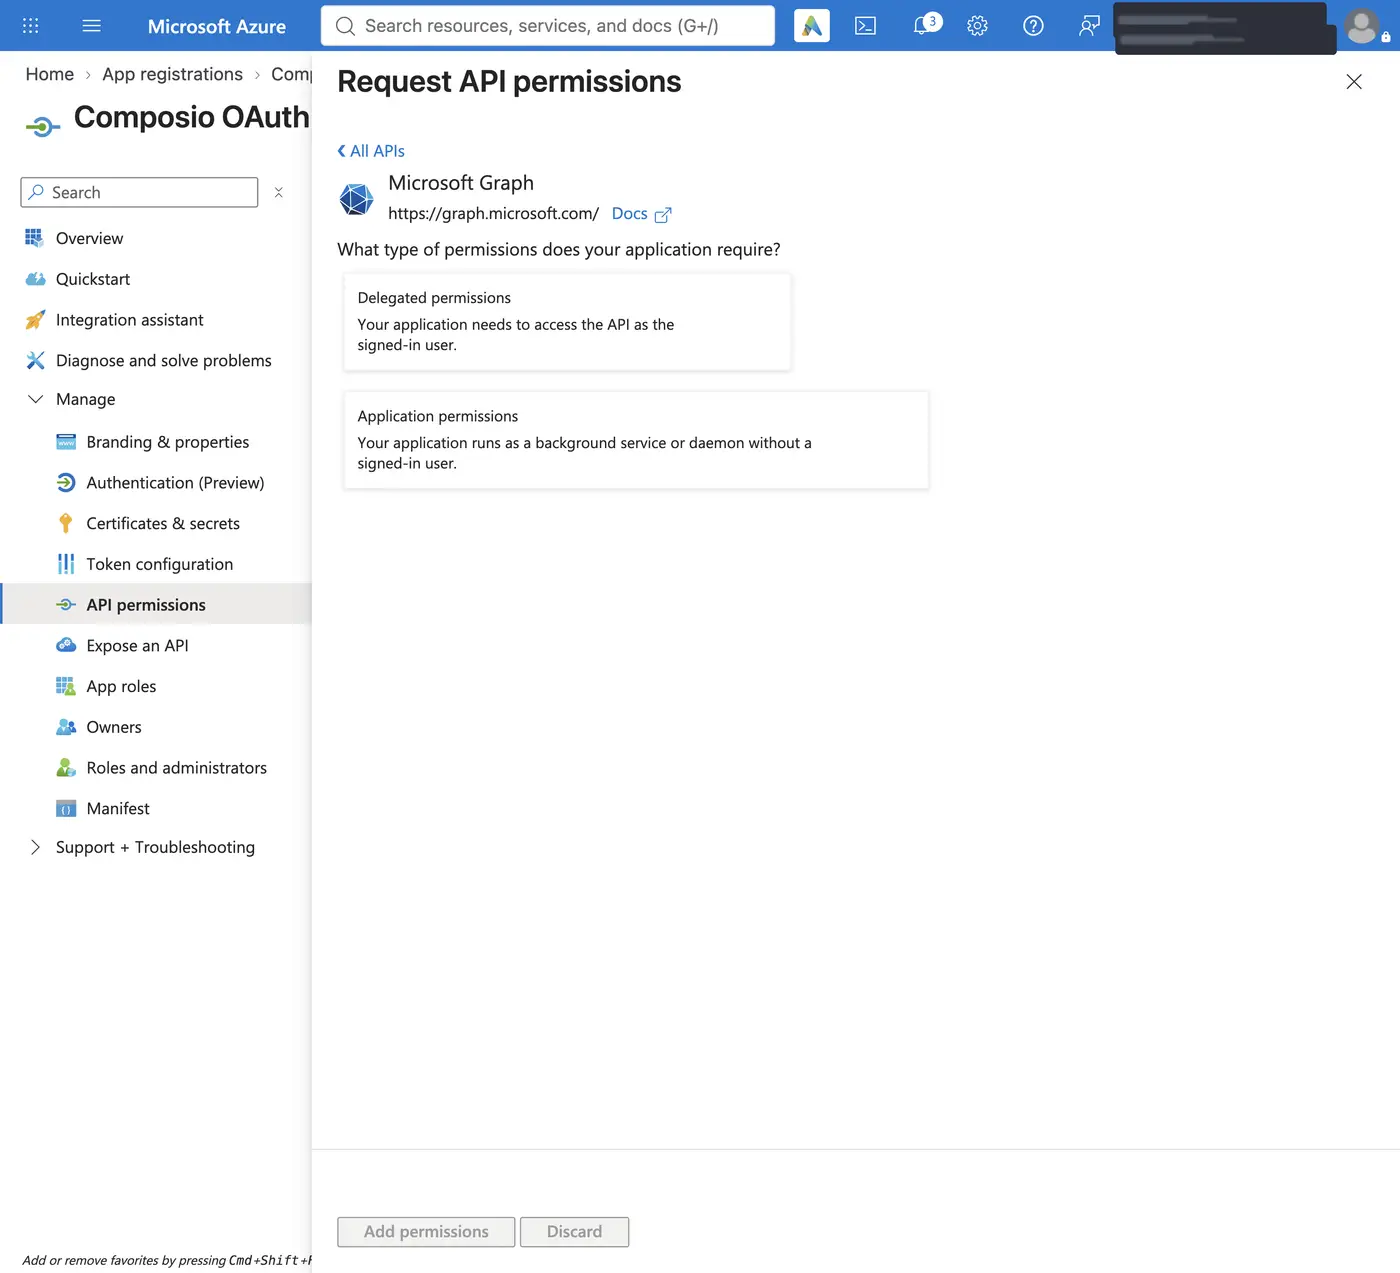
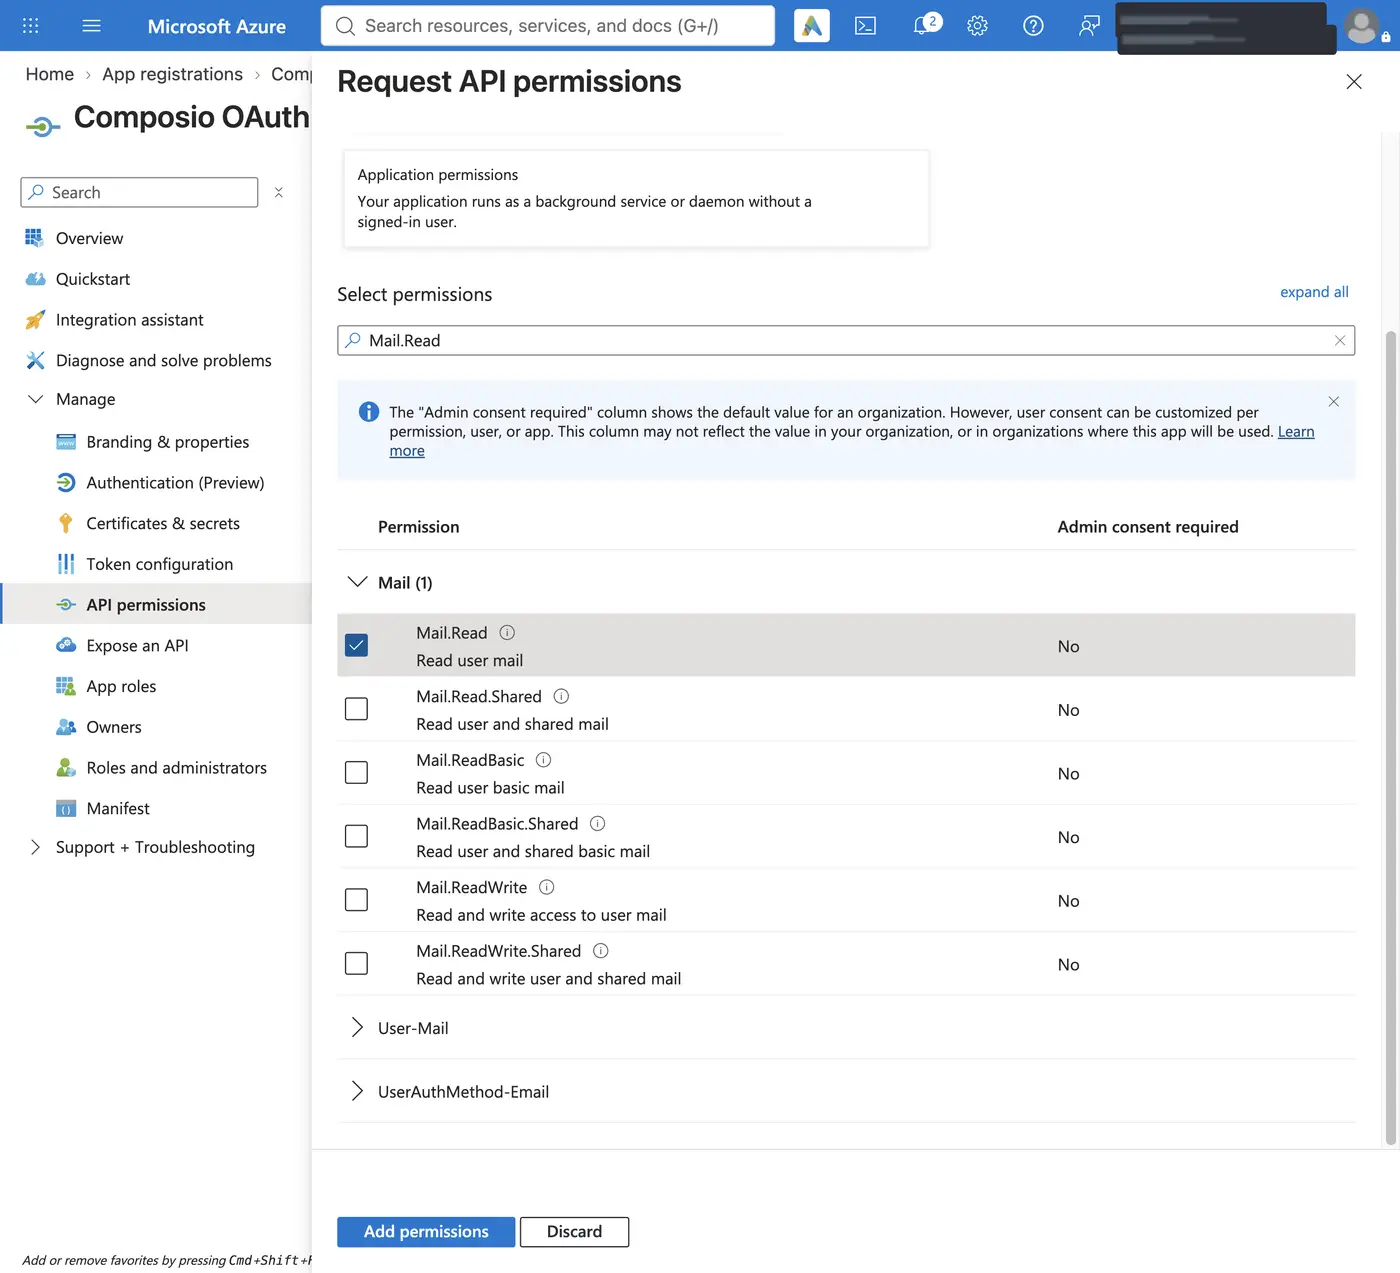
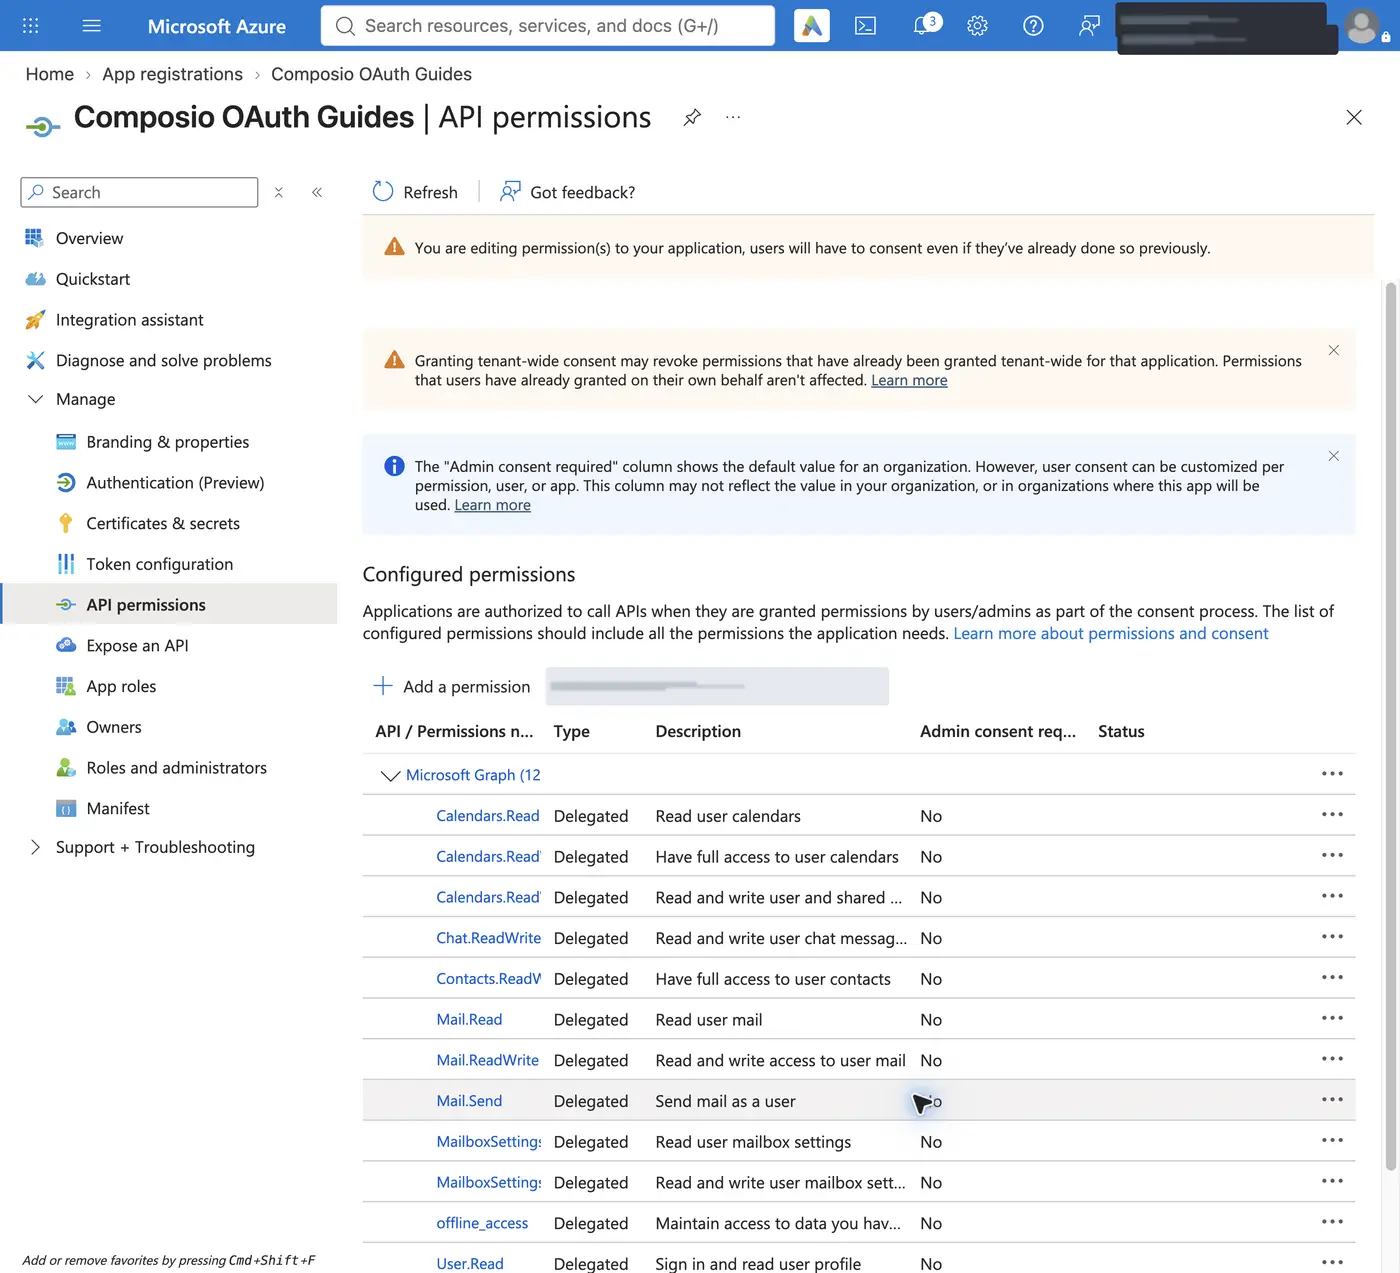
Open API permissions, click Add a permission, select Microsoft Graph, and choose Delegated permissions so the app acts as the signed-in user. Add the delegated permissions that match the scopes you'll select in Composio (see Scopes below), then click Add permissions.
-
If your tenant restricts user consent, have a tenant admin click Grant admin consent for your tenant on the API permissions page. See the admin-consent question below for both ways to do this.
The redirect URI you register must exactly match the oauth_redirect_uri field in your Composio auth config (default https://backend.composio.dev/api/v1/auth-apps/add).
Create the auth config in Composio
-
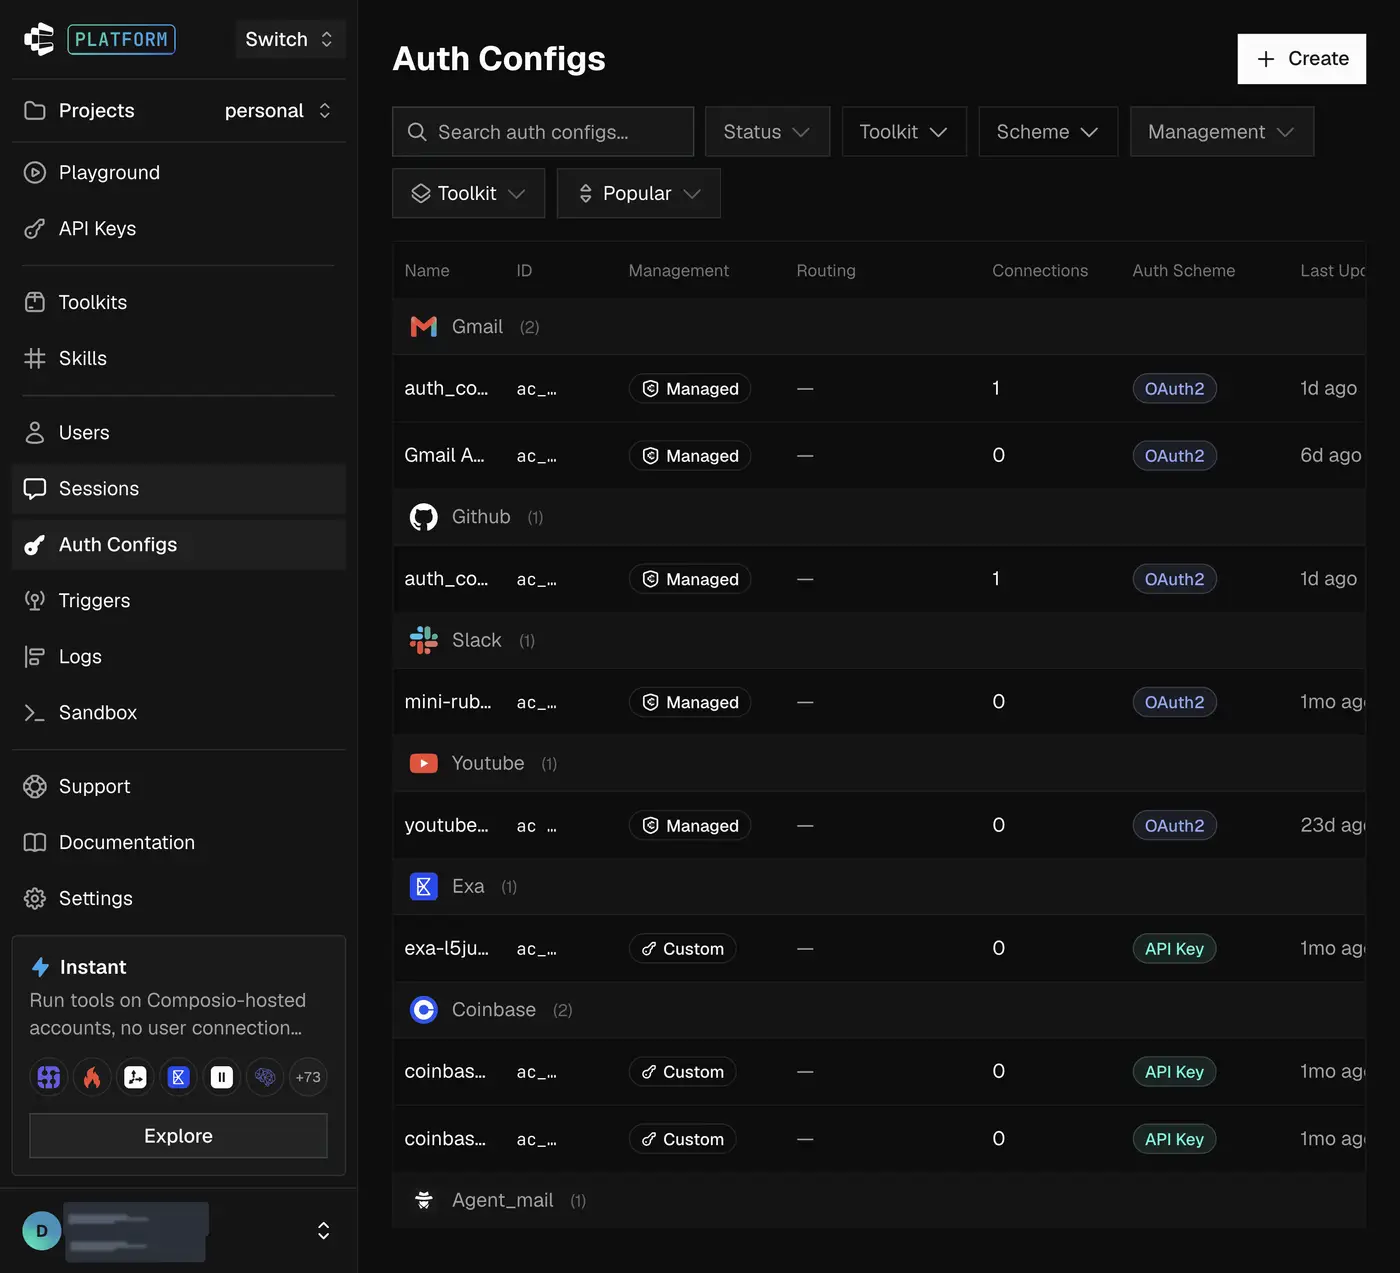
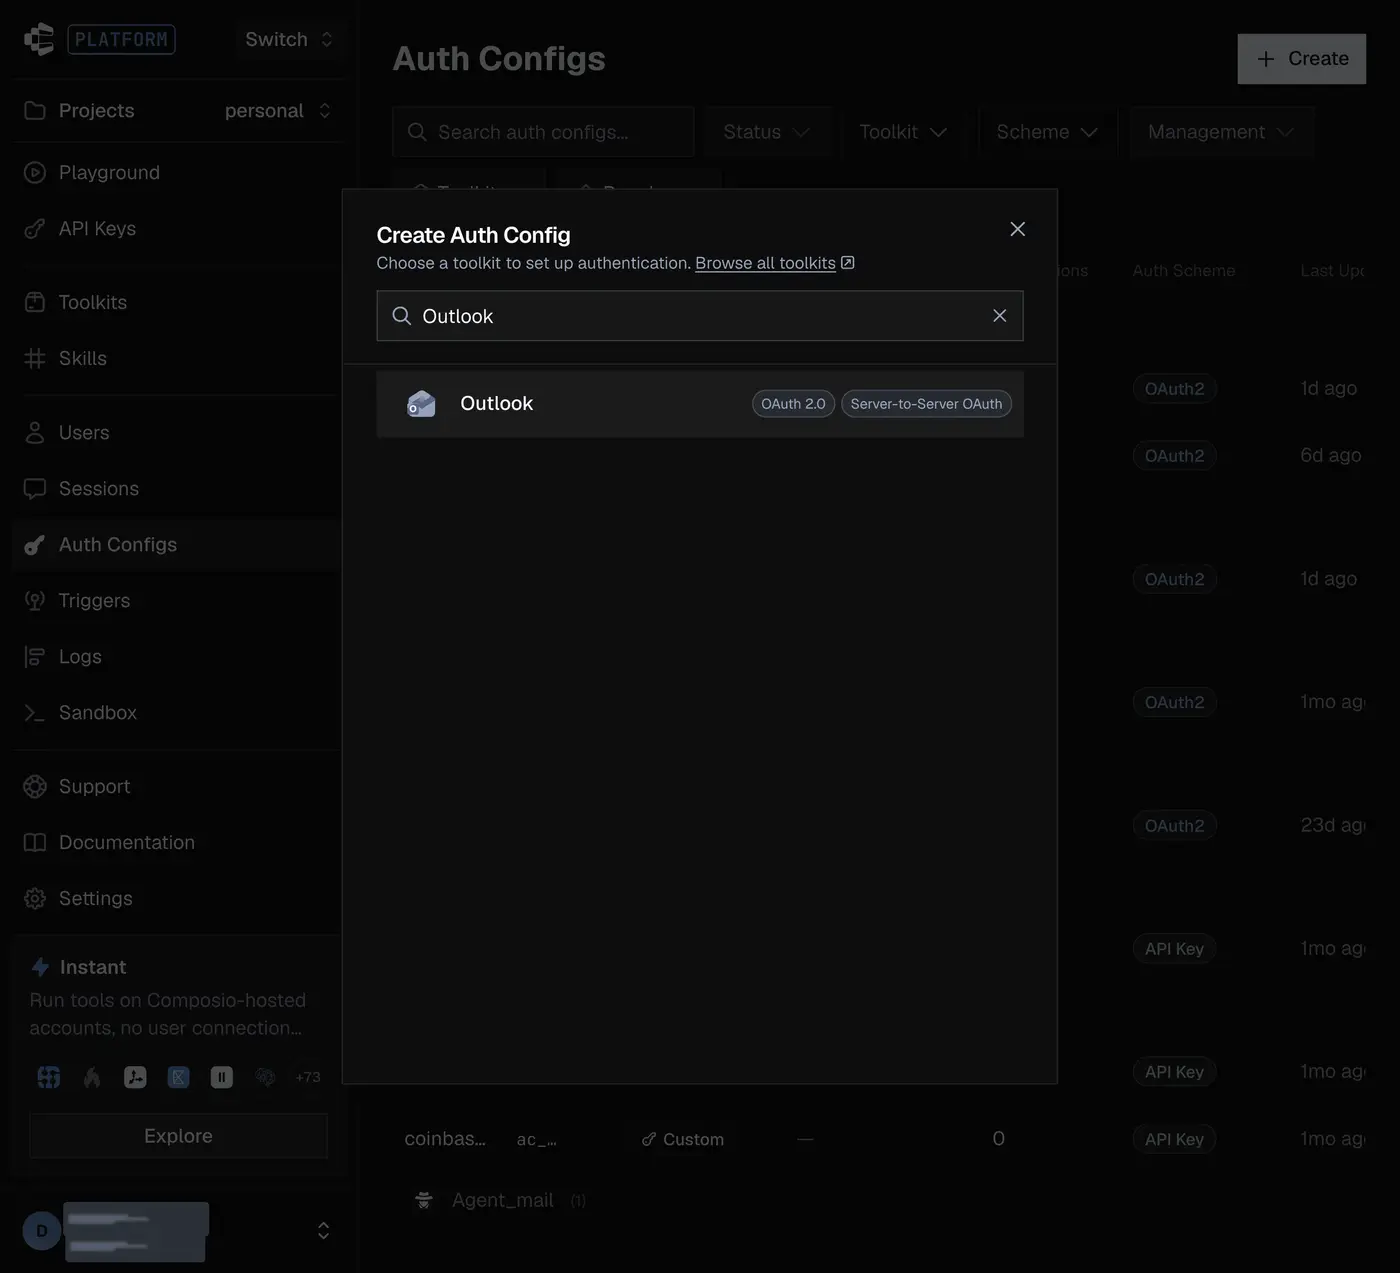
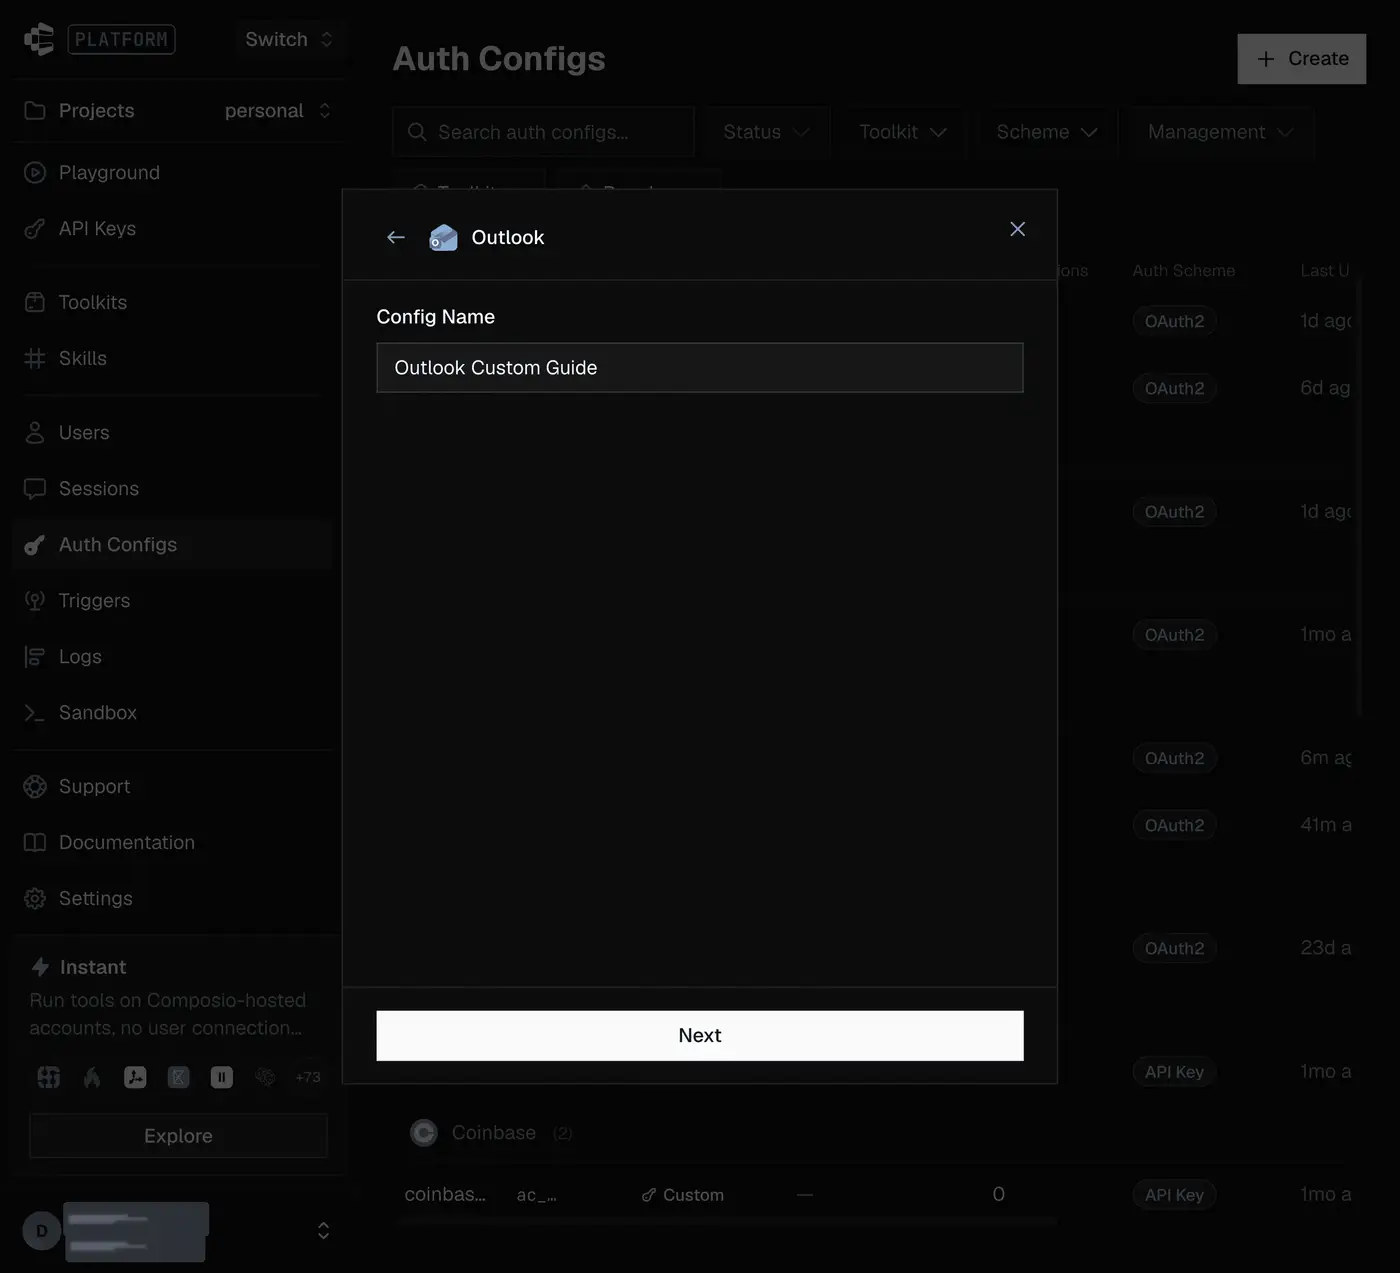
In the Composio dashboard, go to Auth Configs, click Create, and select Outlook. Enter a config name and click Next.
-
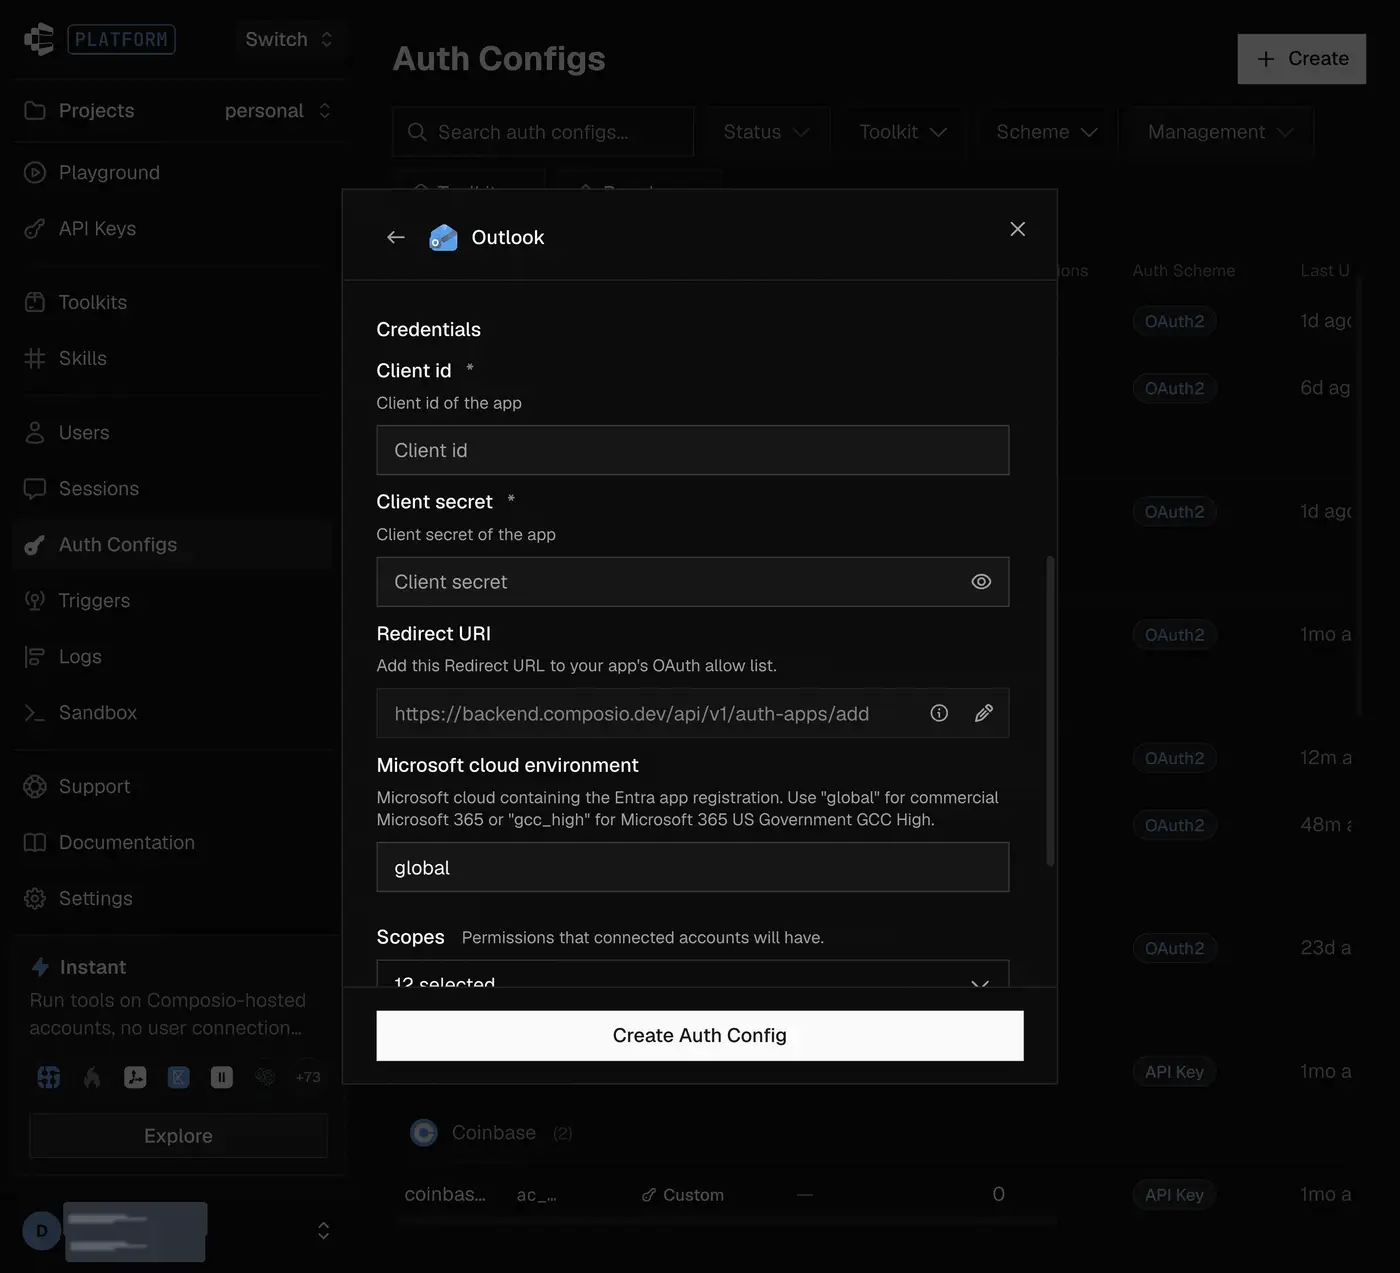
Select OAuth 2.0 and Your Own Credentials. Paste the Application (client) ID into Client id and the secret value into Client secret. Leave Redirect URI as shown. Keep Microsoft cloud environment (
microsoft_cloud) set toglobalfor commercial Microsoft 365, or setgcc_highfor Microsoft 365 US Government GCC High. The app registration must live in that cloud.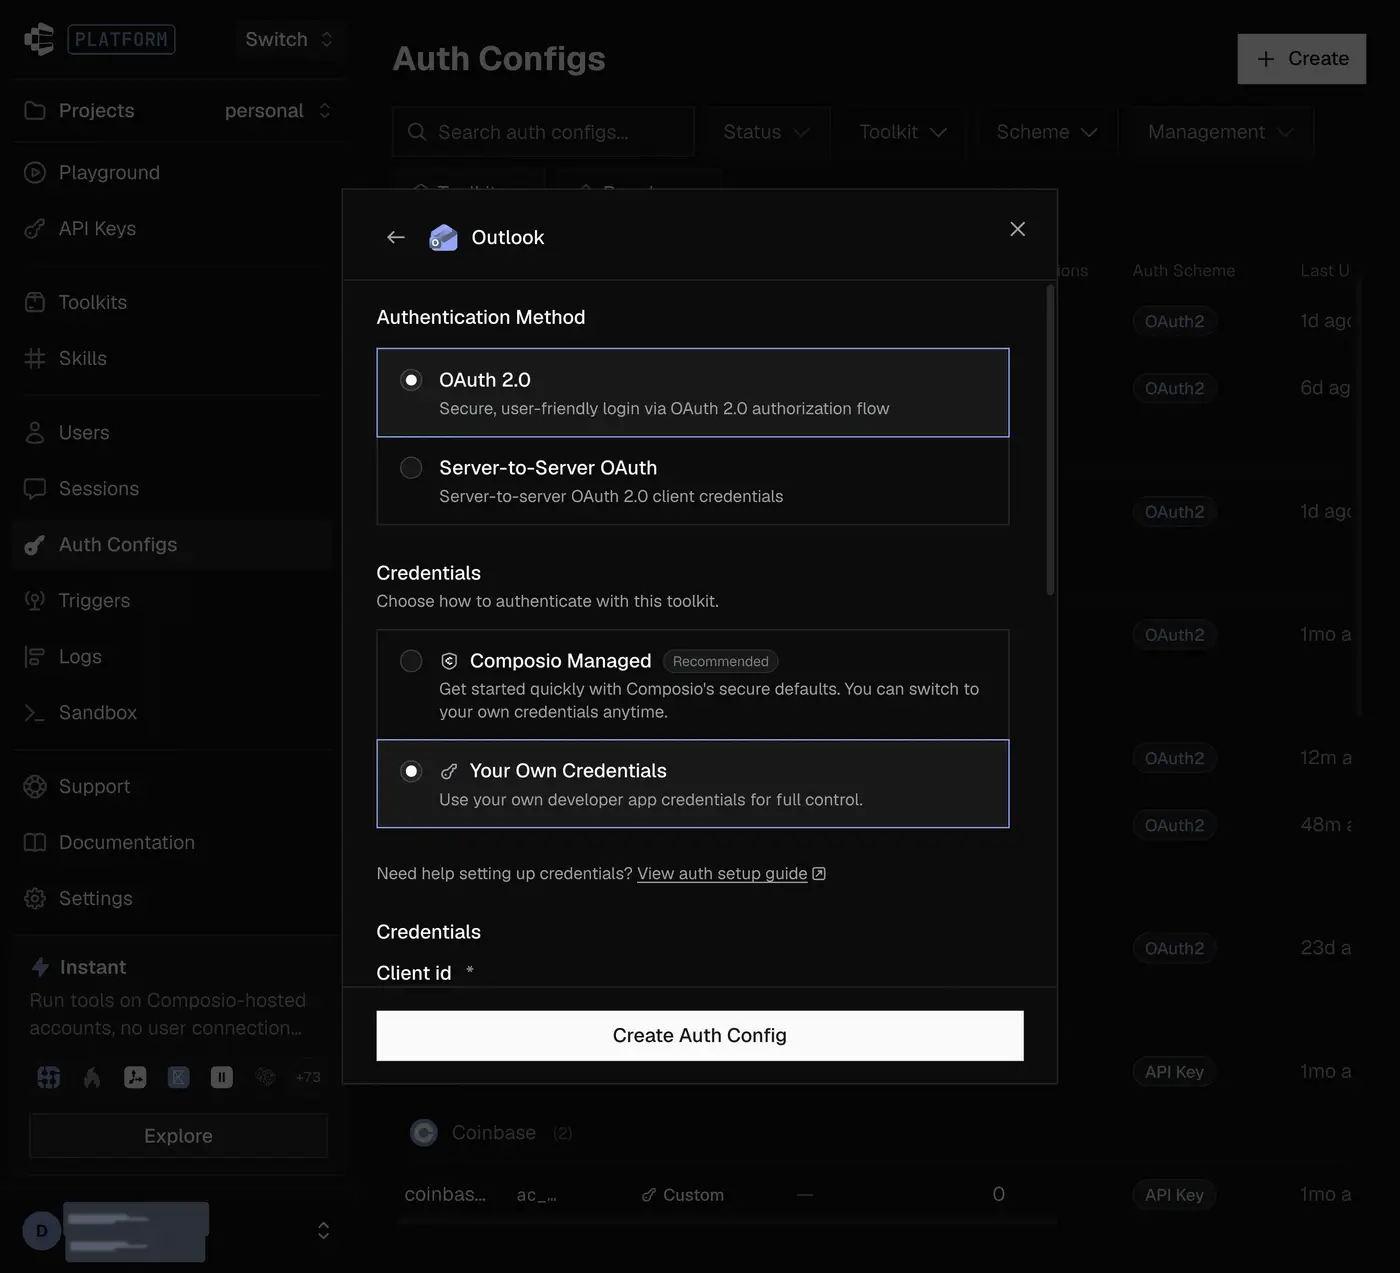
-
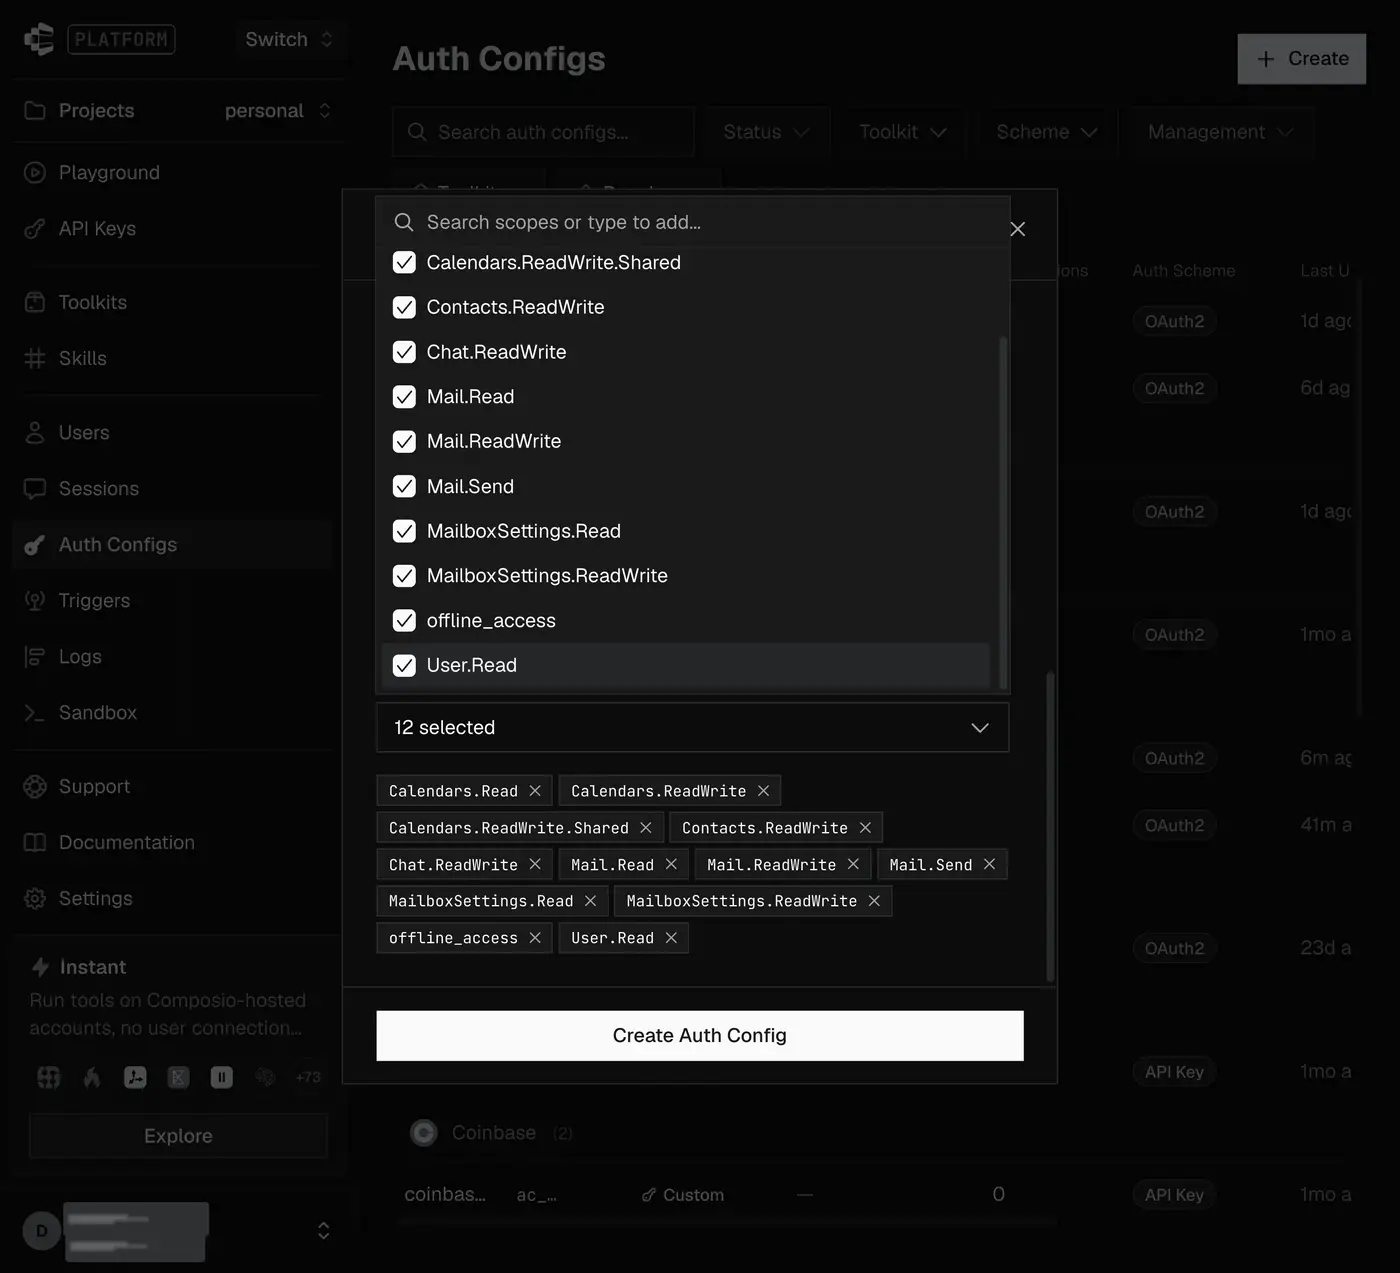
Under Scopes, select the same permissions you added in Azure, then click Create Auth Config.
-
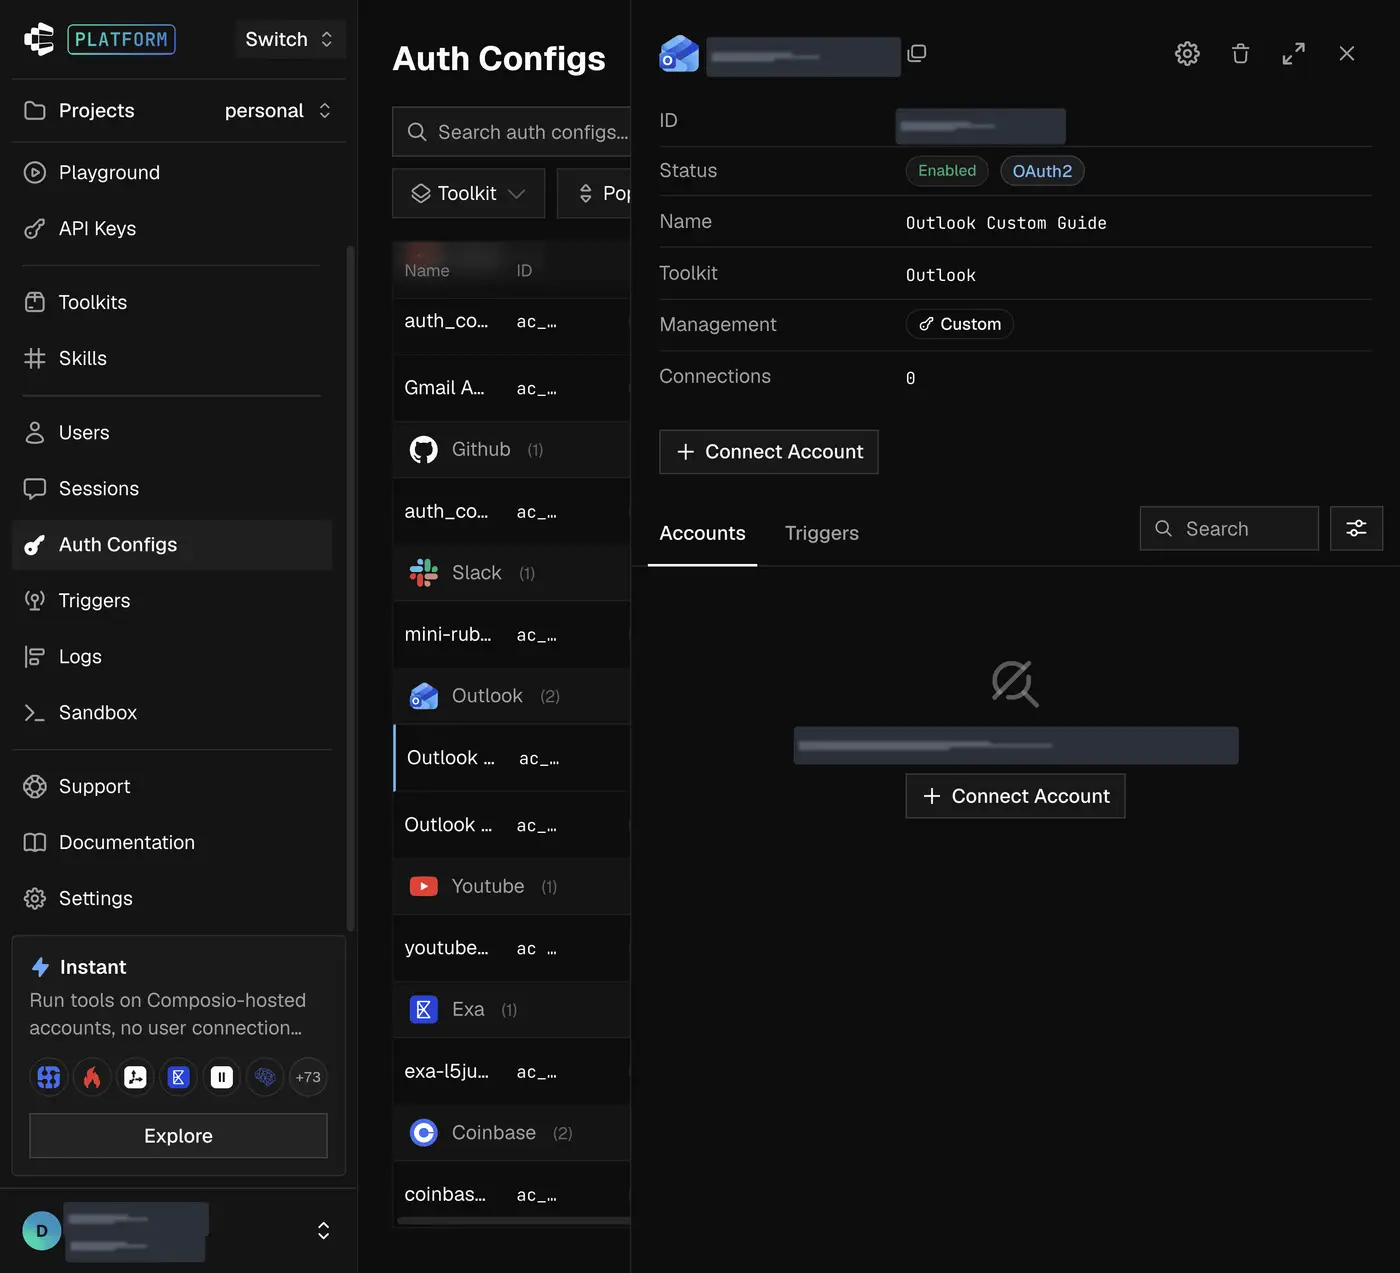
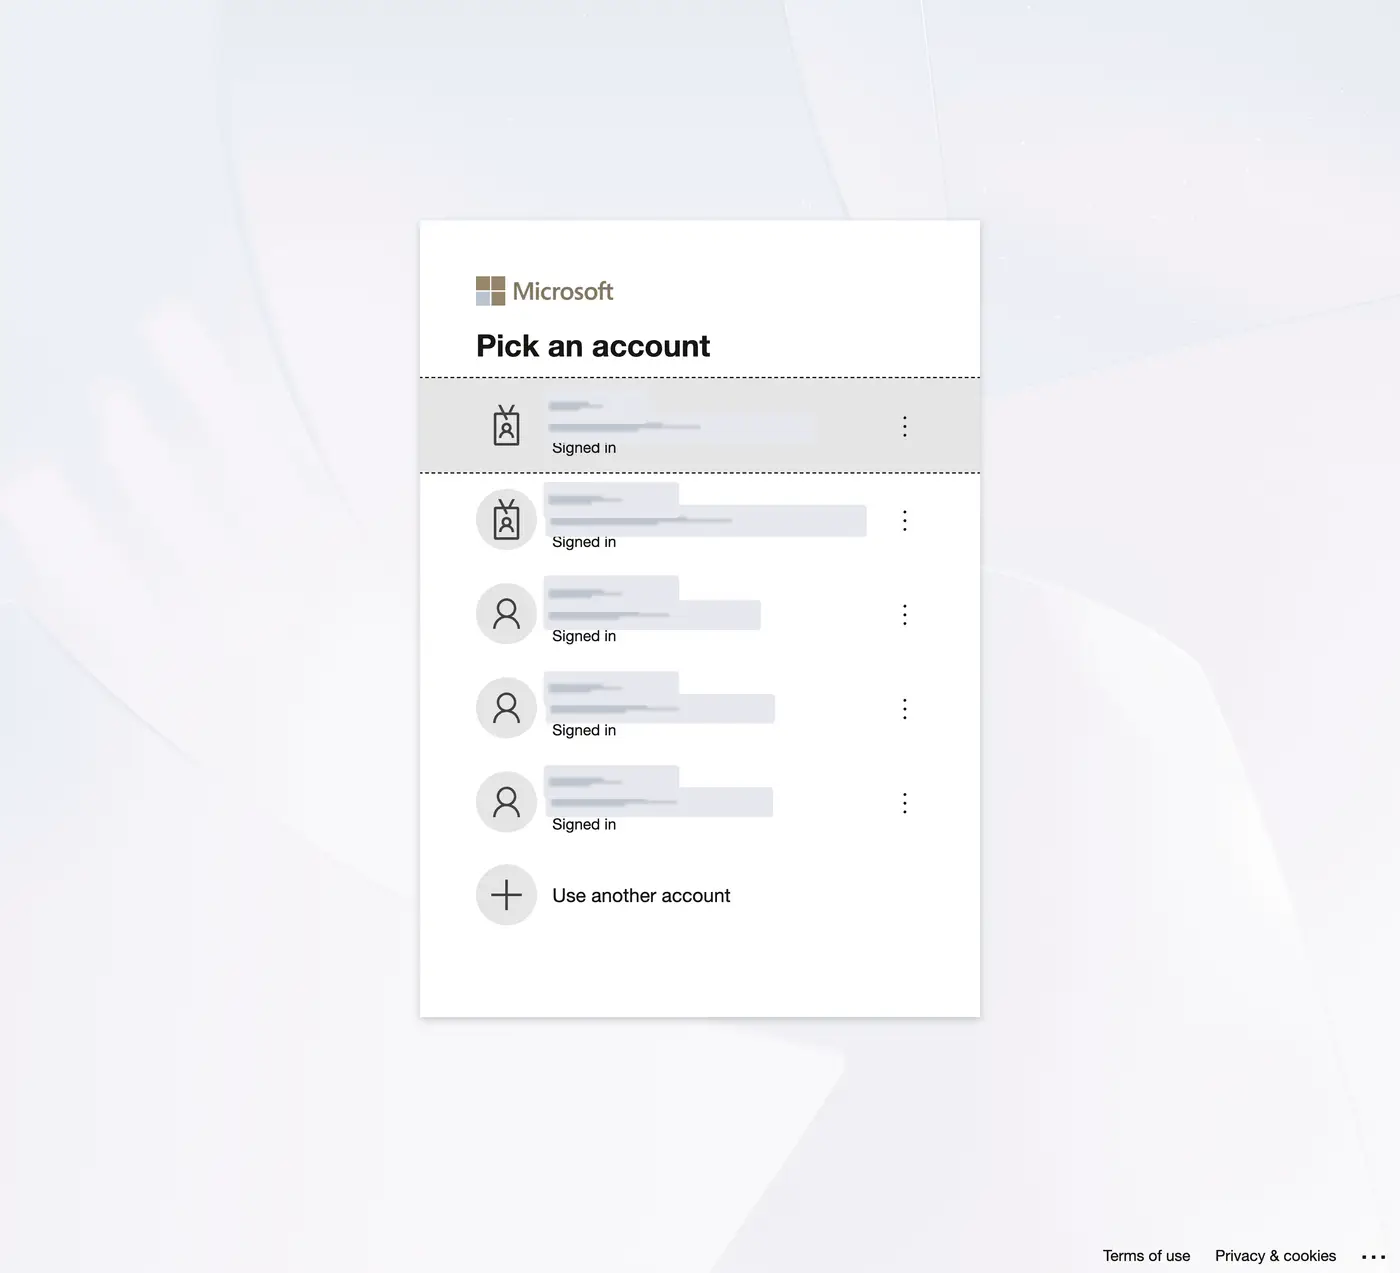
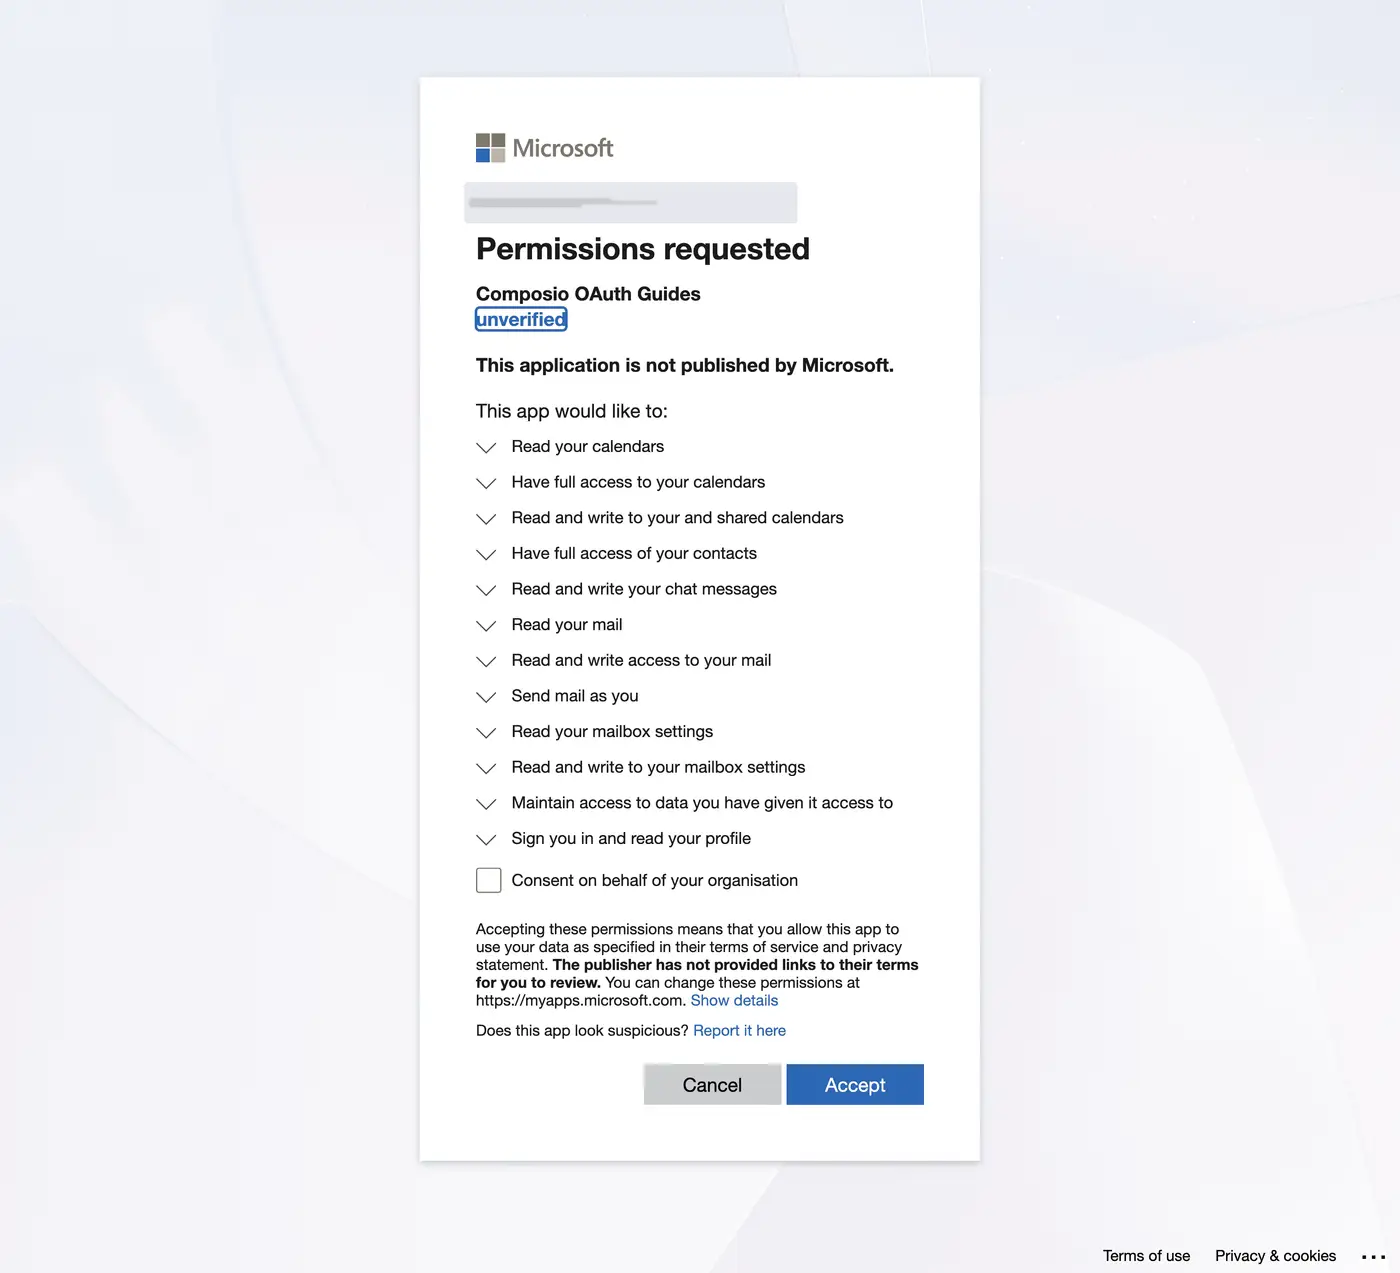
Open the auth config and click Connect Account. Sign in with the Microsoft account you want to connect, check that the consent prompt shows your app's name, and click Accept. Leave Consent on behalf of your organization unchecked unless you're an admin granting tenant-wide consent. An unverified label is expected for a custom app without a verified publisher.
-
Back on the auth config's Connected Accounts tab, confirm the account shows Active. The Enabled label at the top of the page describes the auth config, not the account.
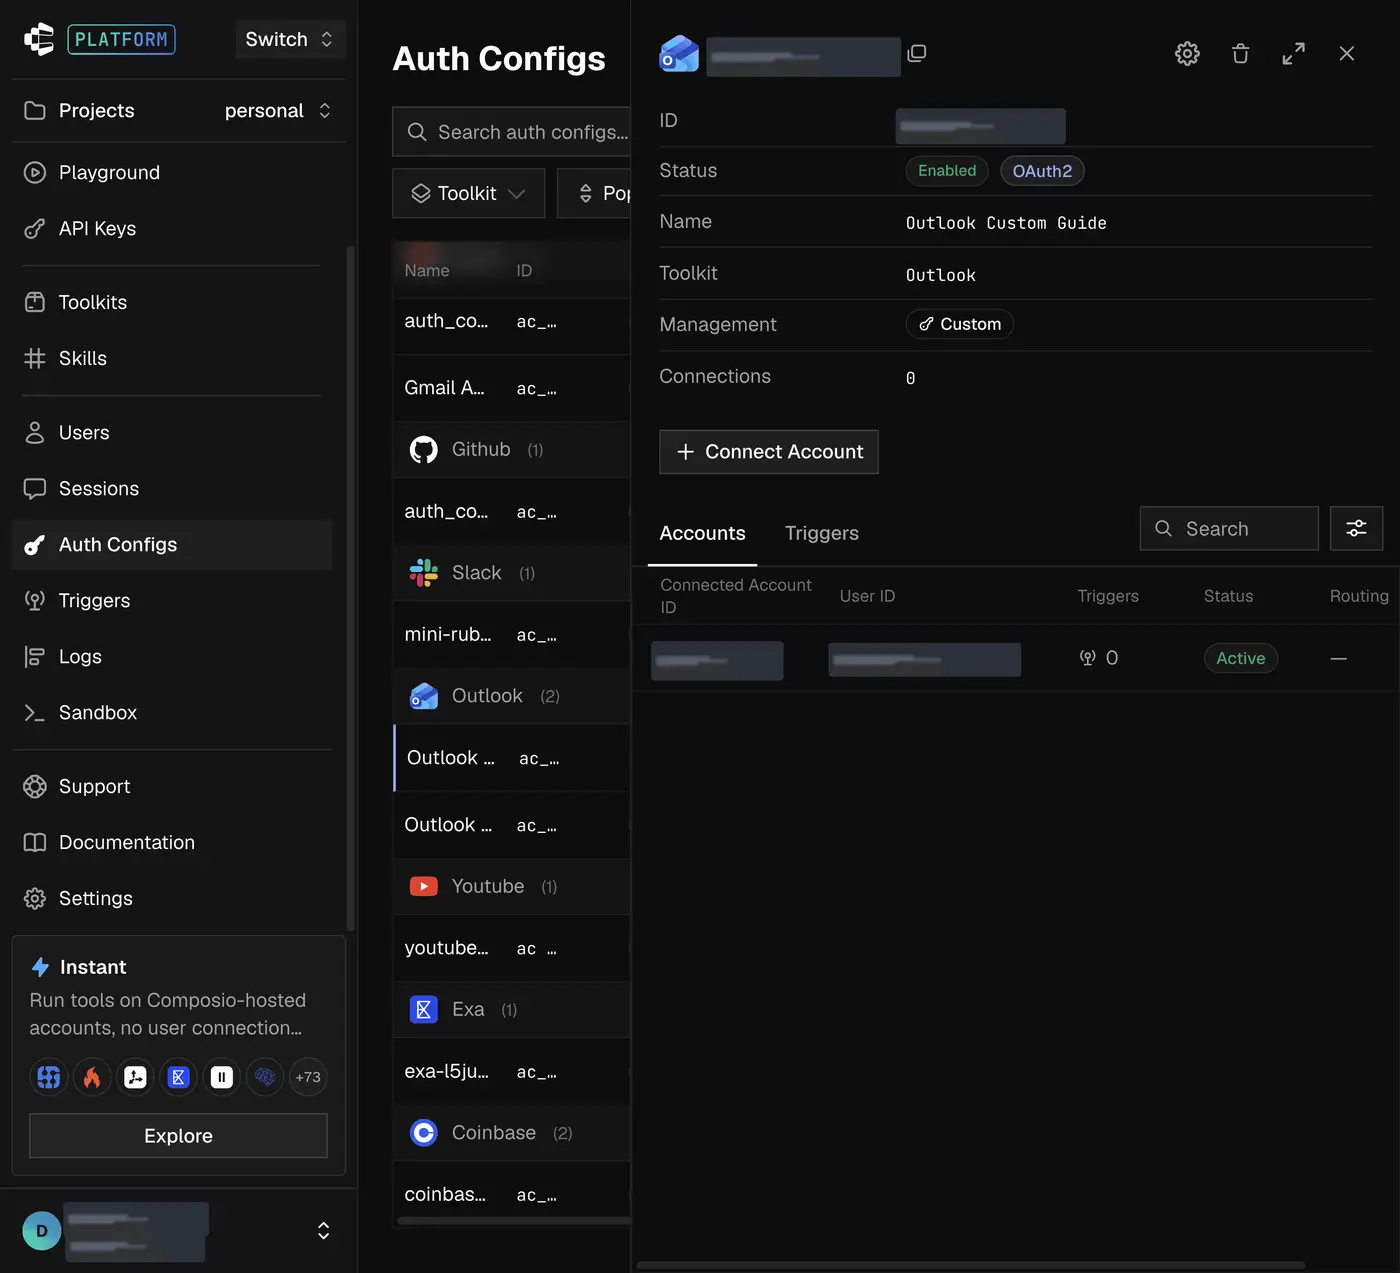
For the general flow, see custom auth configs.
Scopes
The default auth config requests Calendars.Read, Calendars.ReadWrite, Calendars.ReadWrite.Shared, Contacts.ReadWrite, Chat.ReadWrite, Mail.Read, Mail.ReadWrite, Mail.Send, MailboxSettings.Read, MailboxSettings.ReadWrite, offline_access, and User.Read. Request only what your workflow uses: reading full messages needs Mail.Read, and sending needs Mail.Send. If users sign in with personal Outlook.com accounts, leave out organization-only scopes such as Chat.ReadWrite (Teams chat). See Microsoft's get message reference.
Restrict sign-in to one tenant
The connection's tenant field (issuer) defaults to common. To restrict sign-in to one tenant, set it to your Directory (tenant) ID from the app's Overview page or a verified tenant domain.
App-only access (client credentials)
Outlook also supports an app-only auth mode (S2S_OAUTH2) that runs without a signed-in user. It takes the Client id, the Client secret value, and your Microsoft Entra tenant ID (generic_id) as a GUID, found under Microsoft Entra ID > Overview > Tenant ID. For this mode, add Application permissions instead of delegated permissions on the app registration, and have an admin grant admin consent.
Why does the Outlook new message trigger only return a message ID?
Outlook's webhooks send only the message ID on trigger events. To get the full message (subject, body, headers), call the OUTLOOK_GET_MESSAGE tool with that message ID.
Why doesn't OUTLOOK_SEND_EMAIL return message details?
Microsoft Graph's send endpoint returns an HTTP 202 with no message details. To get the message ID and conversation ID, create a draft first with OUTLOOK_CREATE_DRAFT, then send it with OUTLOOK_SEND_DRAFT. See Microsoft Graph docs.
What's the @odata.context / @odata URL?
The @odata.context URL provides metadata about the response (entity set, service version, and schema info) to help clients interpret the payload structure. It's primarily used for pagination and data parsing, not as a direct URL to the resource itself.
Why do Outlook connections show "Needs Admin Approval" or "admin approval required"?
Microsoft/Outlook admin-consent issues are Microsoft 365 tenant-level approval problems, not something fixed by changing only the Composio connection. Adding delegated permissions to an Azure app registration is not the same as granting tenant admin consent. Once a tenant admin grants consent for the requested permissions, affected users should start a fresh normal Outlook connection flow with their own accounts; the admin does not need to connect every user individually.
Two concrete ways an admin can approve are:
- App Registration / OAuth app level: in Microsoft Entra / Azure Portal, go to App registrations, open the OAuth app, go to API permissions, click Grant admin consent for [Tenant Name], then confirm/save.
- Enterprise Applications / org level: in Microsoft Entra / Azure Portal, go to Enterprise applications, find the Composio/Outlook app or the user's own service principal, open Permissions / admin-consent controls, then grant admin consent for the organization.
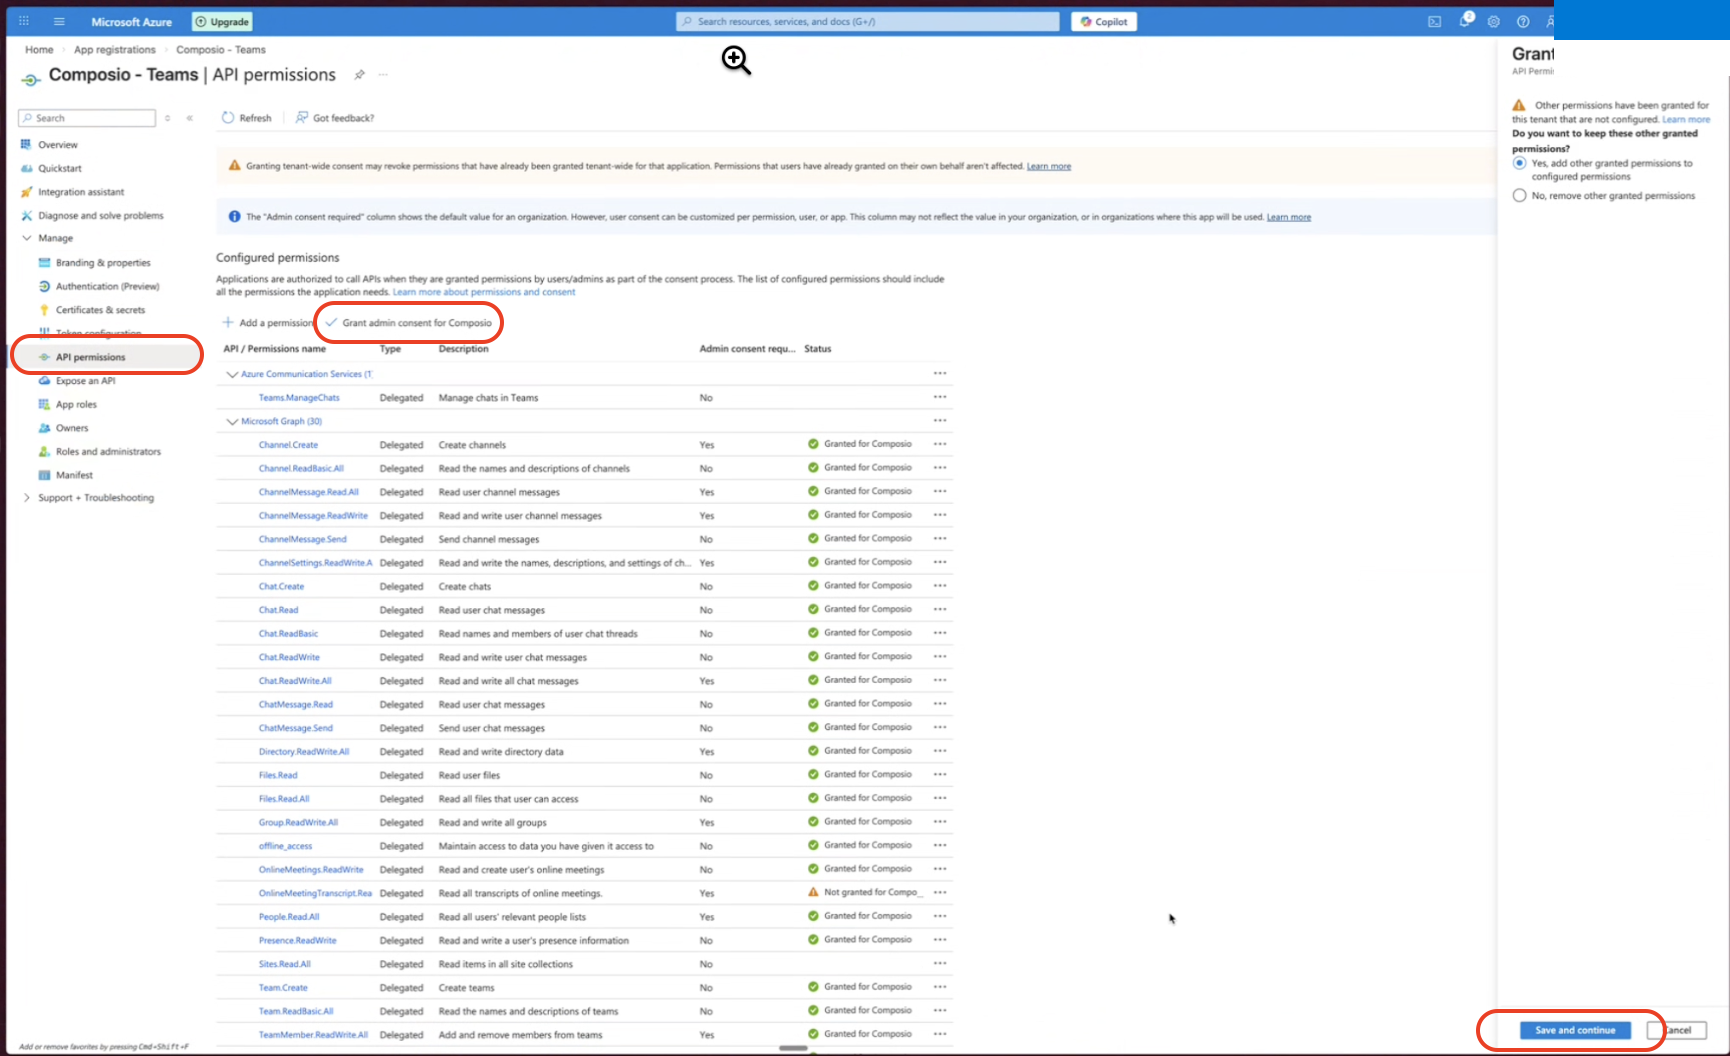
Microsoft may also show an in-flow sign in as an admin / Connectez-vous avec ce compte option on the OAuth screen. Treat that as a secondary path, not the first recommendation. If an admin signs in through the same OAuth attempt, that attempt may connect the admin's mailbox instead of the original user's mailbox. After tenant-wide consent is granted, the original user should start a fresh Outlook connection flow with their own account.
For custom Microsoft OAuth apps, a verified publisher can improve branding and may reduce consent friction in tenants that allow user consent for verified publishers and the requested delegated permissions. It does not remove the admin-consent requirement in every tenant; each Microsoft 365 tenant's user-consent policy and the exact scopes requested still decide whether admin approval is needed.