OneDrive
Latest versionOneDrive is Microsoft’s cloud storage solution enabling users to store, sync, and share files across devices, offering offline access, real-time collaboration, and enterprise-grade security
Authentication DetailsComposio-managed OAuth available
Frequently Asked Questions
How do I set up custom OAuth credentials for OneDrive?
Use your own Microsoft Entra ID app registration when you want the Microsoft consent screen to show your app's name and you want to control which permissions OneDrive requests.
Create the Microsoft Entra app
-
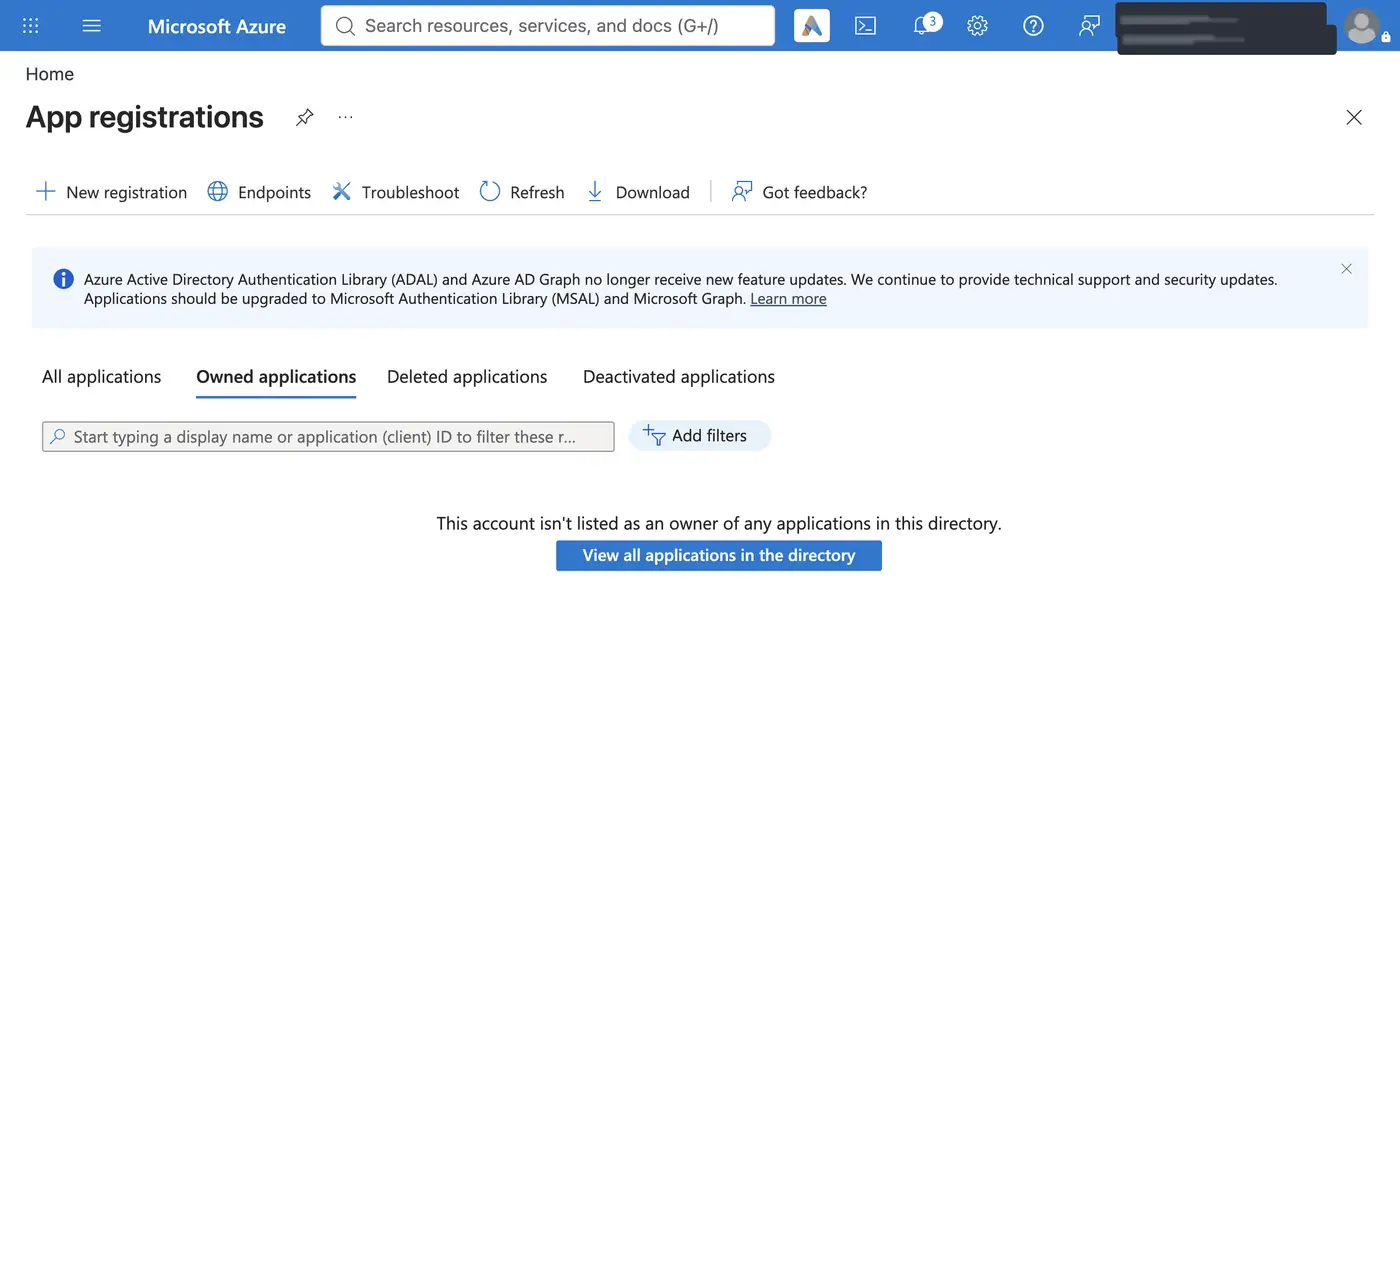
Sign in to the Azure portal, open App registrations, and click New registration.
-
Enter a Name. Under Supported account types, choose Accounts in any organizational directory and personal Microsoft accounts (shown as Any Entra ID Tenant + Personal Microsoft accounts) if you want to connect both work or school and personal accounts. Choose a single-tenant or multitenant organizational option if you only connect work or school accounts.
-
Under Redirect URI, select the Web platform, enter
https://backend.composio.dev/api/v1/auth-apps/add, and click Register.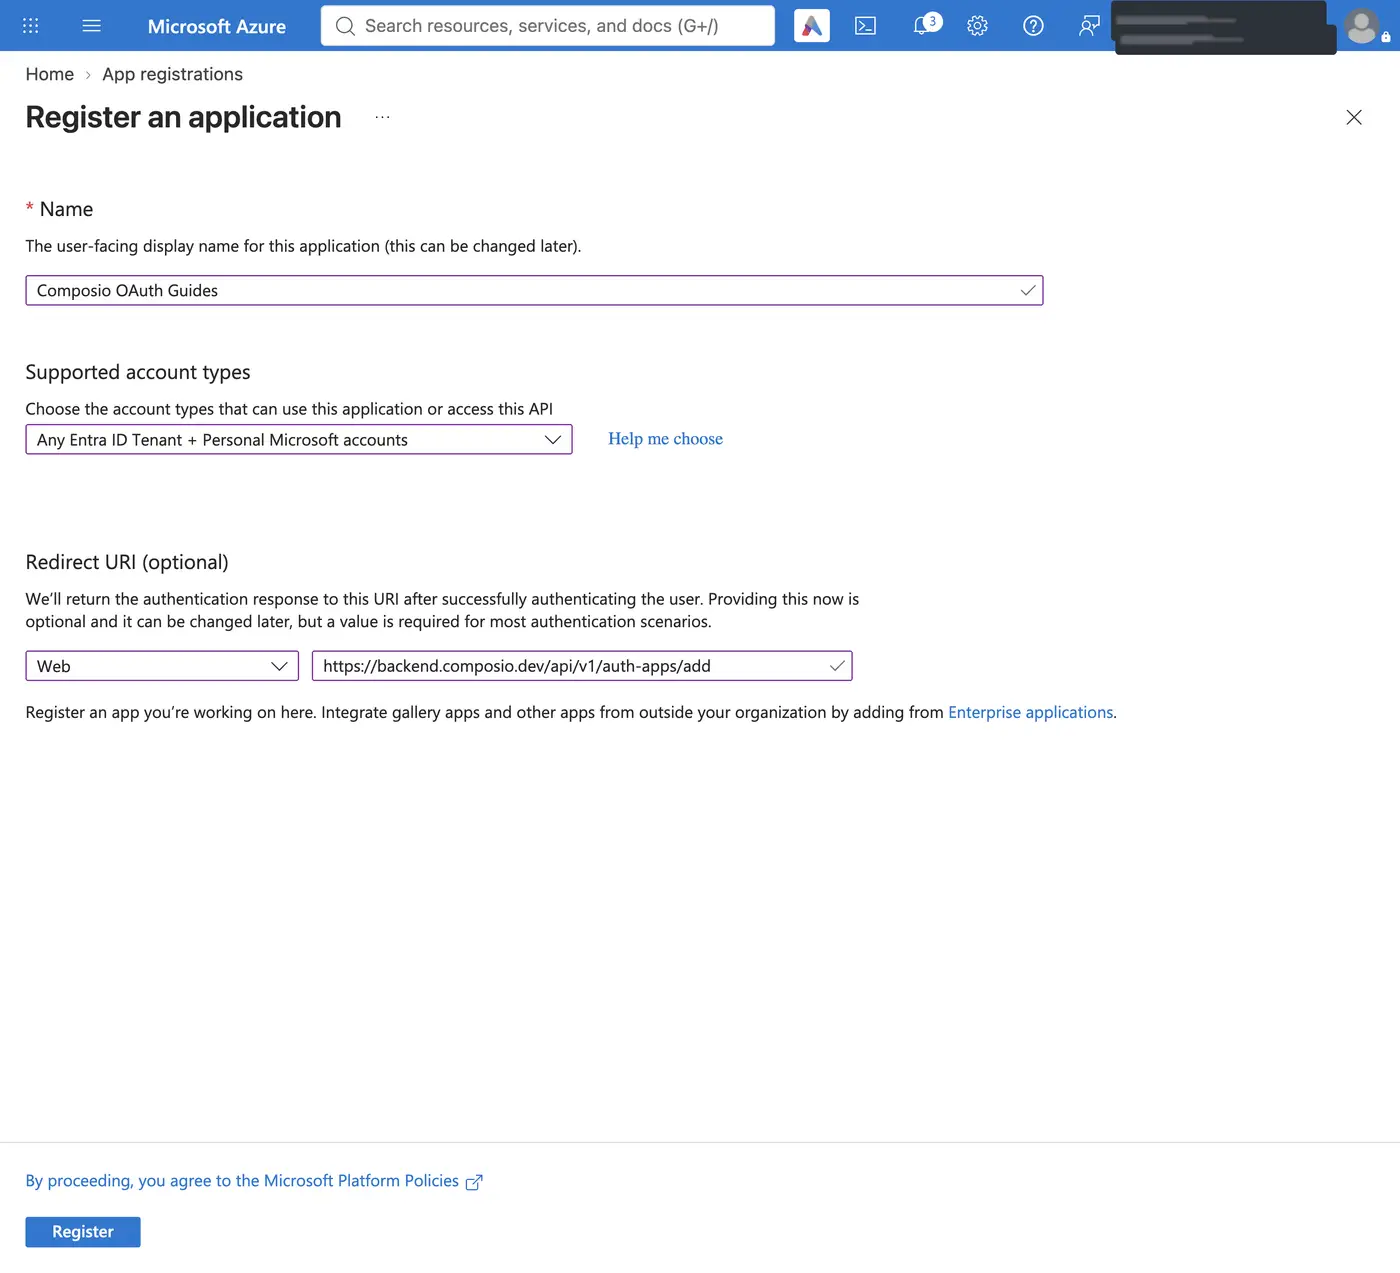
-
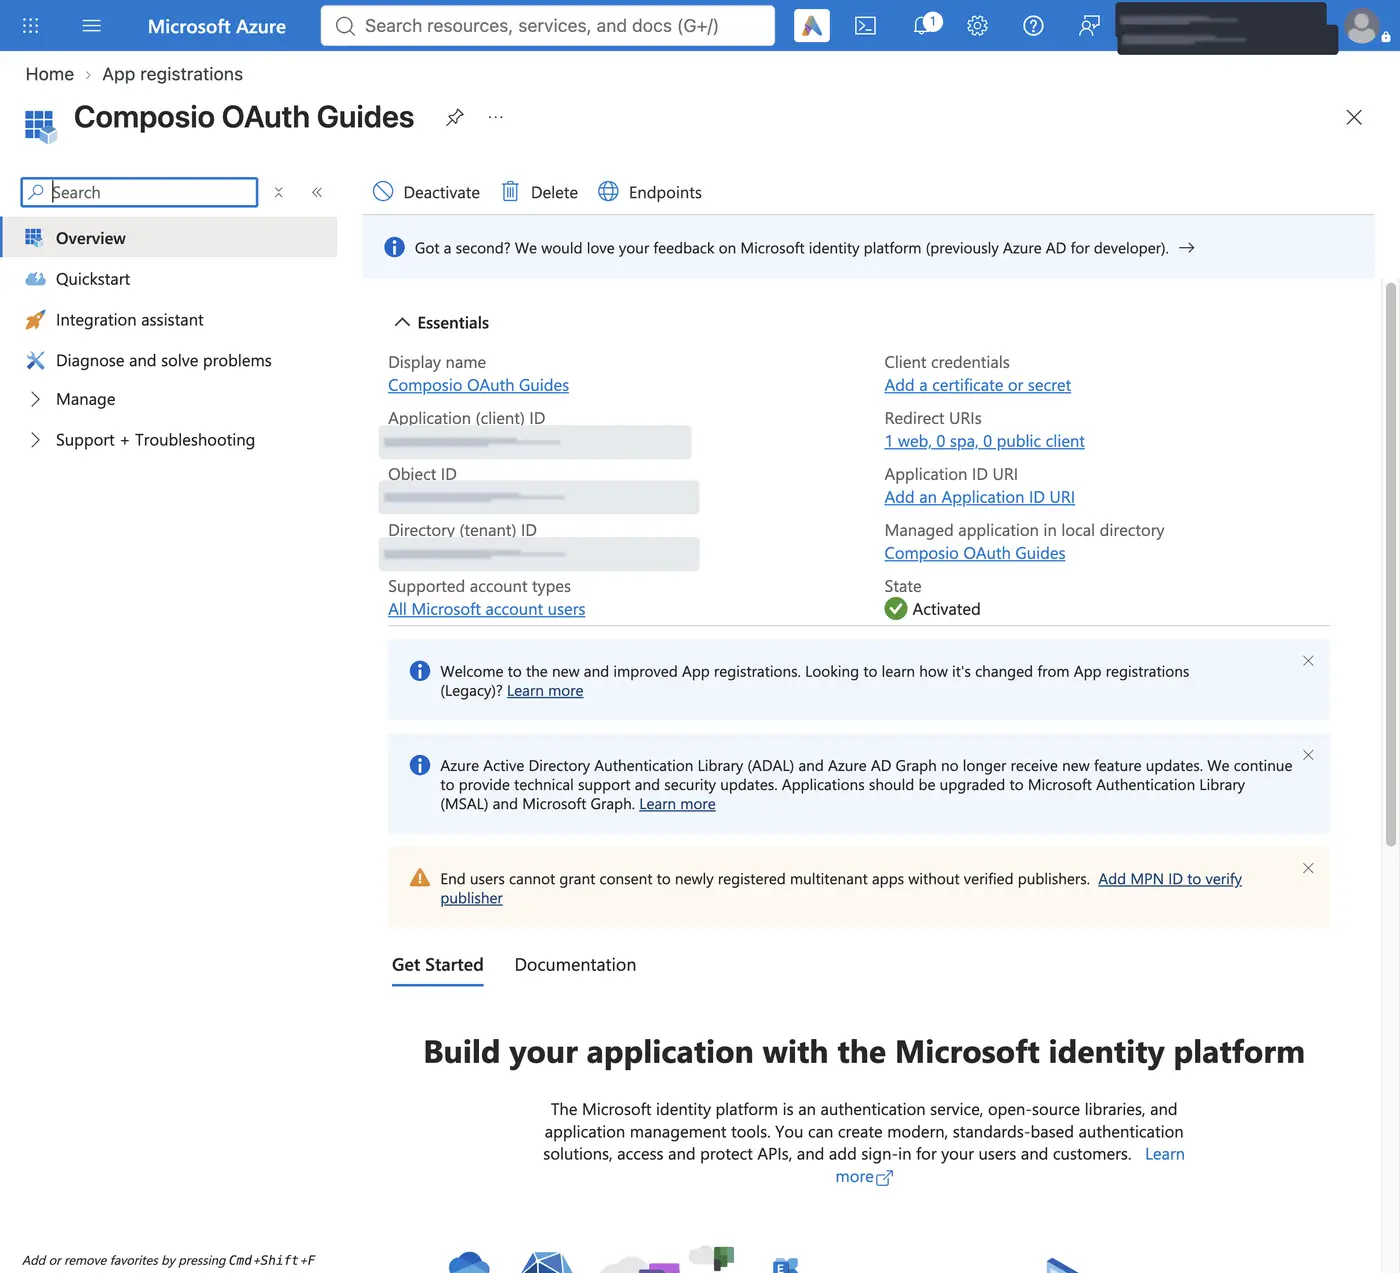
On the app's Overview page, copy the Application (client) ID.
-
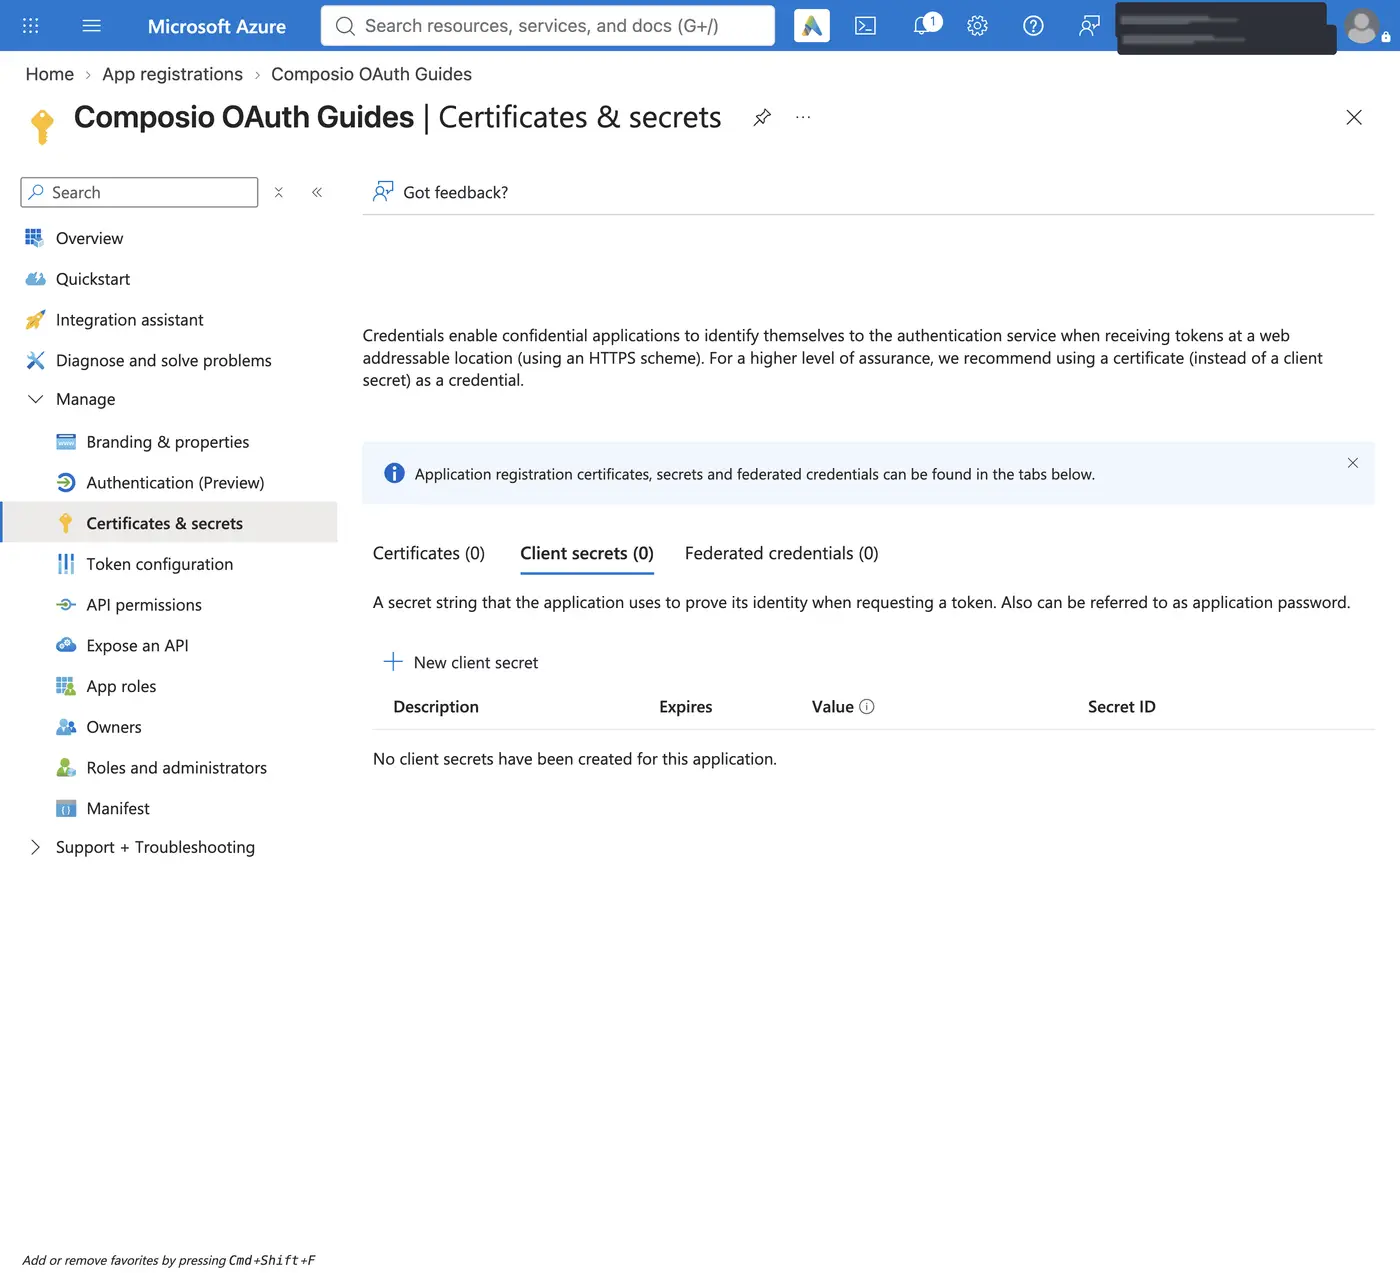
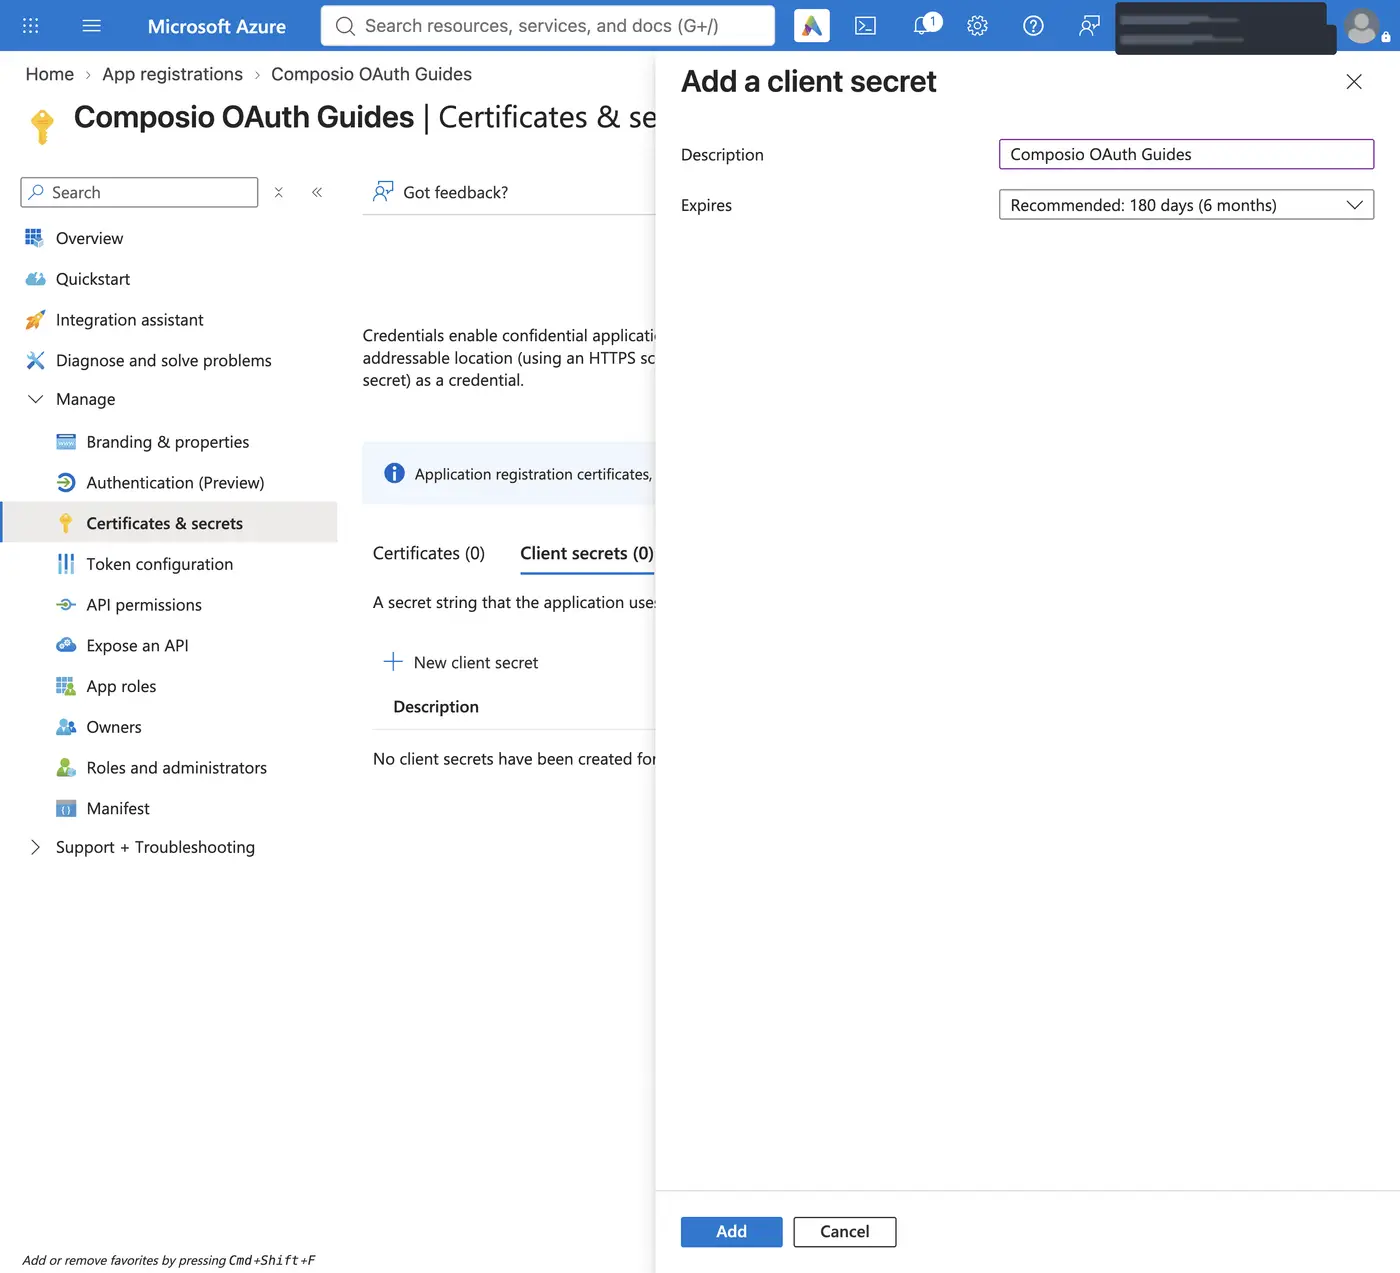
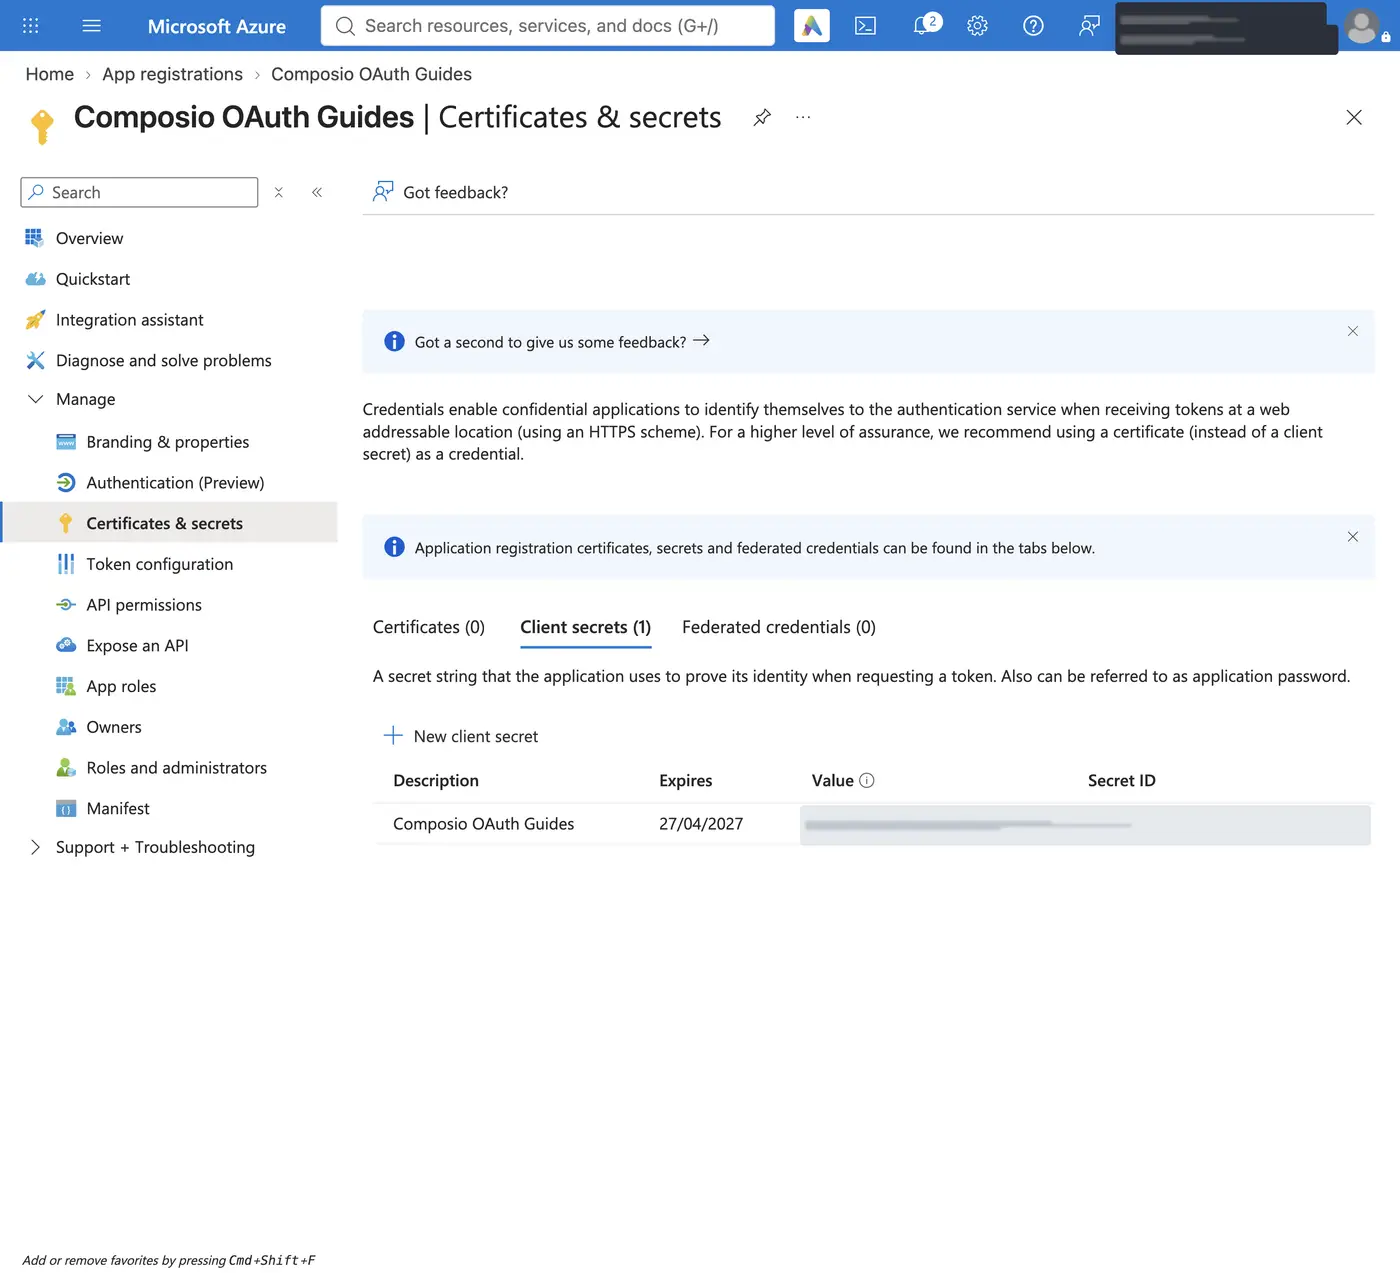
Open Certificates & secrets and click New client secret. Add a description, choose an expiry that fits your rotation policy (for example, 180 days), and click Add. Rotate the secret before it expires.
-
Copy the secret Value right away. Use the Value, not the Secret ID. Azure shows the full value only once; if you lose it, create a new secret.
-
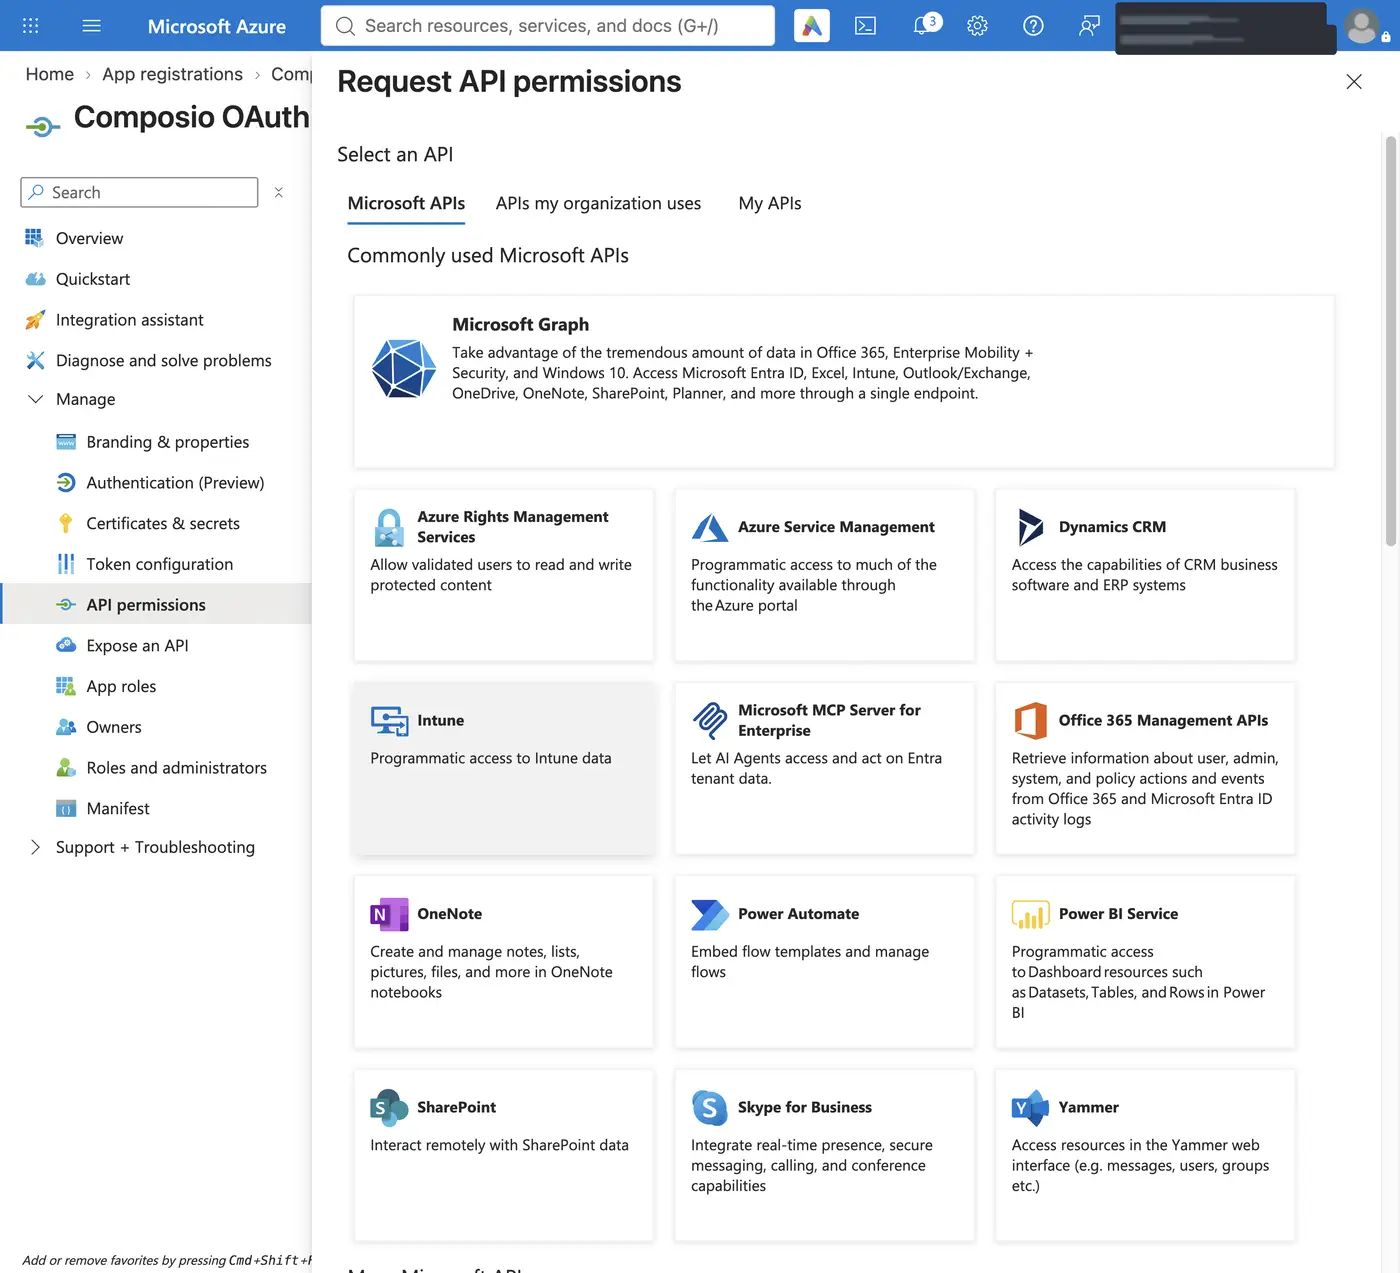
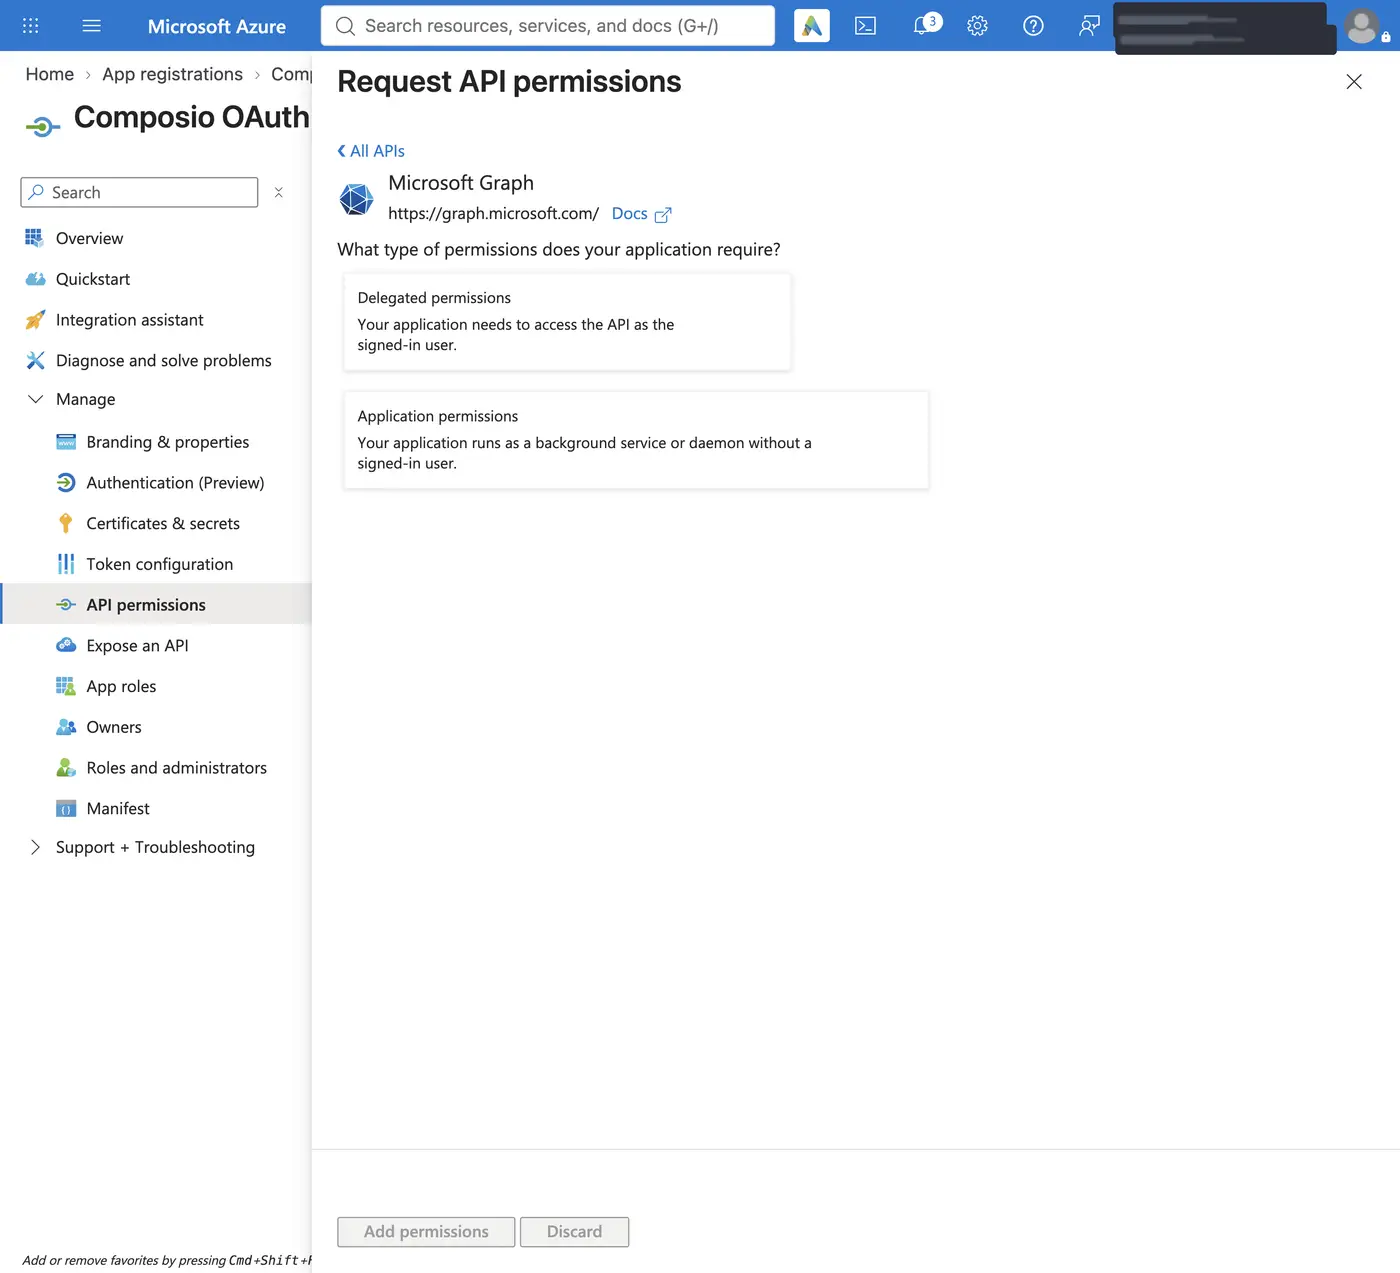
Open API permissions, click Add a permission, select Microsoft Graph, and choose Delegated permissions so the app acts as the signed-in user. Add
Files.ReadWrite.All,Sites.ReadWrite.All, andoffline_access, or only the subset your workflow uses, then click Add permissions.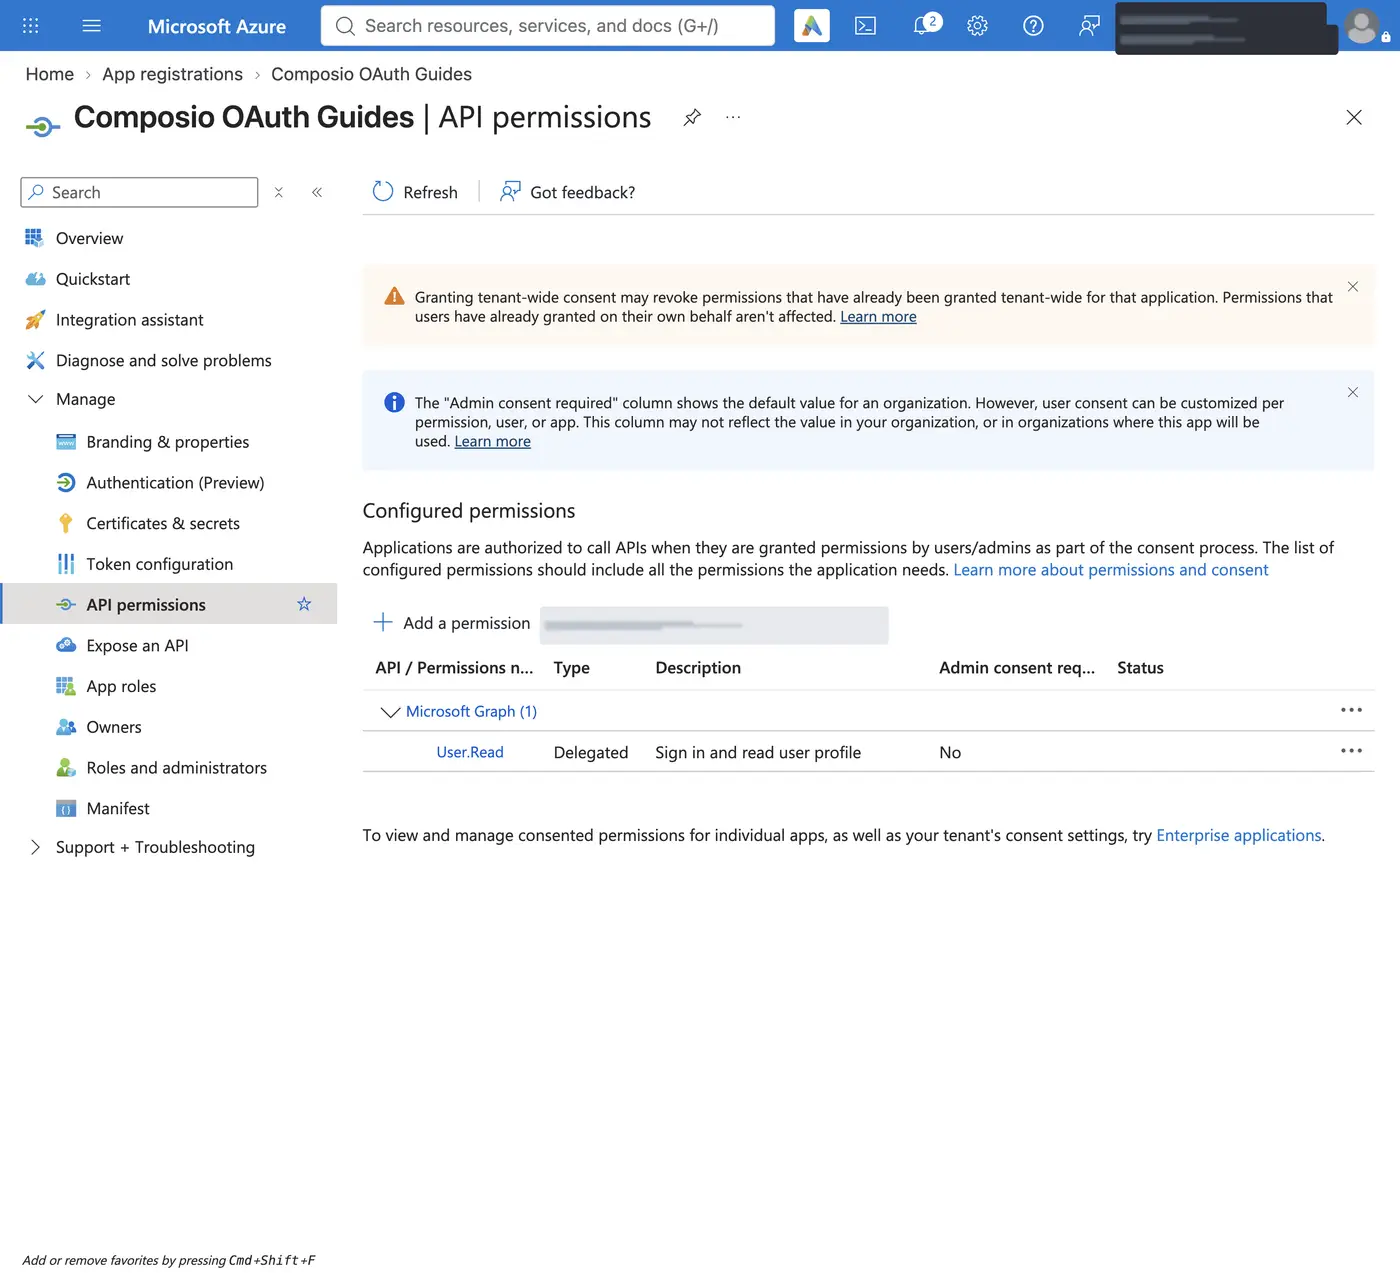
-
If your tenant restricts user consent, have a tenant admin click Grant admin consent for your tenant on the API permissions page. Adding a permission to the app registration doesn't grant consent by itself.
The redirect URI you register must exactly match the oauth_redirect_uri field in your Composio auth config (default https://backend.composio.dev/api/v1/auth-apps/add).
Create the auth config in Composio
-
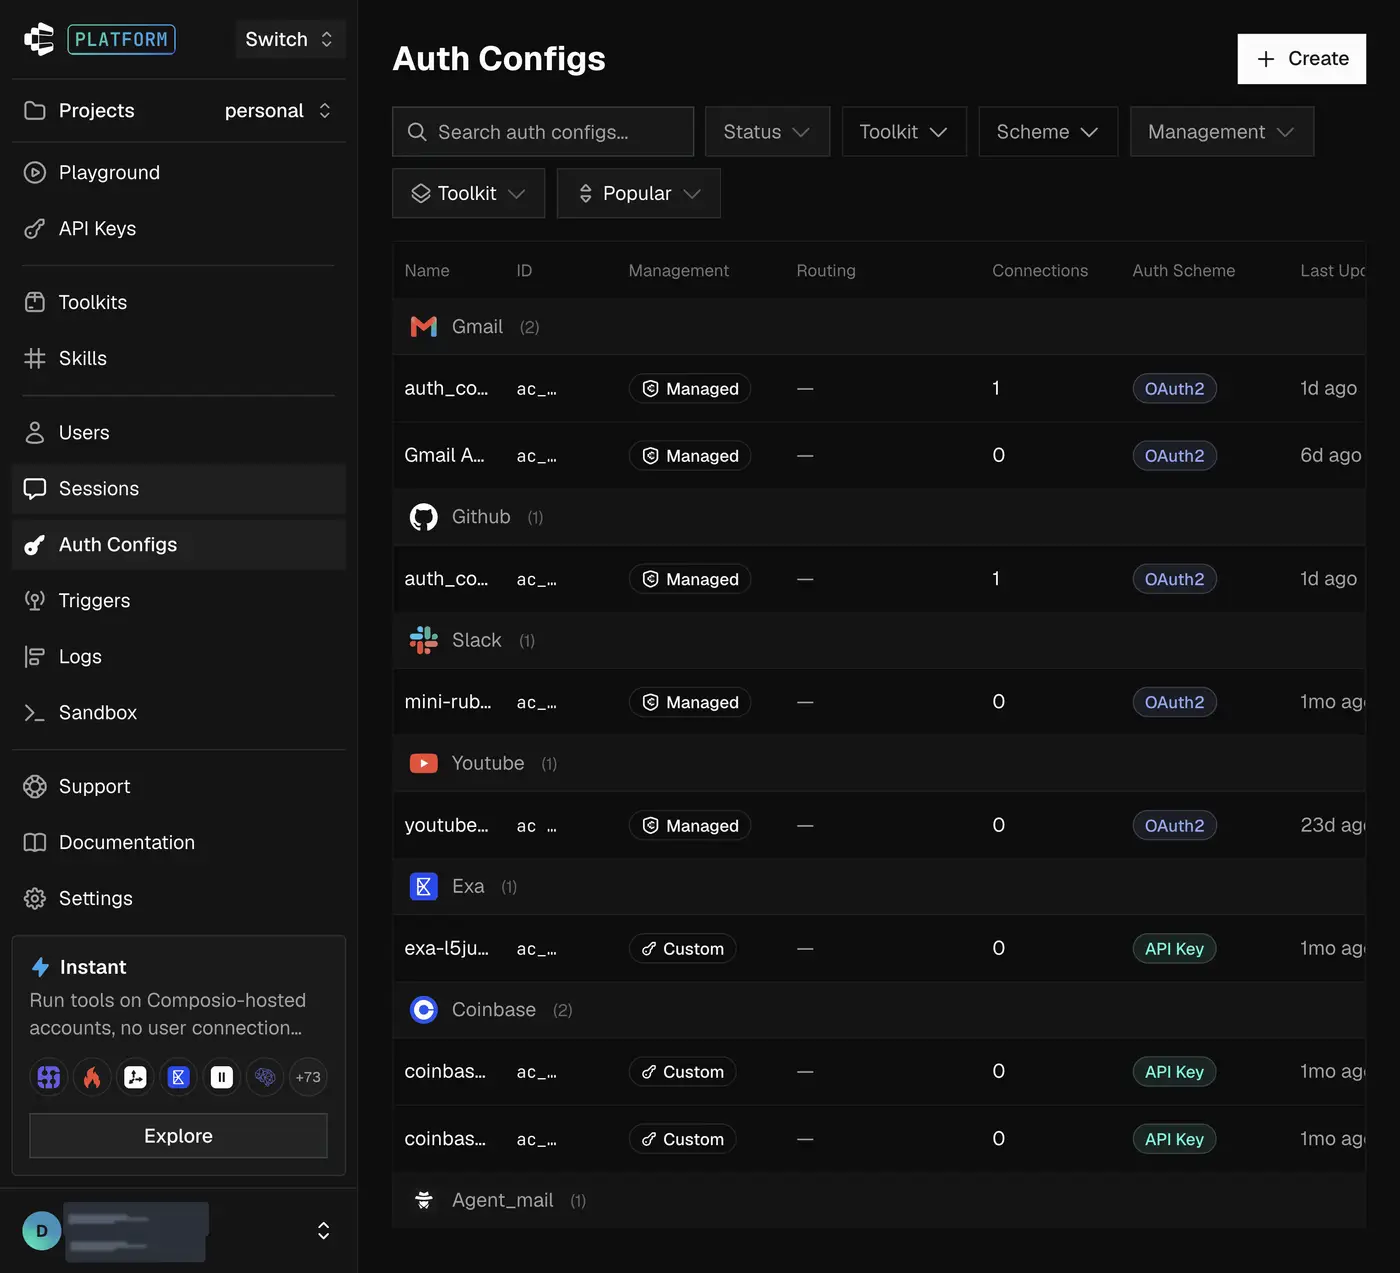
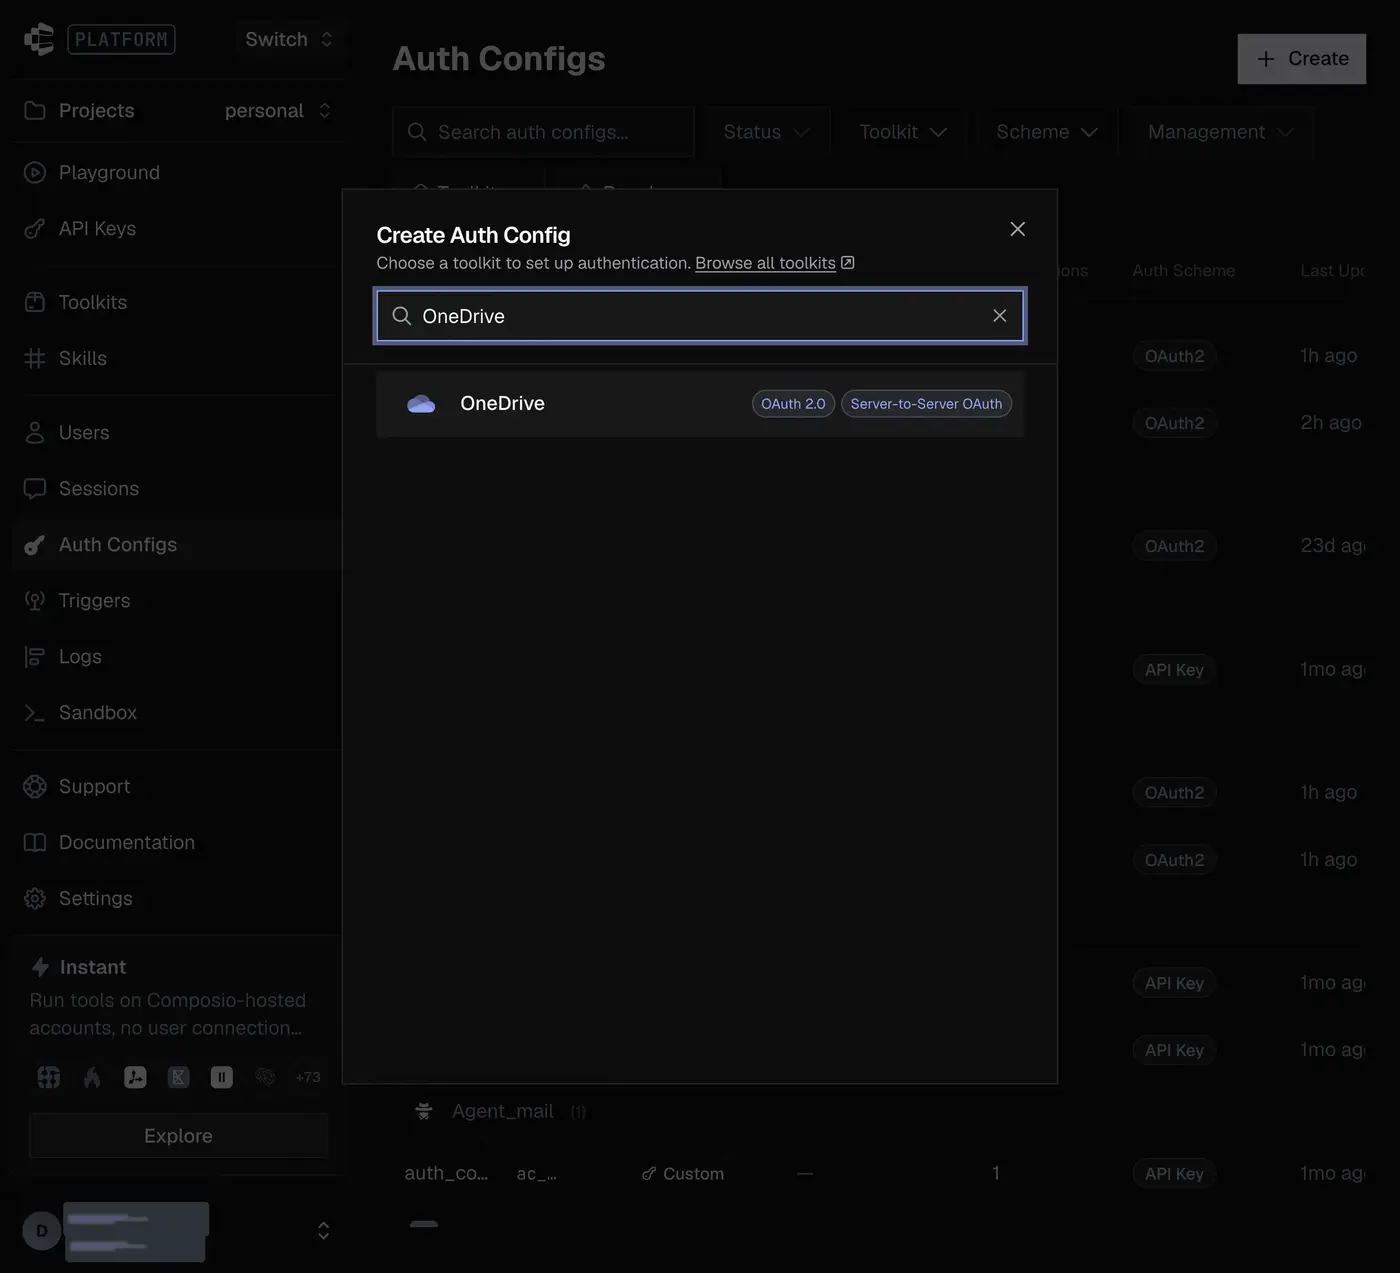
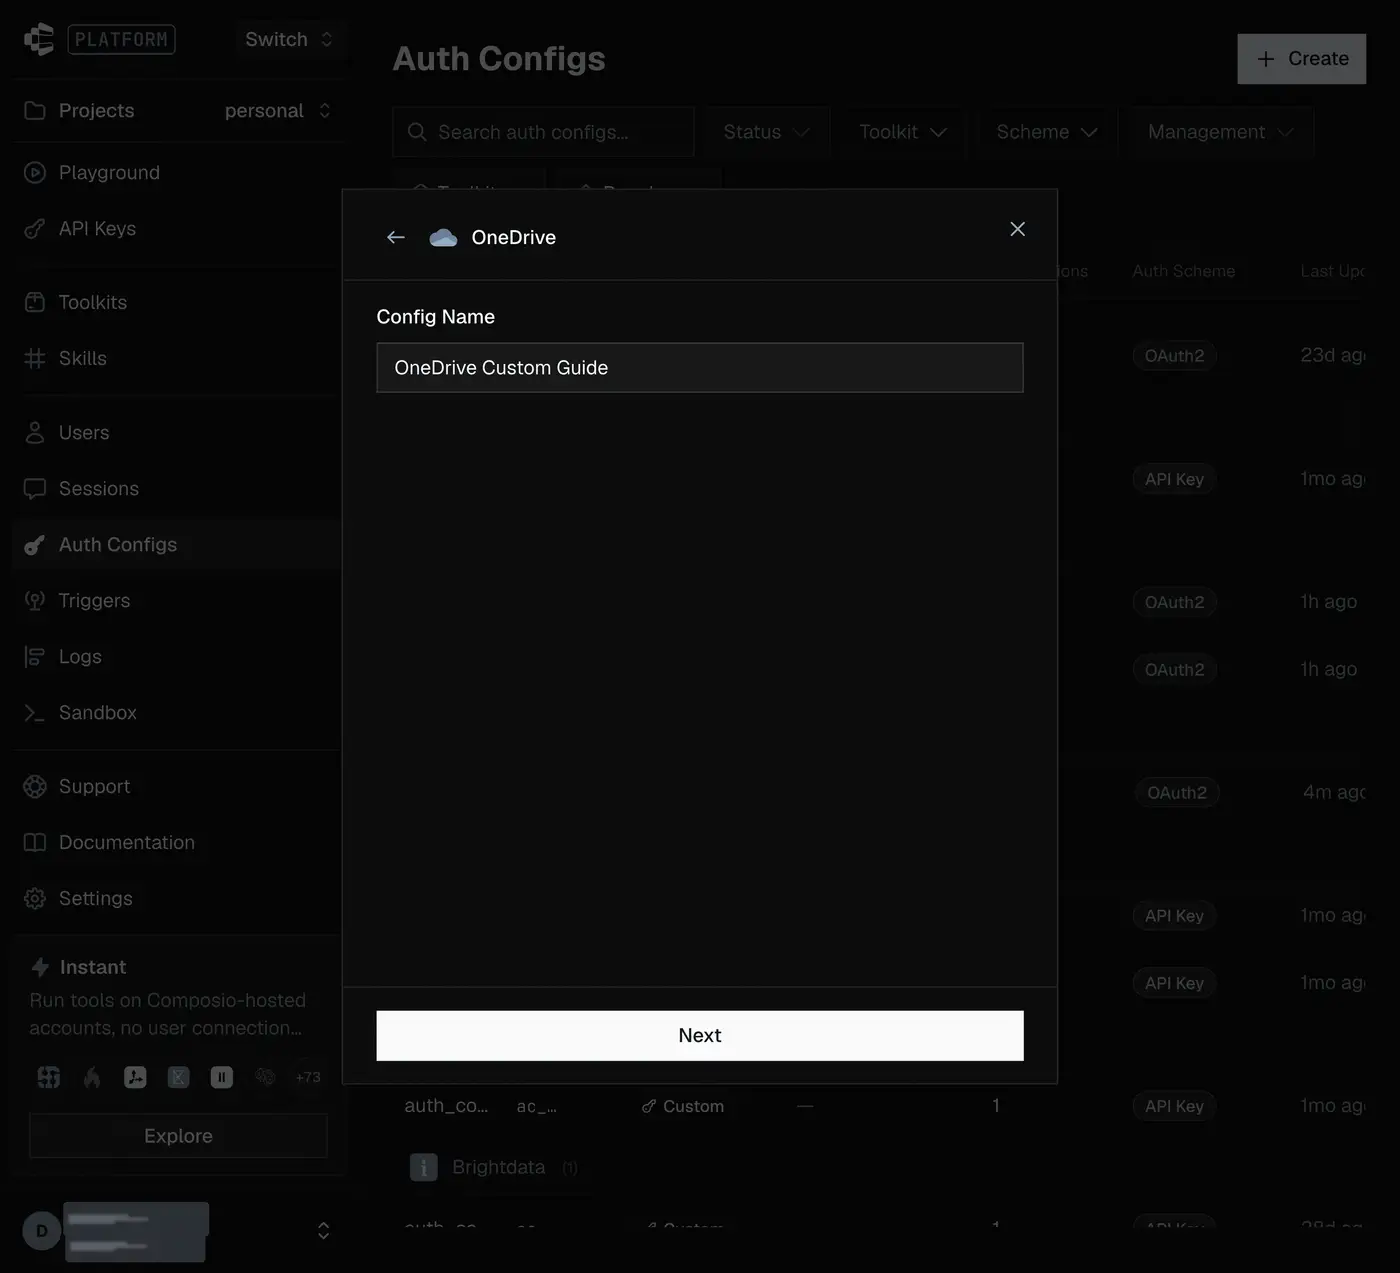
In the Composio dashboard, go to Auth Configs, click Create, and select OneDrive. Enter a config name and click Next.
-
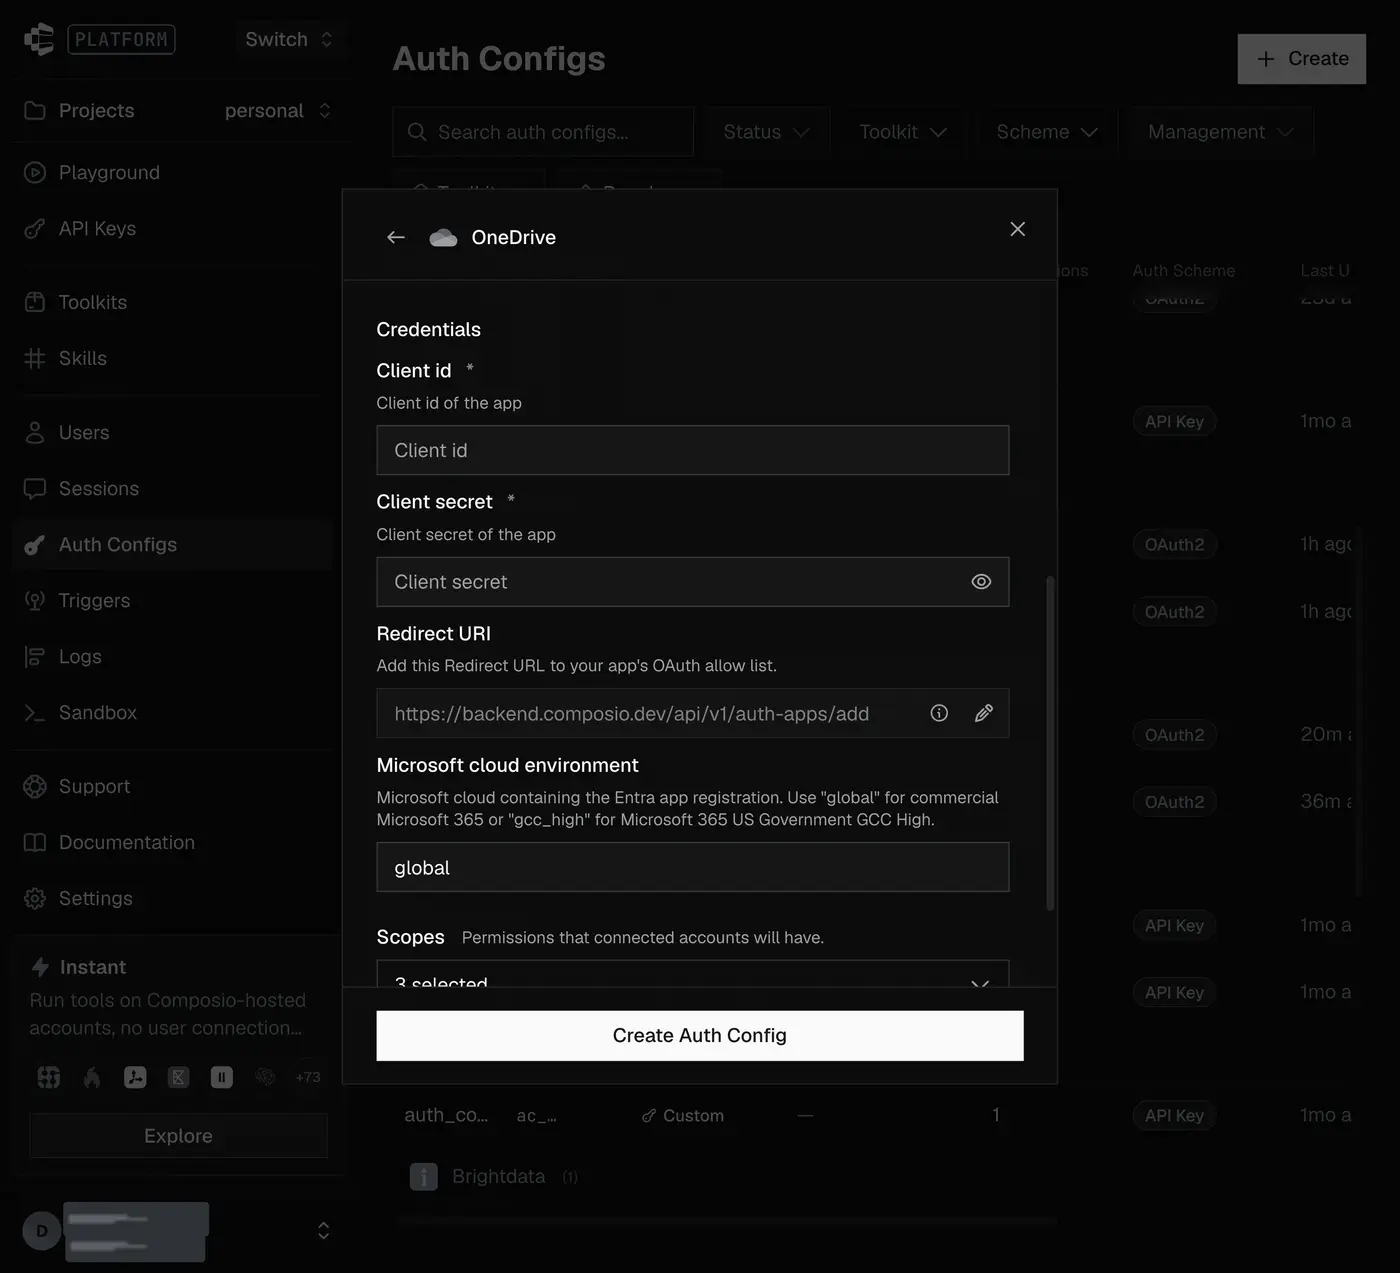
Select OAuth 2.0 and Your Own Credentials. Paste the Application (client) ID into Client id and the secret value into Client secret. Leave Redirect URI as shown. Keep Microsoft cloud environment (
microsoft_cloud) set toglobalfor commercial Microsoft 365, or setgcc_highfor Microsoft 365 US Government GCC High. The app registration must live in that cloud.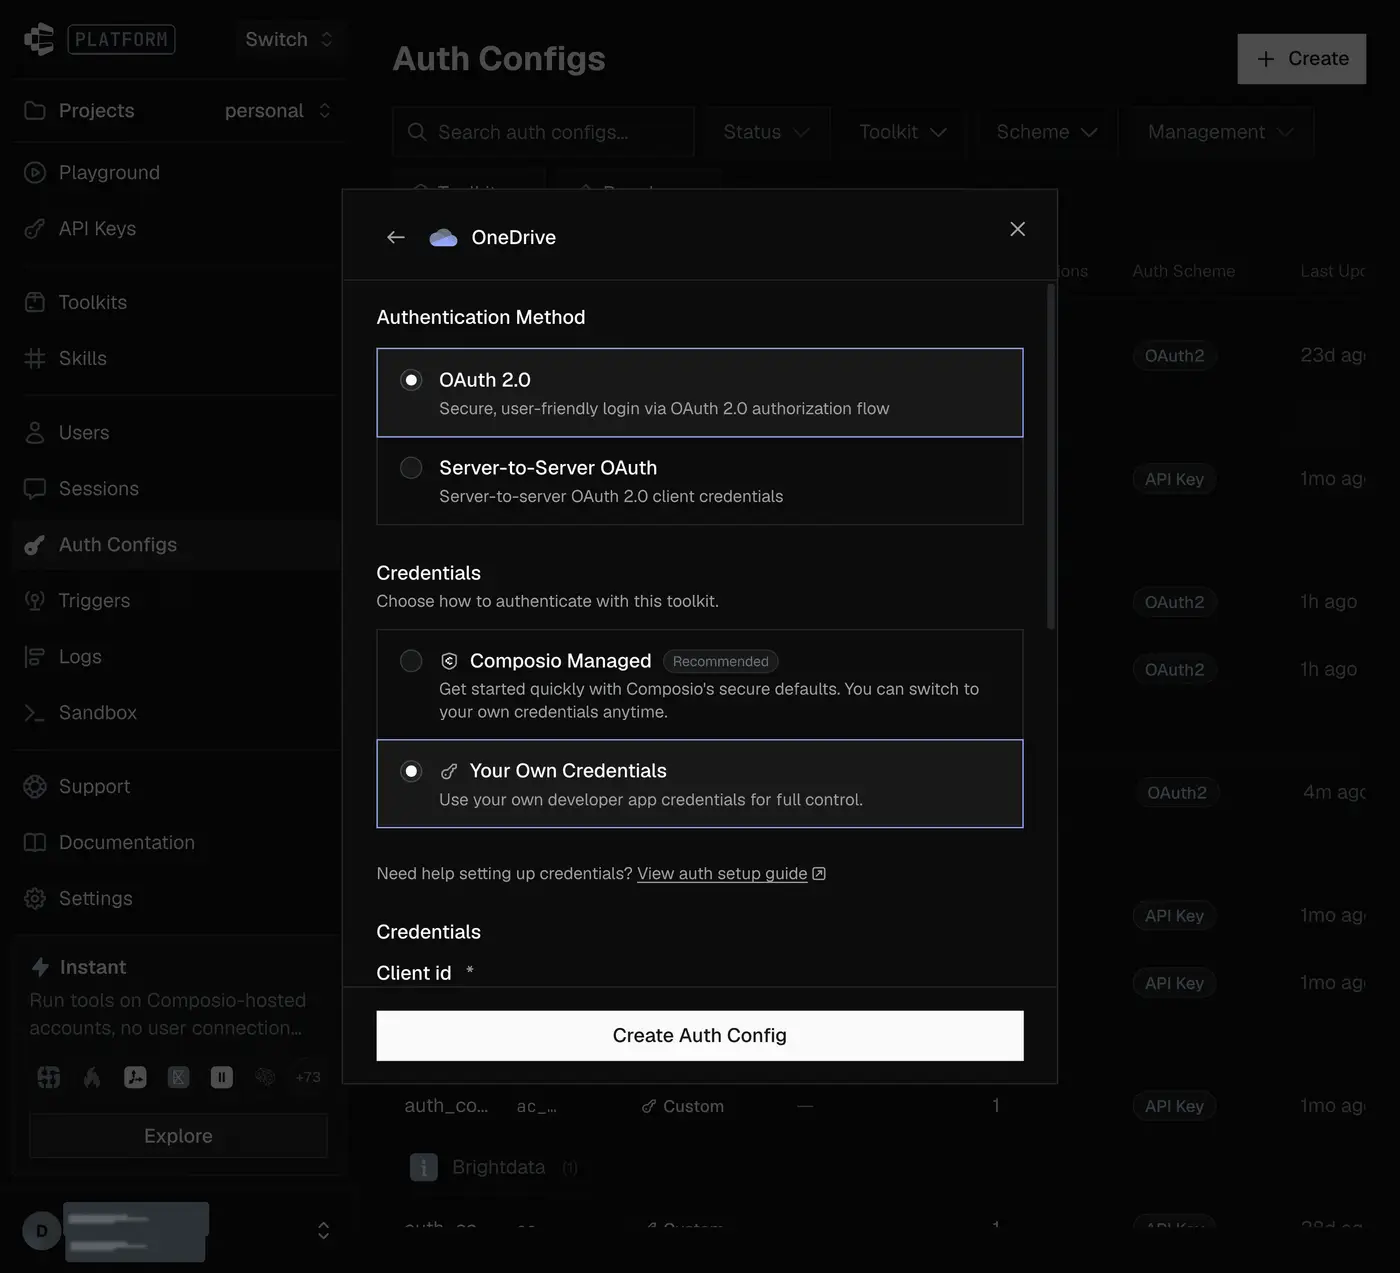
-
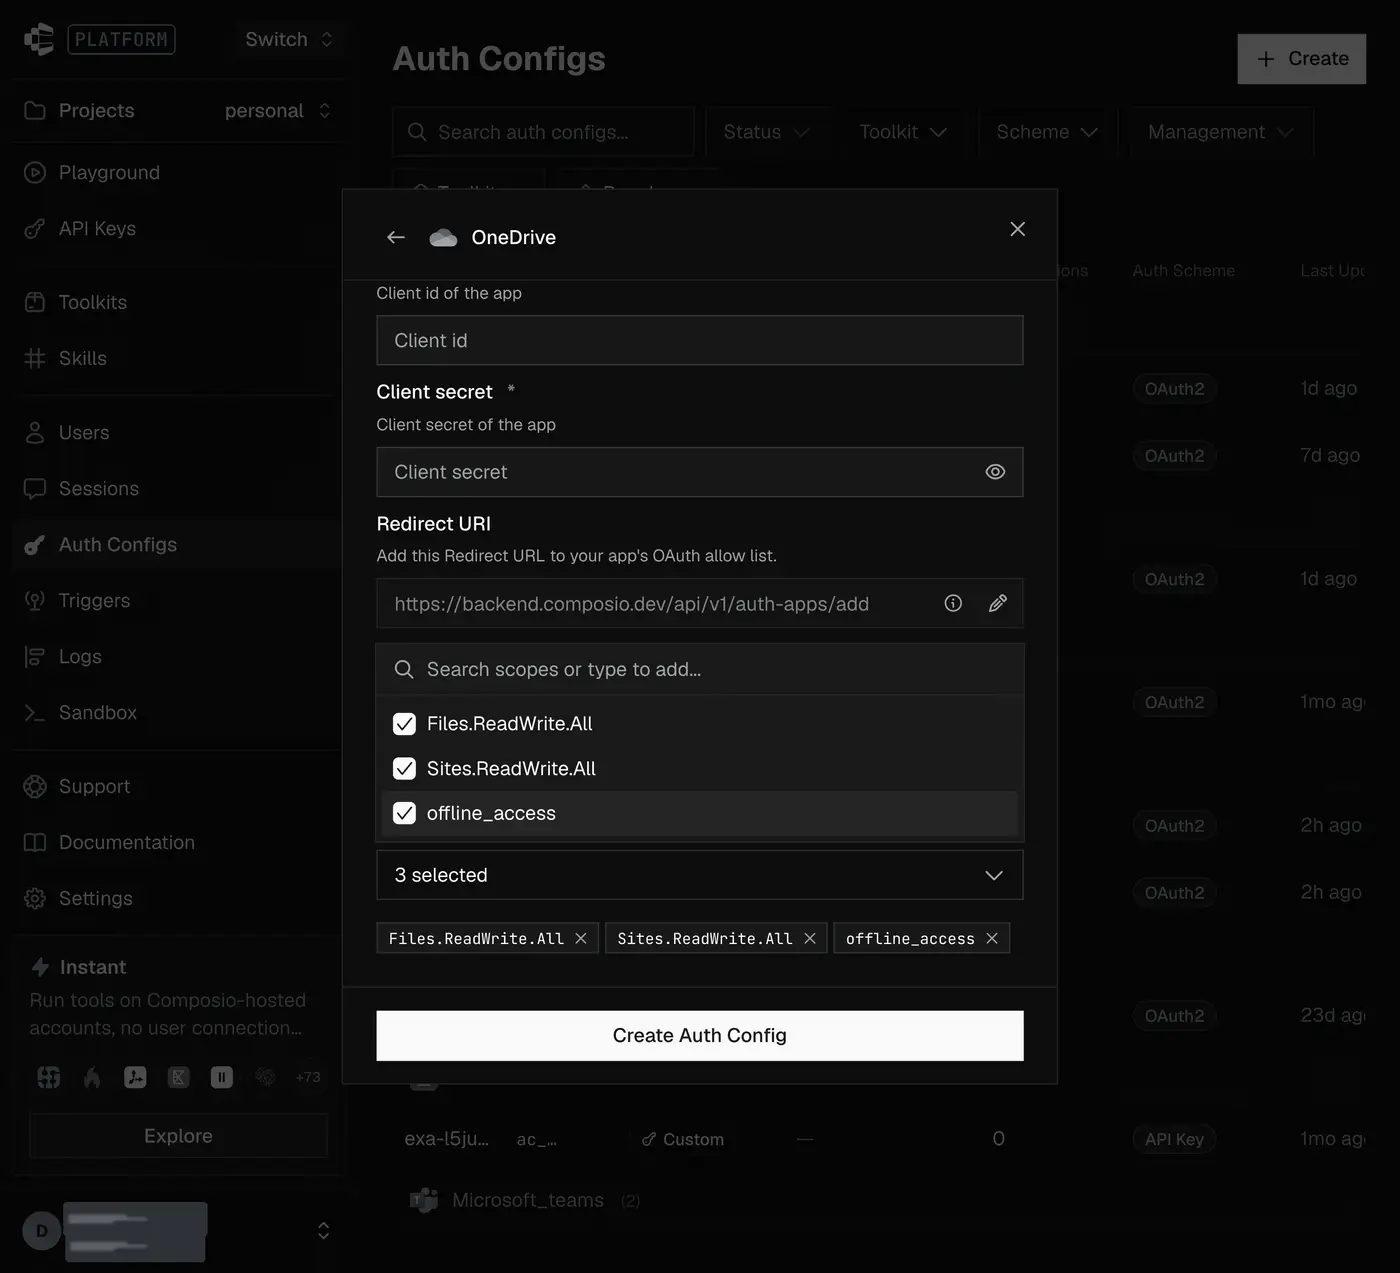
Under Scopes, select the same permissions you added in Azure, then click Create Auth Config.
-
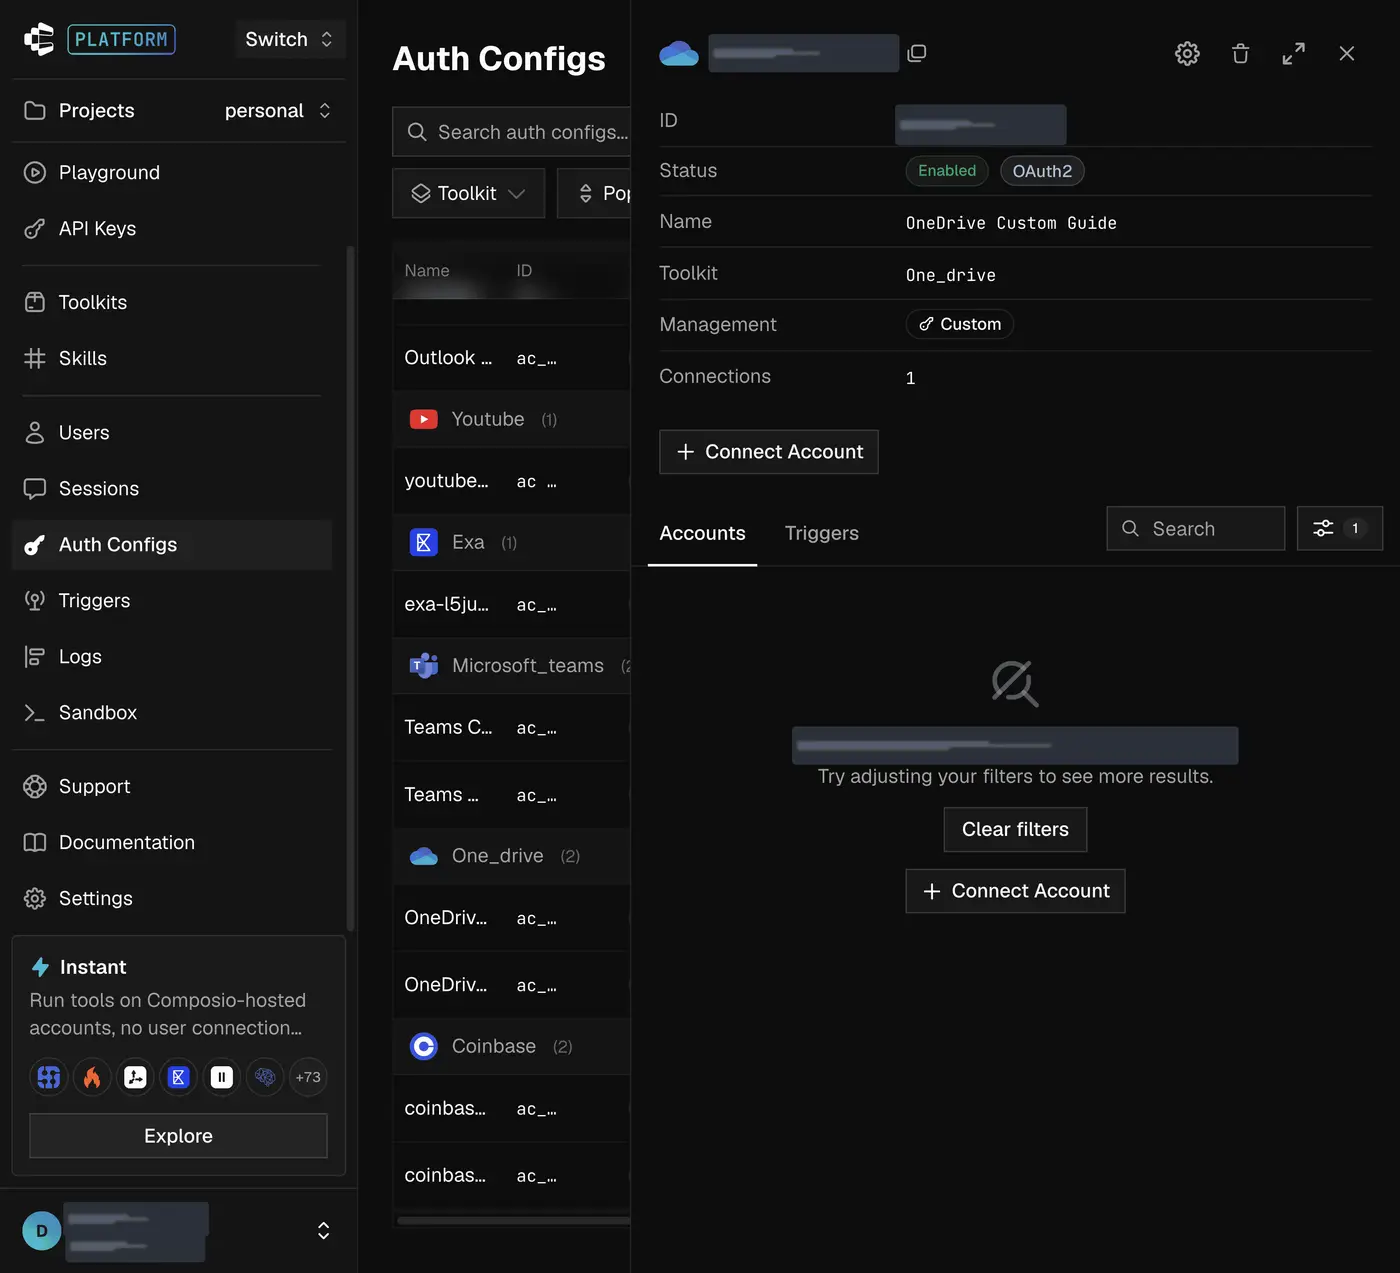
Open the auth config and click Connect Account. Sign in with the account whose OneDrive you want to use, check that the consent prompt shows your app's name, and click Accept. Leave Consent on behalf of your organization unchecked unless you're an admin granting tenant-wide consent. An unverified label is expected for a custom app without a verified publisher.
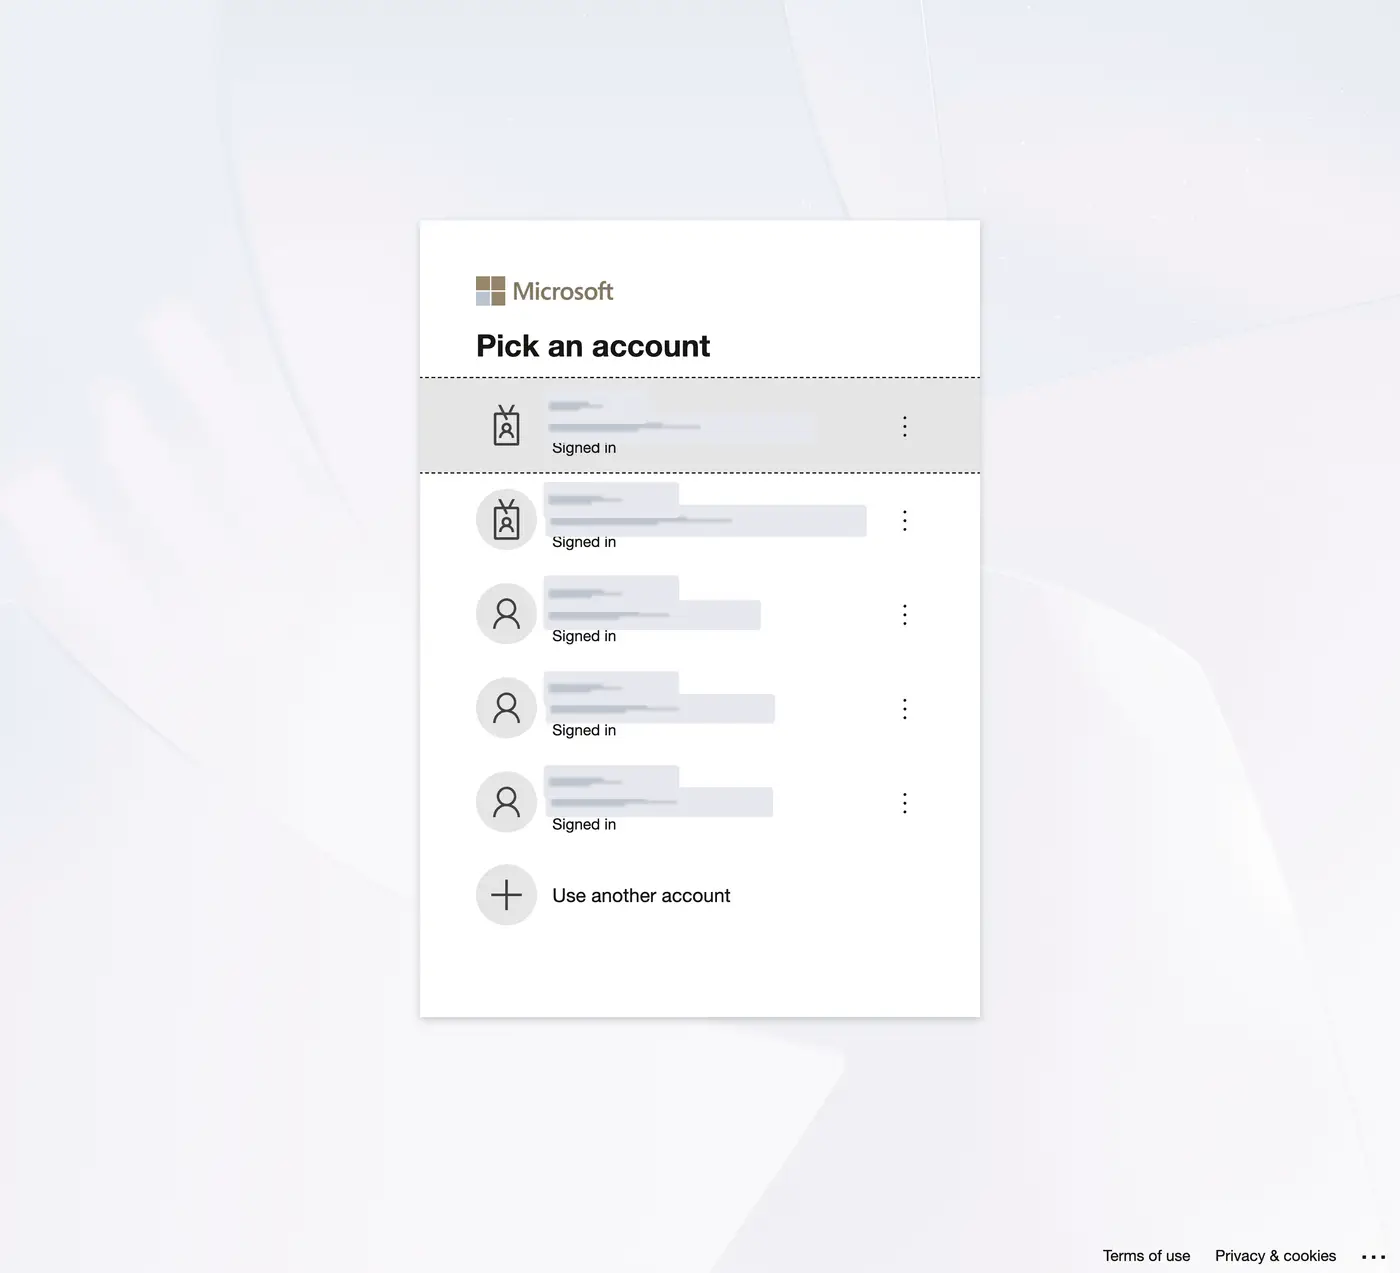
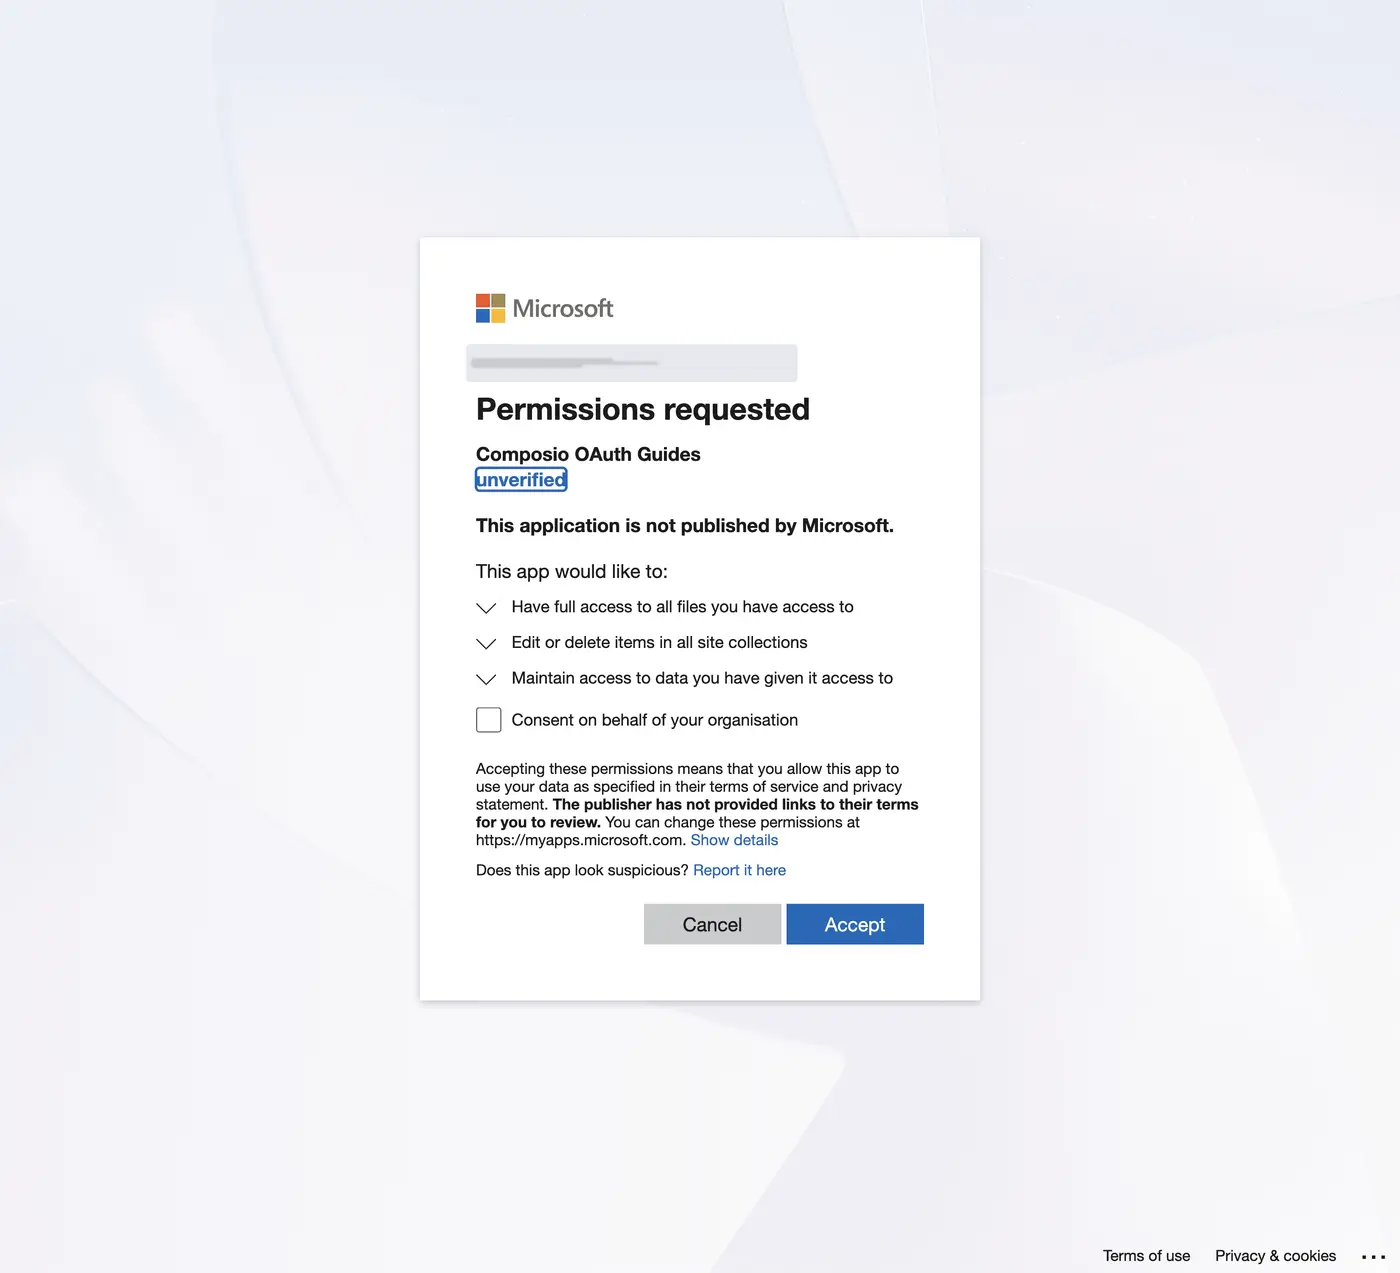
-
Back on the auth config's Connected Accounts tab, confirm the account shows Active. The Enabled label at the top of the page describes the auth config, not the account.
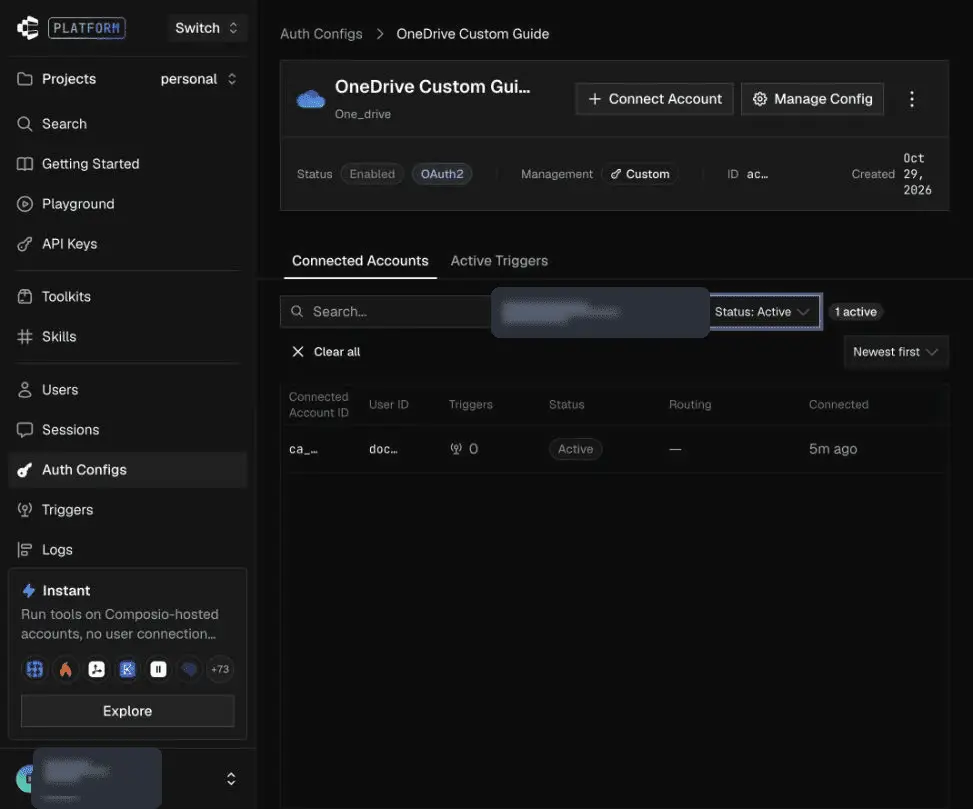
For the general flow, see custom auth configs.
Scopes
The default auth config requests Files.ReadWrite.All, Sites.ReadWrite.All, and offline_access. Basic file reads need only Files.Read, and file edits need Files.ReadWrite. Shared files and SharePoint-backed items need the broader permissions. See Microsoft's get driveItem reference.
Restrict sign-in to one tenant
The connection's tenant field (issuer) defaults to common. To restrict sign-in to one tenant, set it to your Directory (tenant) ID from the app's Overview page or a verified tenant domain.
App-only access (client credentials)
OneDrive also supports an app-only auth mode (S2S_OAUTH2) that runs without a signed-in user. It takes the Client id, the Client secret value, and your Microsoft Entra tenant ID (generic_id) as a GUID, found under Microsoft Entra ID > Overview > Tenant ID. For this mode, add Application permissions instead of delegated permissions on the app registration, and have an admin grant admin consent.