Google Chat
Latest versionGoogle Chat API integration for messaging and collaboration in Google Workspace
Authentication DetailsComposio-managed OAuth not available
Frequently Asked Questions
How do I set up custom Google OAuth credentials for Google Chat?
Composio doesn't provide a managed OAuth app for Google Chat, so you need your own Google OAuth app to connect it.
Connect with a Business or Enterprise Google Workspace account that has Google Chat access.
Create the Google OAuth app
-
In Google Cloud Console, select the project that will own the OAuth client, or create one.
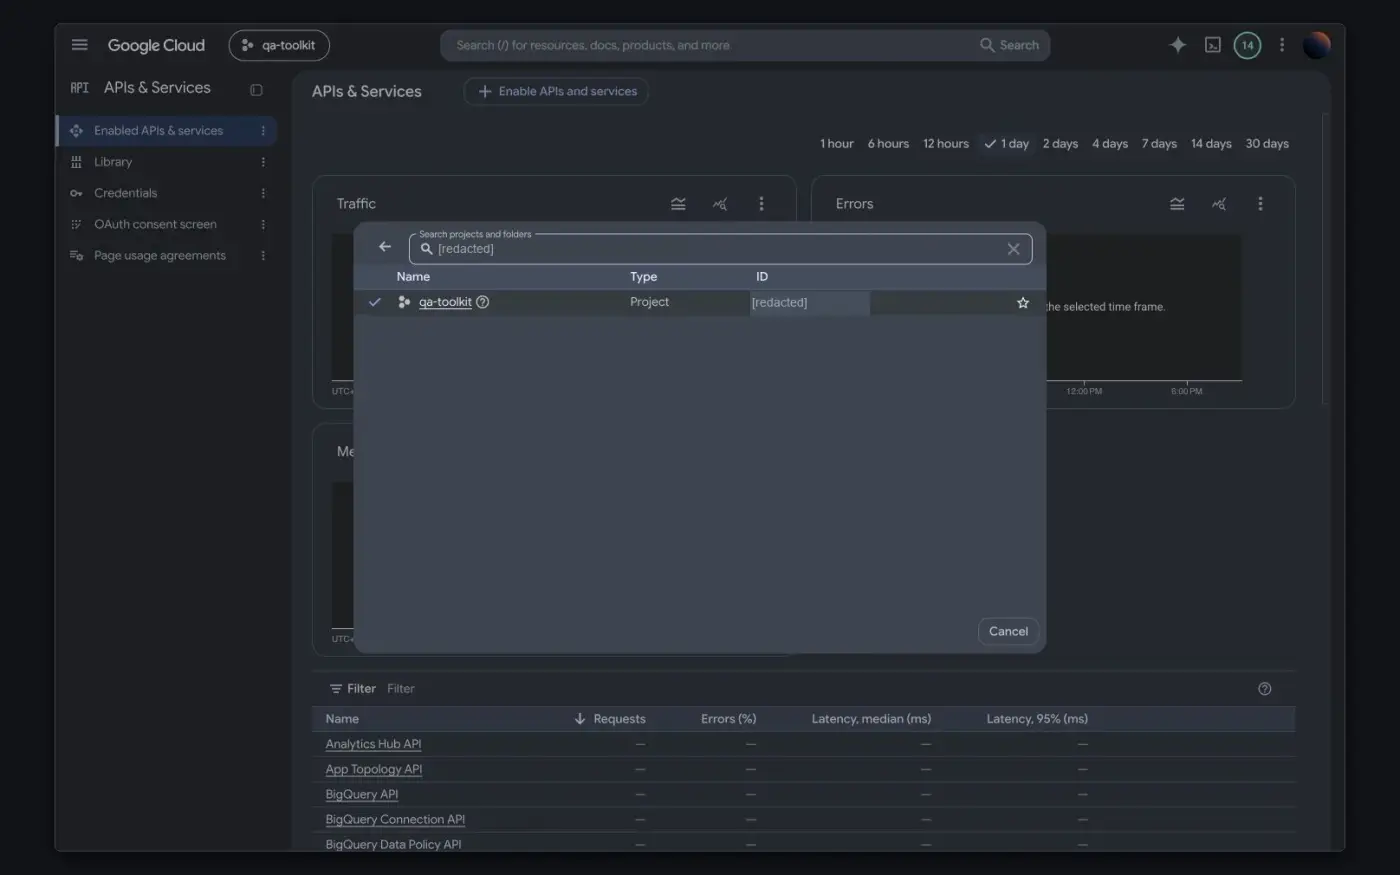
-
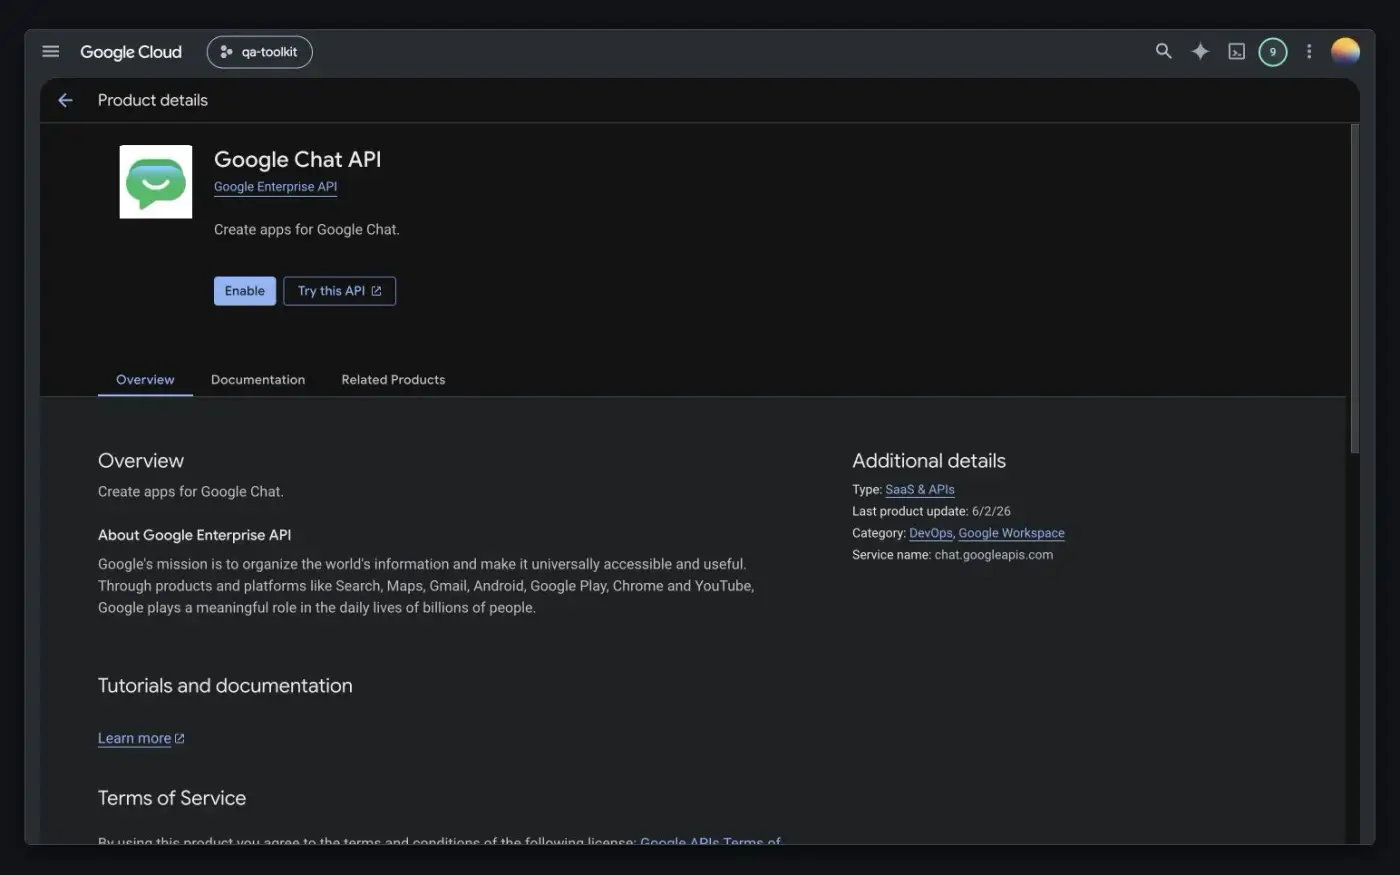
Open APIs & Services → Library, search for Google Chat API (
chat.googleapis.com), and select Enable. If the page shows Manage, the API is already enabled. You don't need to request manual approval for this API.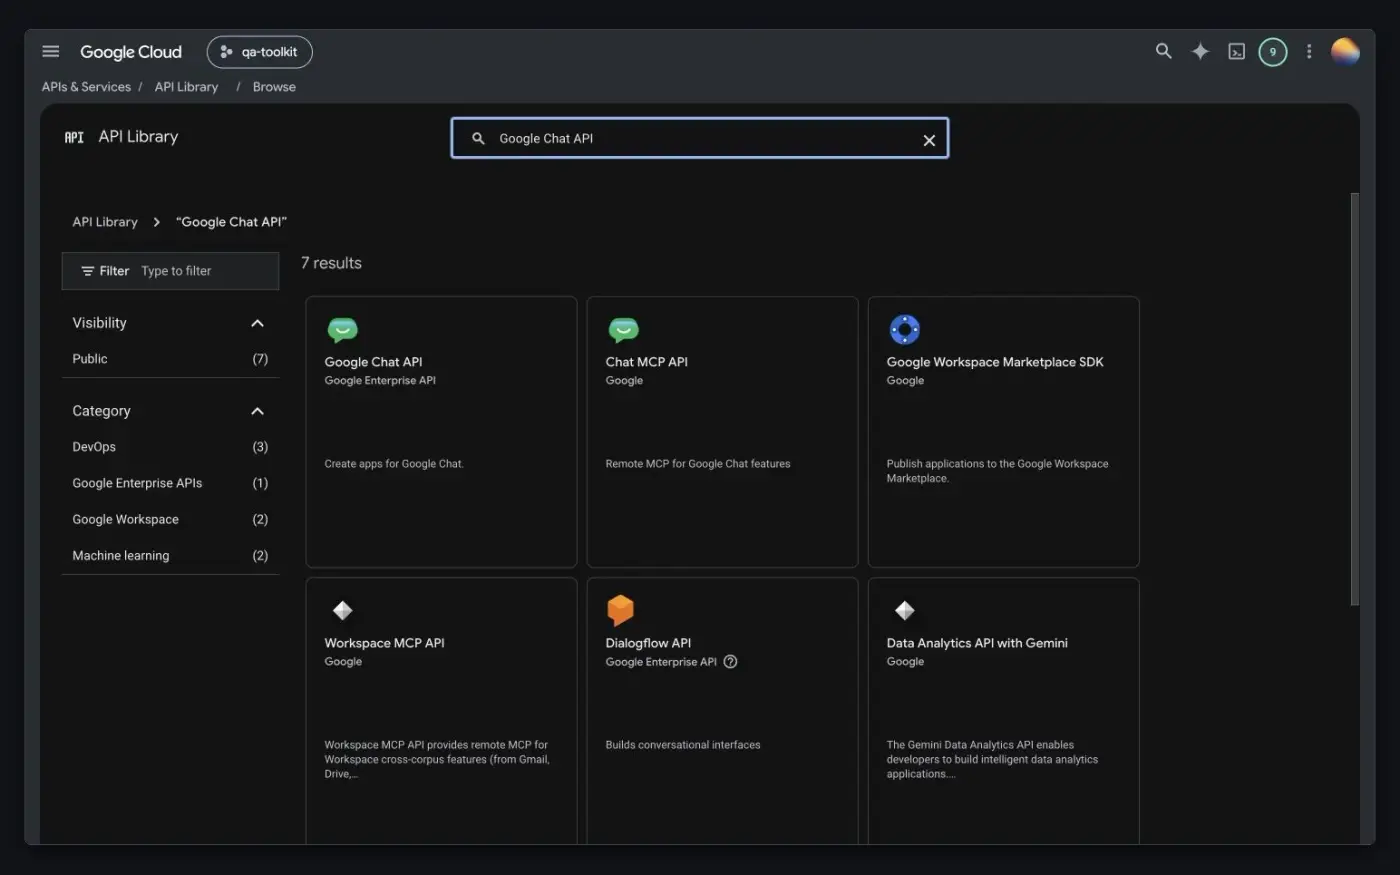
-
If your workflow creates, updates, or deletes Chat resources, open Google Chat API → Configuration and enter an app name, avatar URL, and description. Leave interactive features off for an API-only app. You don't need a Cloud Run deployment. Read-only calls don't need this step. See Google's Chat API setup.
-
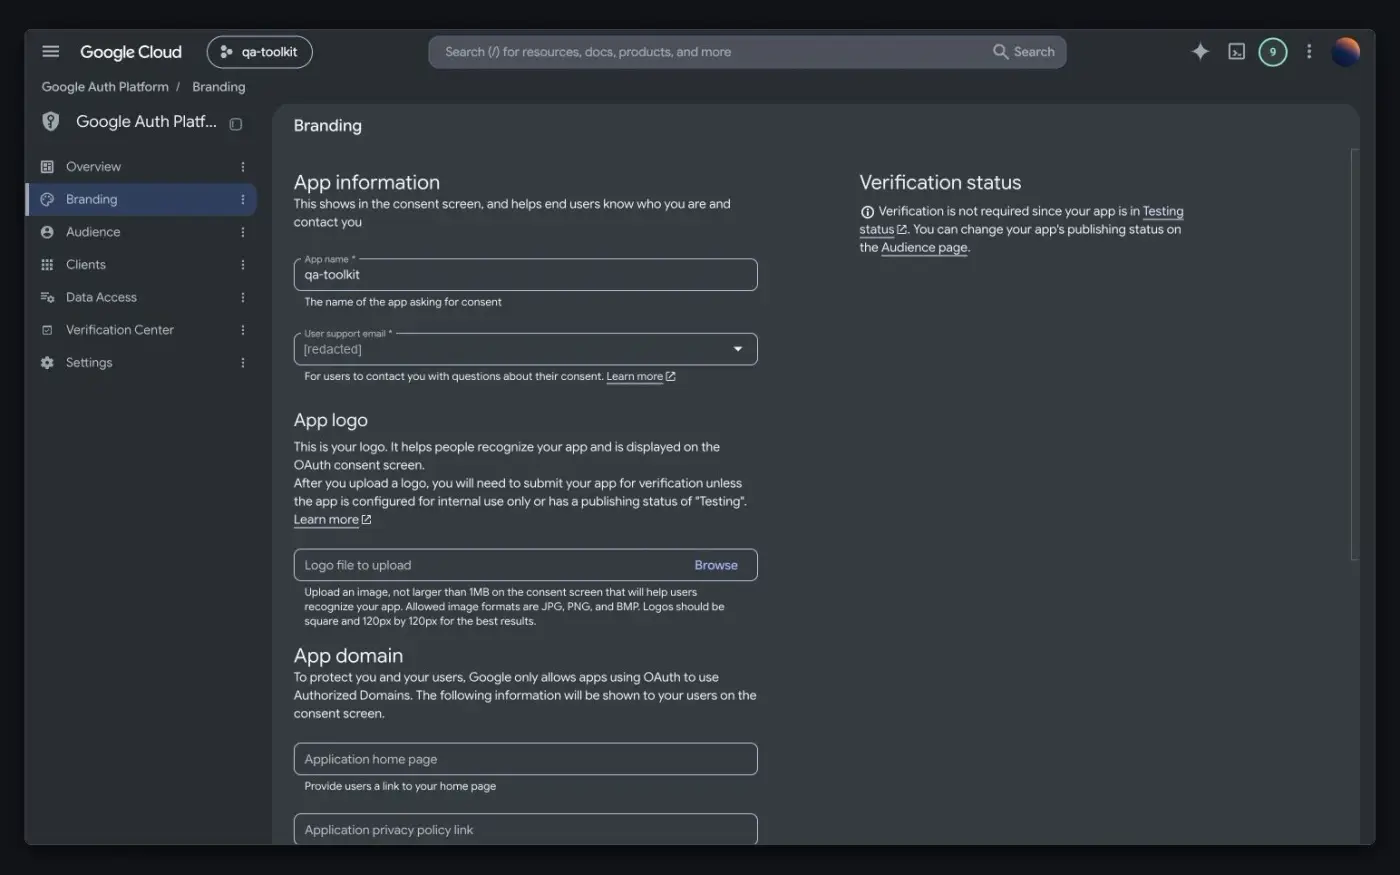
Open Google Auth Platform → Branding. If Google shows Get started, enter the app name, user support email, and developer contact email, then save.
-
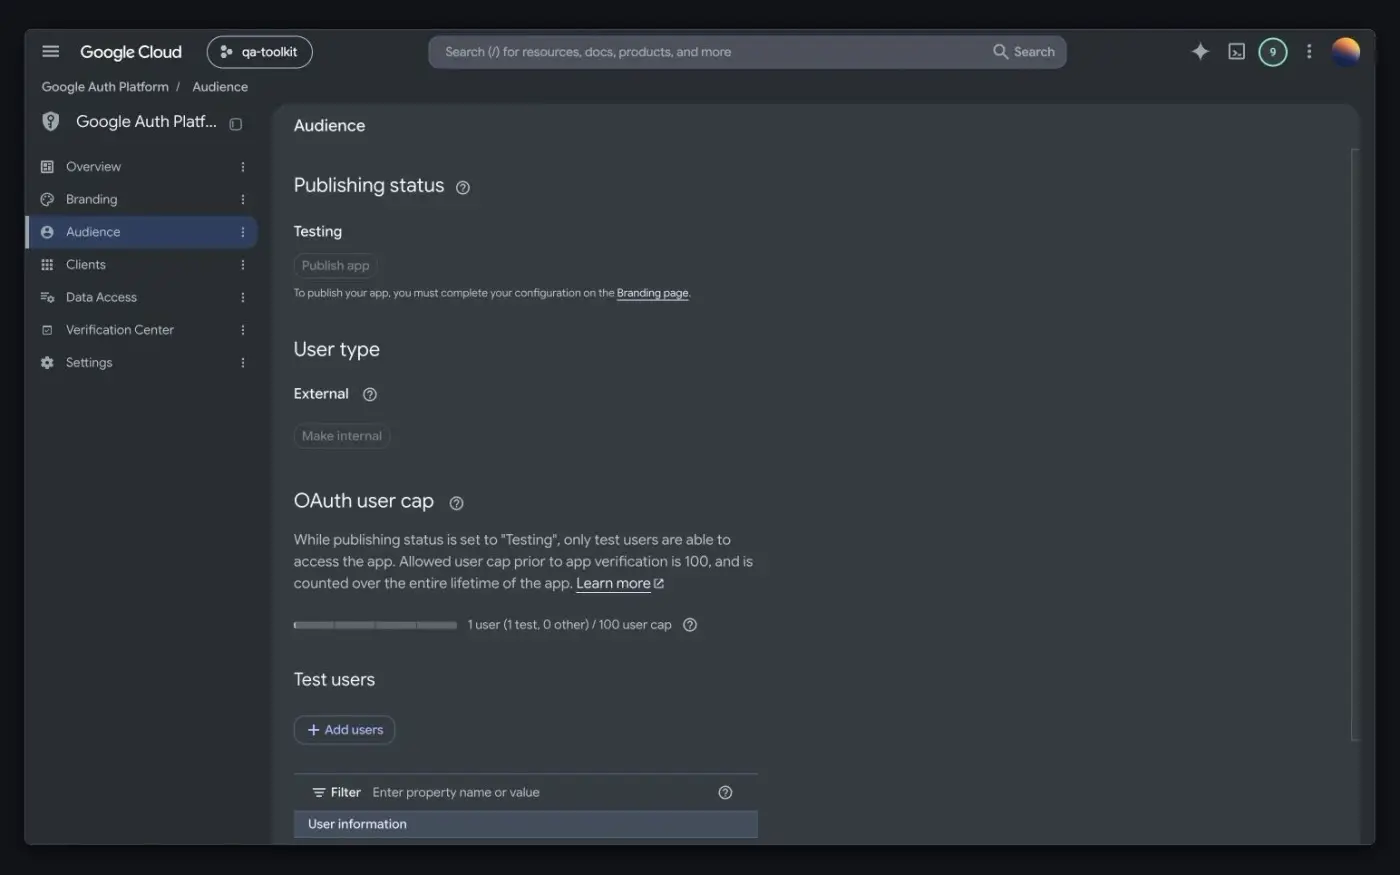
Open Audience. Choose Internal to limit the app to users in your Google Workspace organization, or External for consumer accounts and users outside it. While an external app's publishing status is Testing, only accounts listed under Test users can connect, so add every account you'll test with.
-
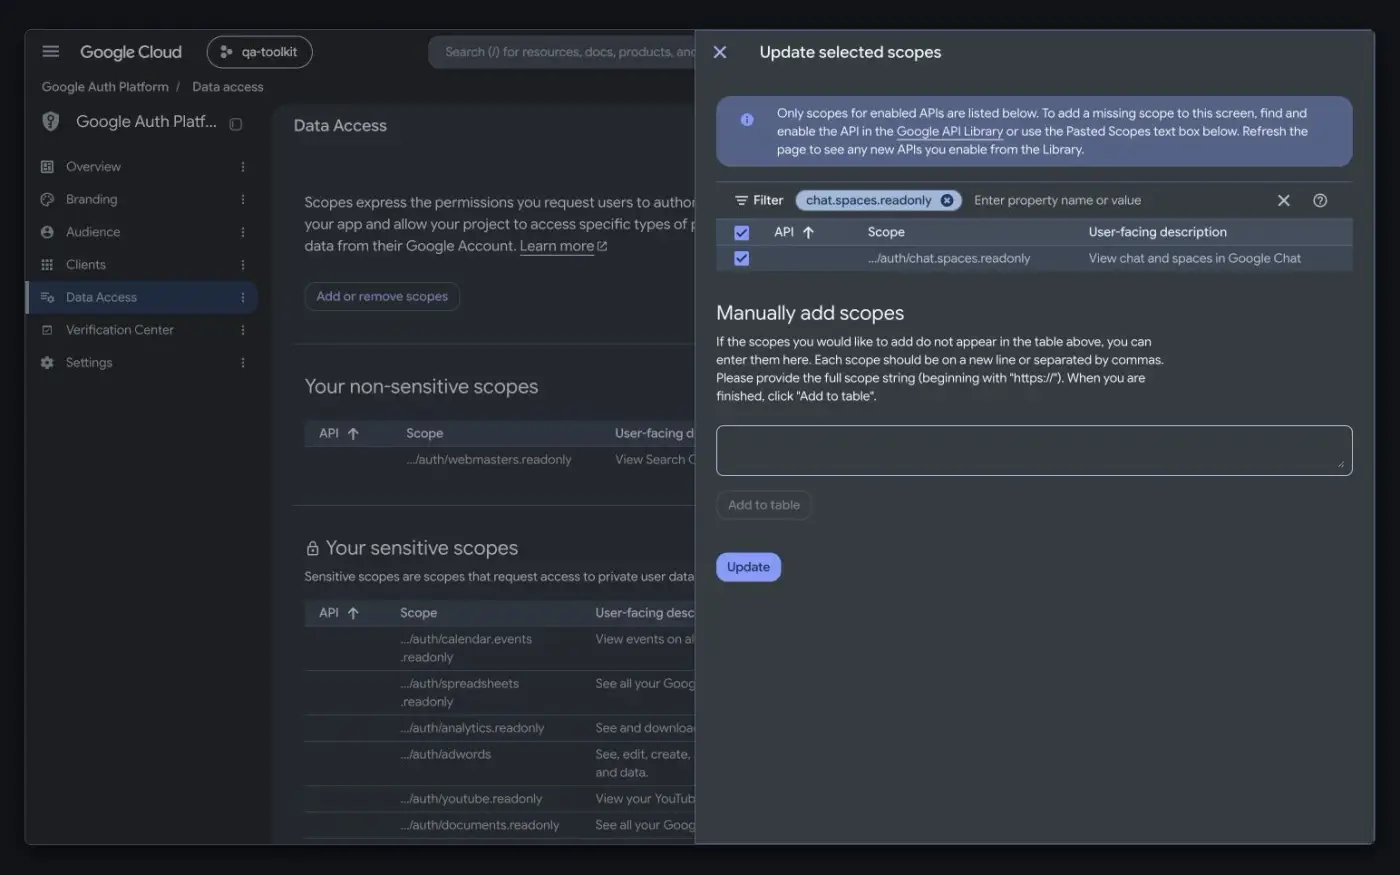
Open Data Access → Add or remove scopes and add the scopes listed under Scopes below. If a scope isn't in the list, paste its full URL under Manually add scopes and select Add to table. Select Update, then Save.
-
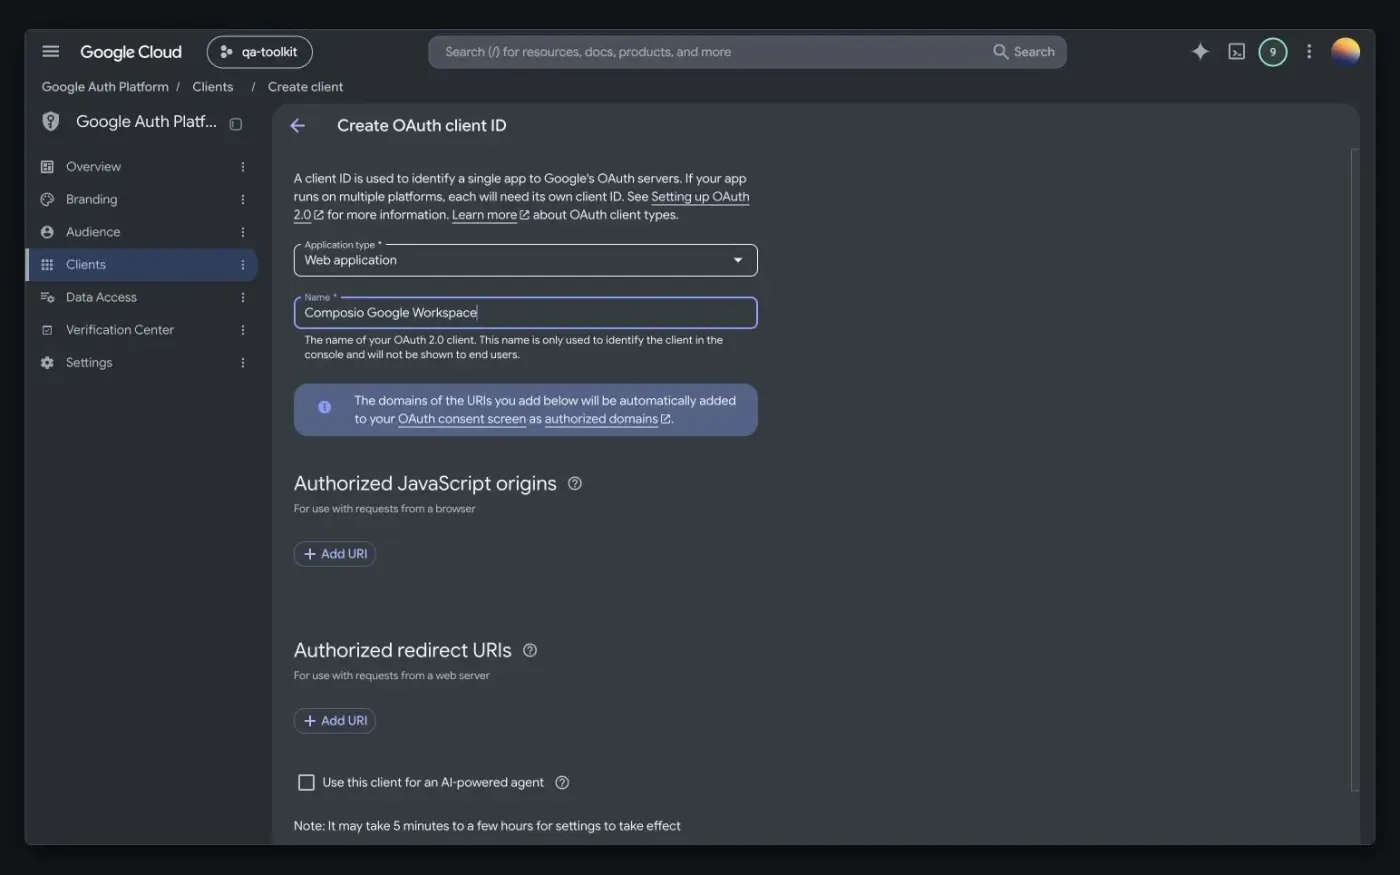
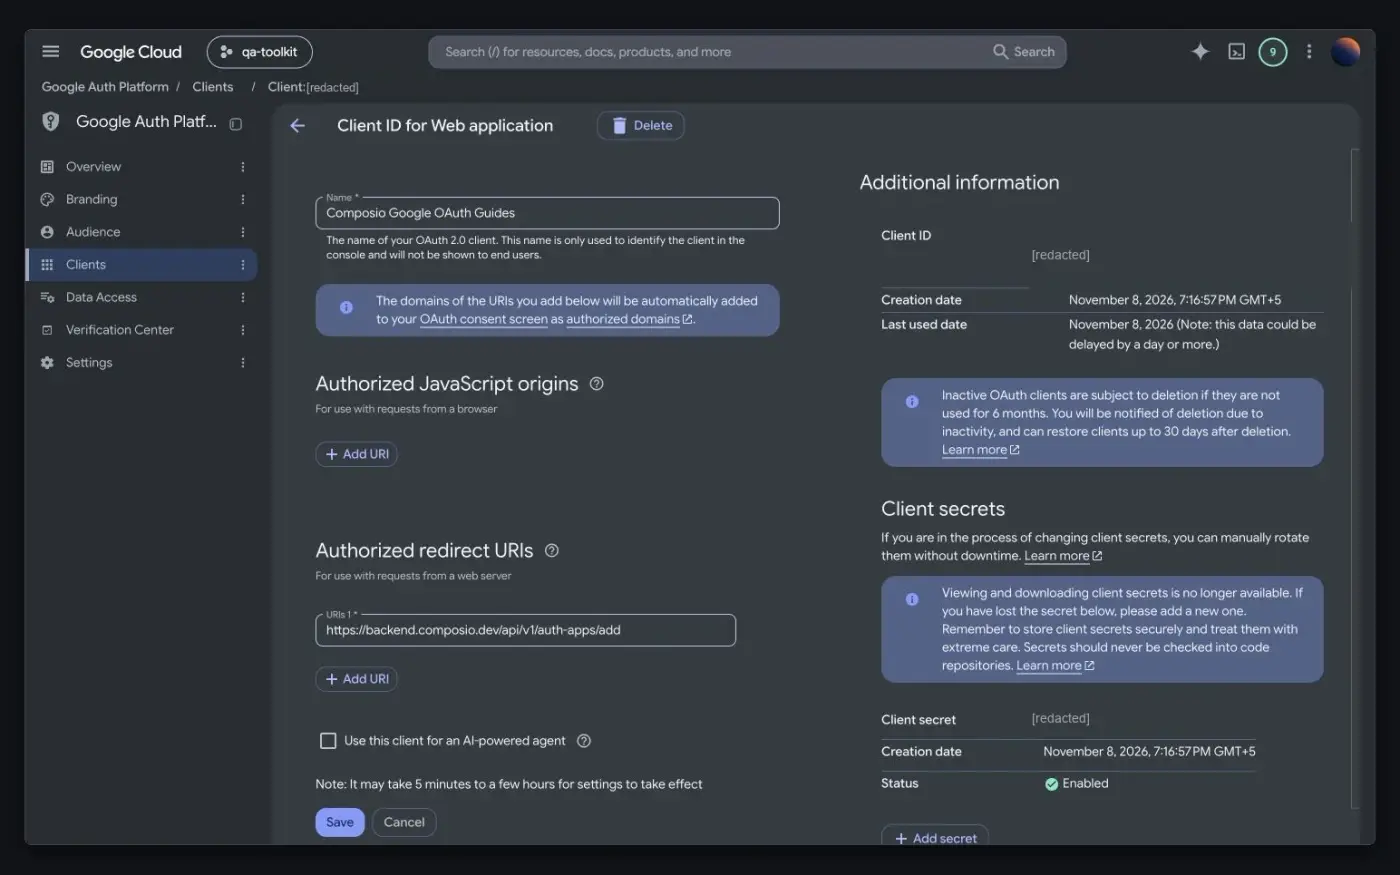
Open Clients → Create client, choose Web application, and give it a name.
-
Under Authorized redirect URIs, add
https://backend.composio.dev/api/v1/auth-apps/add. It must exactly match theoauth_redirect_urifield on your Composio auth config.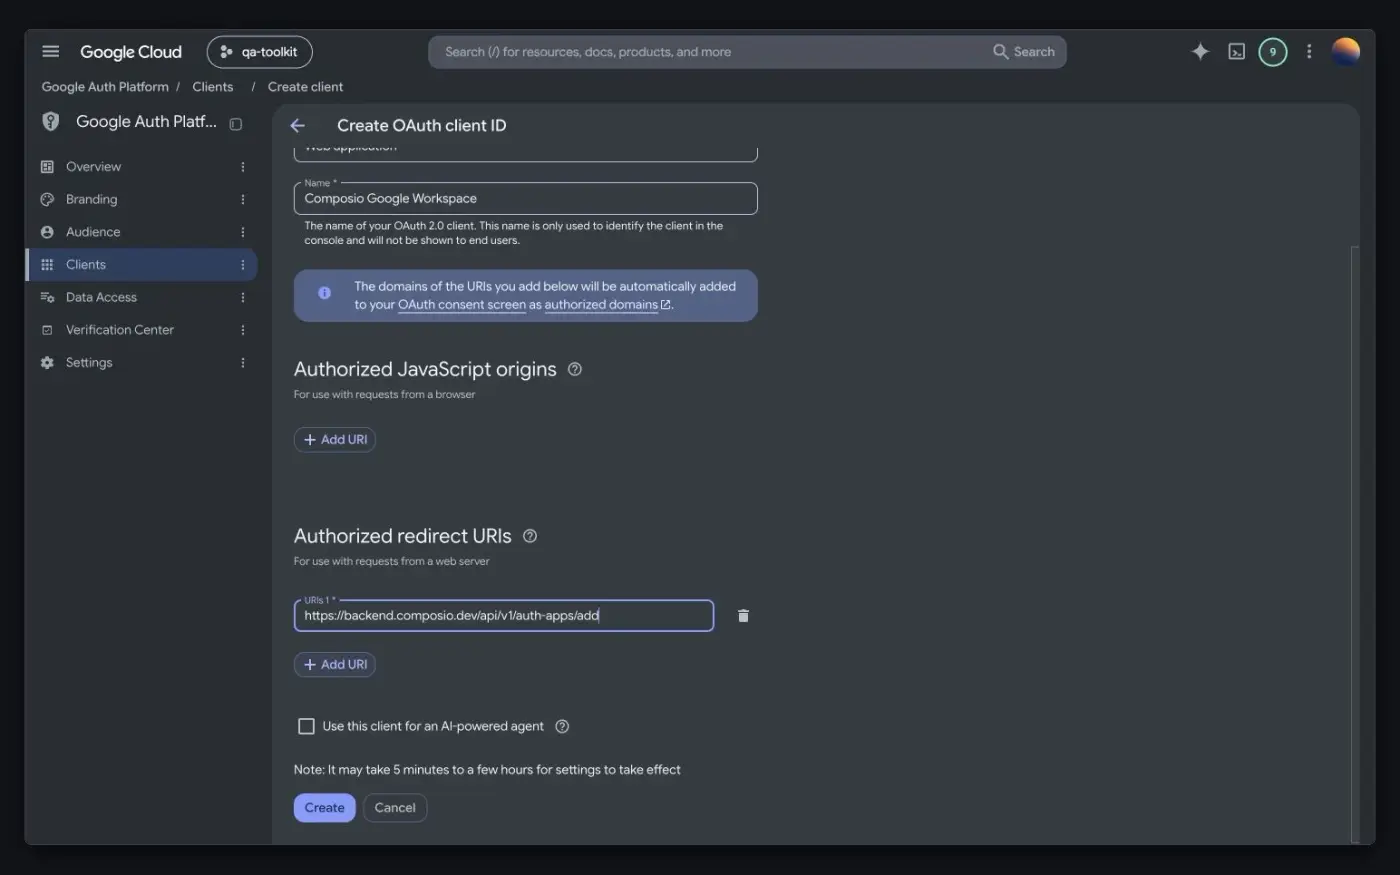
-
Select Create. Copy the Client ID and Client secret. Google shows the full secret only once, so save it before you close the dialog.
Create the auth config in Composio
-
In the Composio dashboard, open Auth Configs → Create and select Google Chat.
-
Choose OAuth 2.0 and Your Own Credentials, then paste your Client ID and Client secret. Leave Redirect URI unchanged, keep the scopes in line with what you added in Google, and select Create Auth Config.
-
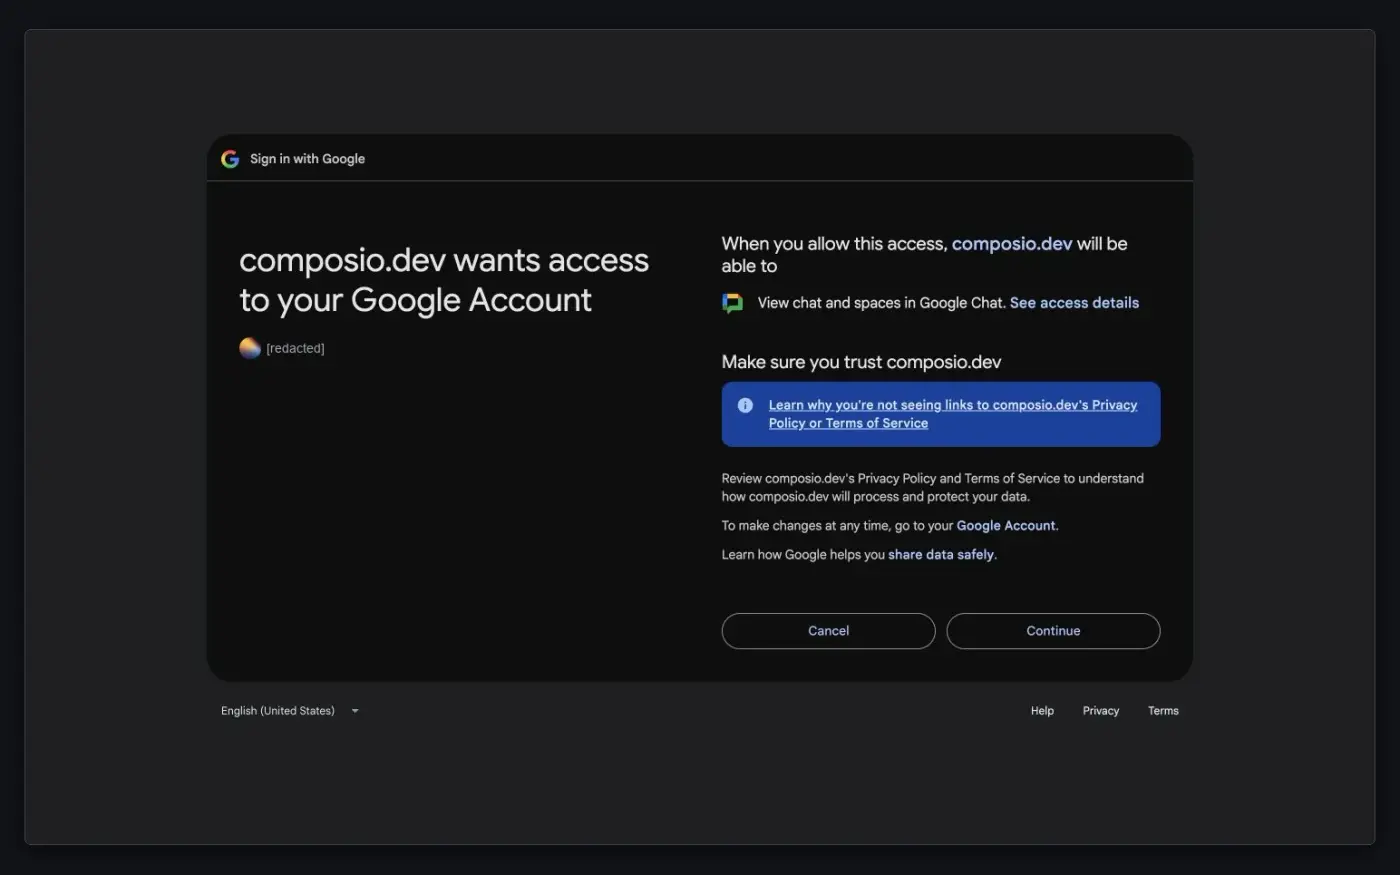
Open the auth config, select Connect Account, and sign in with the Google account you want to connect. Review the requested permissions before you continue.
-
Open Accounts on the auth config and confirm the connected account shows Active. The auth config's own Enabled label doesn't confirm a connection.
For the general flow, see Custom auth configs.
Scopes
The default auth config requests chat.spaces, chat.messages, chat.messages.create, chat.memberships, and chat.users, plus read-only variants of spaces, messages, and memberships, all under https://www.googleapis.com/auth/. For read-only use, https://www.googleapis.com/auth/chat.spaces.readonly is enough to view the spaces the user belongs to. Remove scopes you don't need. See Google's Chat scope reference.
Short scope names on this page leave out the https://www.googleapis.com/auth/ prefix. When you paste a scope under Manually add scopes, use the full URL, for example https://www.googleapis.com/auth/userinfo.email. Scopes already written as a full URL, such as https://mail.google.com/, go in as shown.
Publish and verify the app
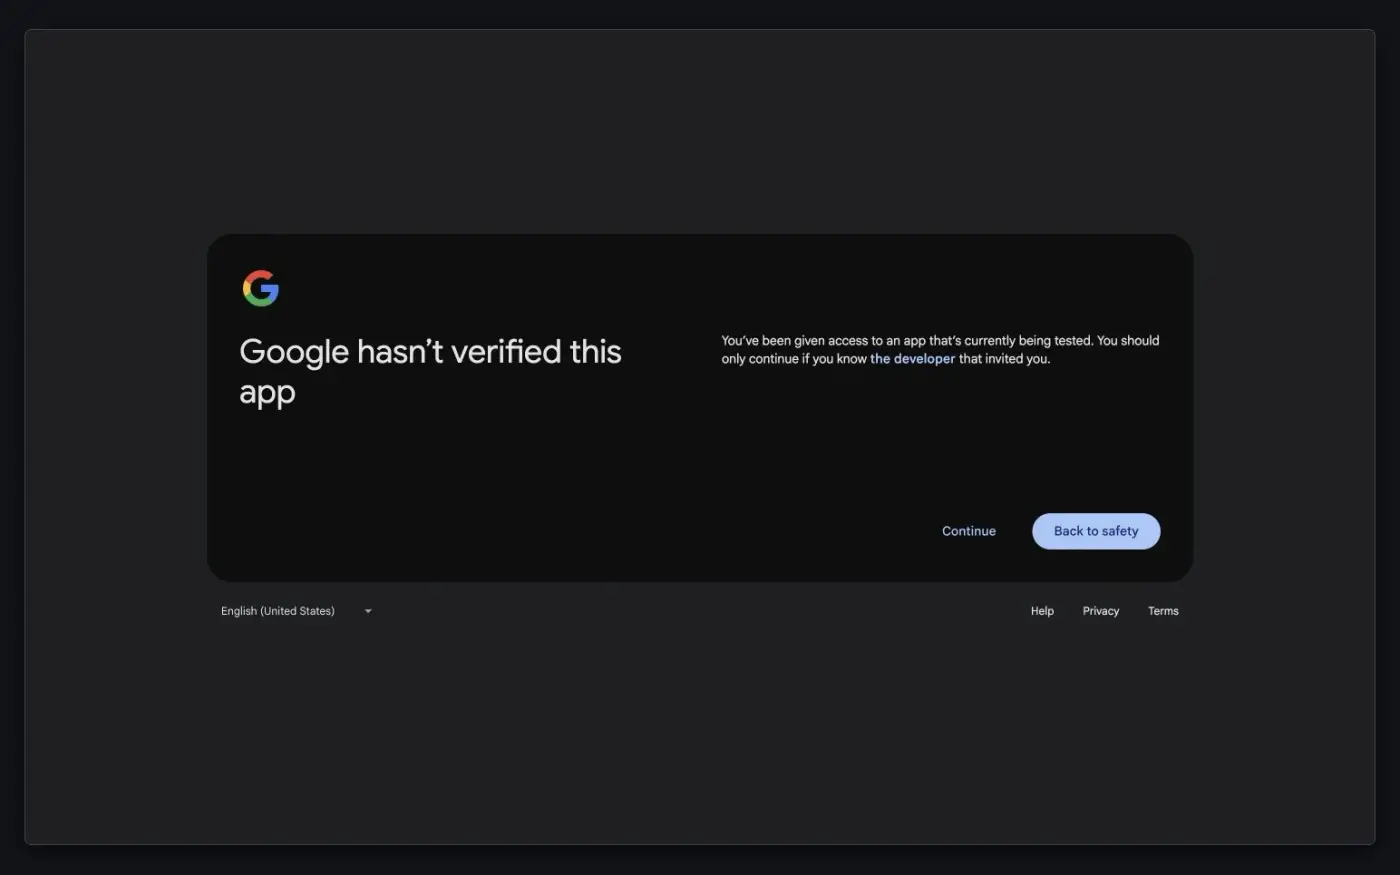
While an external app is in Testing, Google shows an unverified-app notice and refresh tokens expire after seven days, so users have to reconnect. Before you invite production users, select Publish app on the Audience page. A public app that requests sensitive or restricted scopes also needs Google's OAuth verification, which you start from Verification Center. Publishing doesn't complete verification on its own. Internal apps and apps in Testing can be exempt. See Google's verification requirements.
If you change the requested scopes later, reconnect the account so the user grants the new access.